Purpose & Target: #
This Topic will give you an overview of the Gift Card system.
The things you will learn here are:
- What the differences are between our Physical and Digital Gift Cards
- What kind of Digital Gift Card templates we offer
- What the Gift Card tab looks like and how to find it on the Admin side
- What info the Gift Card overview provides
- How to edit an existing Gift Card
Physical GC vs Virtual GC: #
The main difference between the two is fairly simple:
- Digital Gift Cards are sent via email
- Physical Gift Cards are either picked up by the purchaser or delivered in person by our team during our weekly delivery routes
Additional differences are:
- A Digital Gift Card is purchased through the website (Client’s side), a Physical Gift Card has to be purchased via conversation with the client (phone, email, jivo chat or in person).
- Physical Gift Cards are printed and therefore do not contain animated media. All Virtual Gift Card templates have a thematic animated component.
- A PDF of a virtual gc template is adapted and printed for a Physical Gift Card purchase. If the gift occasion is outside of our template themes, we use the ‘classic’ gift card template theme.
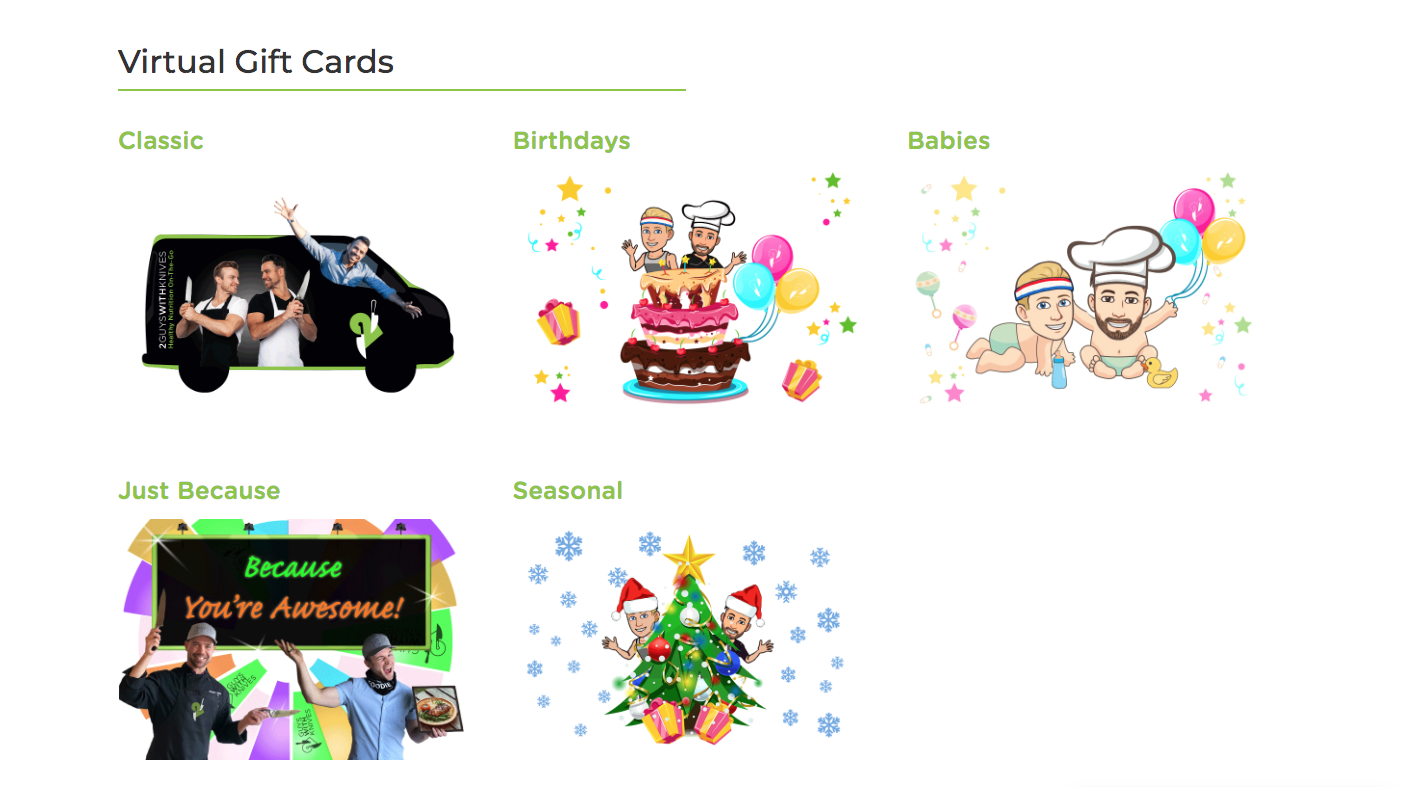
At this moment we offer the following templates of the gift cards:
| Classic Gift Cards
|
Happy Birthday Gift Cards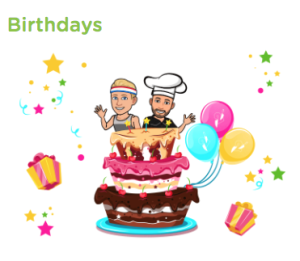 |
Baby Shower Gift Cards |
Just Because… Gift Cards |
Seasonal Gift Cards (Christmas) |

We may offer additional templates in the future.
Gift Cards Tab: #
To view the full list of purchased gift cards, you’ll need to go to the Gift Cards tab of the Admin side of the website.
Once you do – you will see something like this
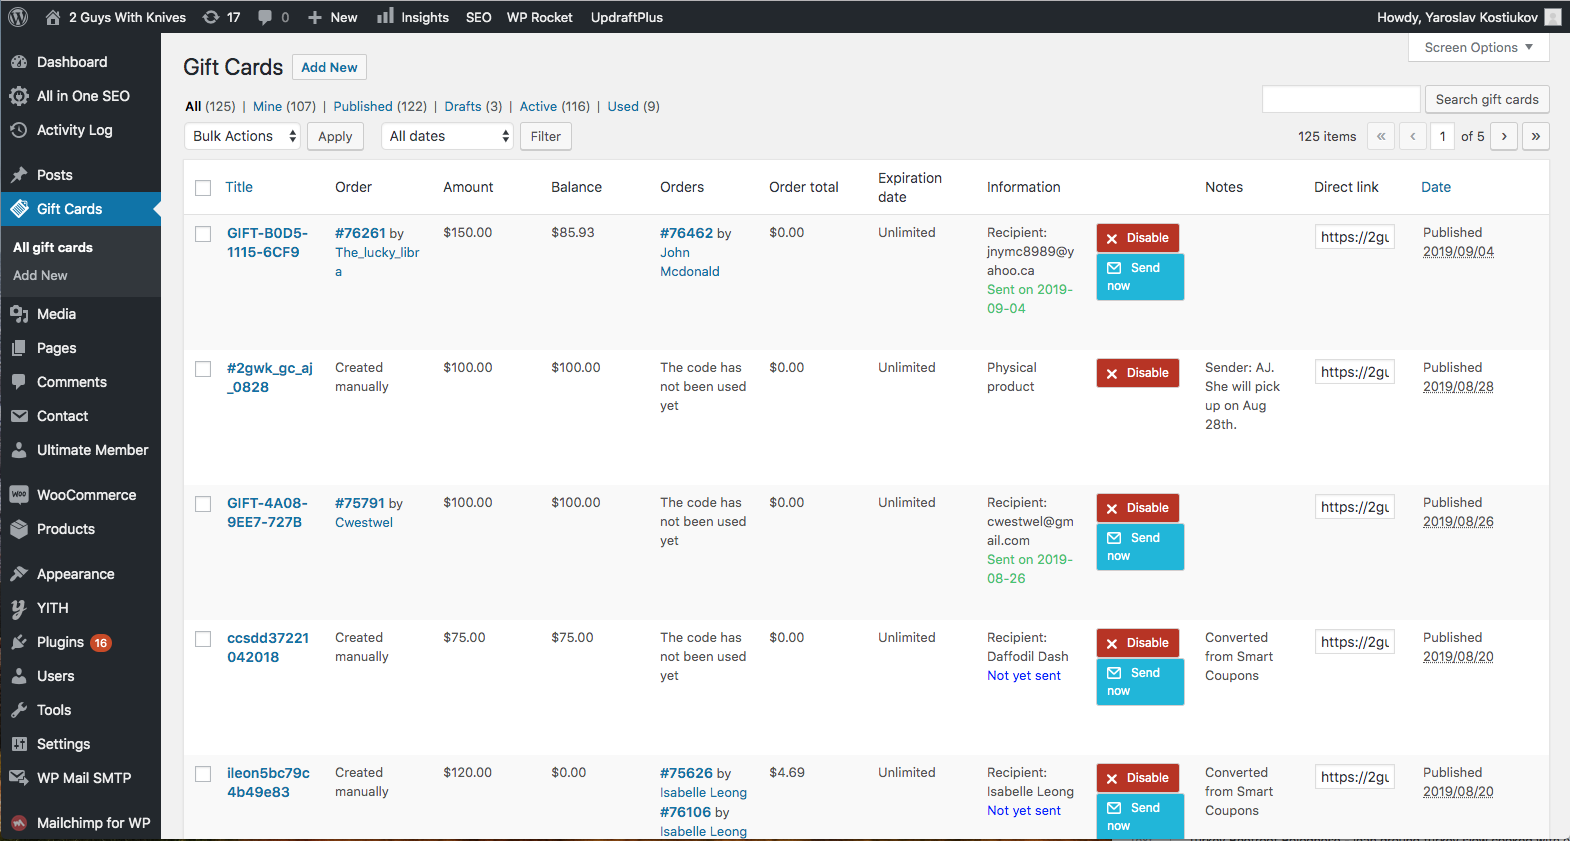
The page behaves like any other WordPress Admin page, allowing you to search for a specific gift card using the title, as shown in the video below.
Selecting the checkbox on the left of the GC Title allows you to use Bulk Actions to either unpublish or delete the selected gift card(s).
Understanding each line: #
The gift card overview has most of the info about the gift card available at first glance. Here is a detailed explanation of each:

Title. The title is the actual code that a customer will need to type into the ‘gift card code’ field on the Cart or Checkout page of their order to apply their GC.
Order. This field shows the customer who purchased the gift card and the order number that corresponds to the purchase. Clicking the order number will redirect you to the order. Clicking the customer’s username redirects to the user’s profile. If the gift card was created manually, this field will say “Created manually”
Amount. This is the initial purchased value of the gift card.
Balance. This is the current balance of the gift card.
Orders. The list of all the orders the gift card has been applied to.
Order total. If the order subtotal is greater than the current balance of the gift card, the remainder that the client has already paid will be displayed in this field.
Expiration Date. If an expiry date has been applied to the gift card, it will show here. Currently we do not apply expiry dates.
Information. If the gift card was purchased via the website, this field will show the email of the Recipient and the date the email was sent. If the gift card was created manually and it was a digital gift card, it will show anything that is put into the Recipient’s Email field, e.g. Winner of Instagram Contest. If during the creation, the gift card was dedicated as physical, it will state “Physical product”.
Disable button. Clicking this button will disable the code of the GC, but will not delete the GCfrom the website.
Send now button. Clicking this button will resend the gift card email to the recipient. WARNING: if the gift card was created manually, this button will not work, even if the email field has the correct email address. The Gift Card has to be sent manually via email.
Notes. If any notes were added to the gift card during or after its creation, they will show up in this field.
Direct link. This is a technical link, and will not be used in any of the processes. You can ignore it.
Date. Date when the gift card was created.
Editing an Existing Gift Card: #
If you need to update or edit information of an existing gift card, you can do so by clicking the ‘Title’ of the gift card or clicking the ‘Edit’ link beneath the Title.
This will get you into the Edit Gift Card screen, as in the recording below.
After completing your desired edits, click Update on the top right-hand side of the screen.
Breakdown of the Edit Gift Card screen: #
Here is the Edit Gift Card screen in a little more detail
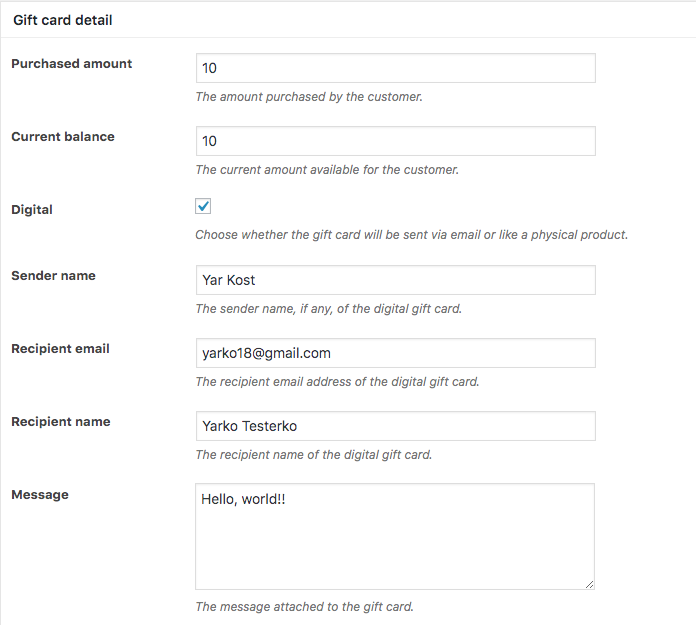
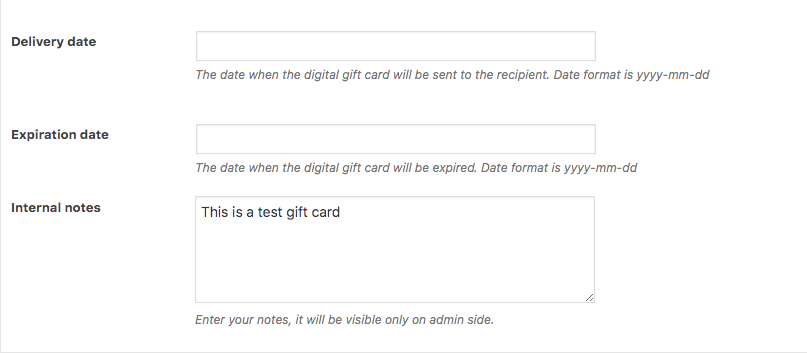
The Purchased amount shows the initial amount of the gift card and will not change
The Current balance of the gift card will dynamically change after a client uses it
The fields, Sender name, Recipient email, Recipient name, Message and Delivery date show up ONLY if the ‘Digital’ checkbox is checked. In a regularly purchased gift card, these fields are filled out by the client.
If there are any internal notes to be added to the gift card, you can easily do it here.
Customer’s View of Gift Cards: #
A Client can access the Gift Cards selection page through the Gift Cards menu link at the top of the website.

They will be redirected to the Gift Cards page, where they can see all the Templates we offer and select the one they’d like.
It looks like this.
A Client can click on the image or the Title of the Gift Card product to be redirected to the product page. The screenshot below shows what it looks like.
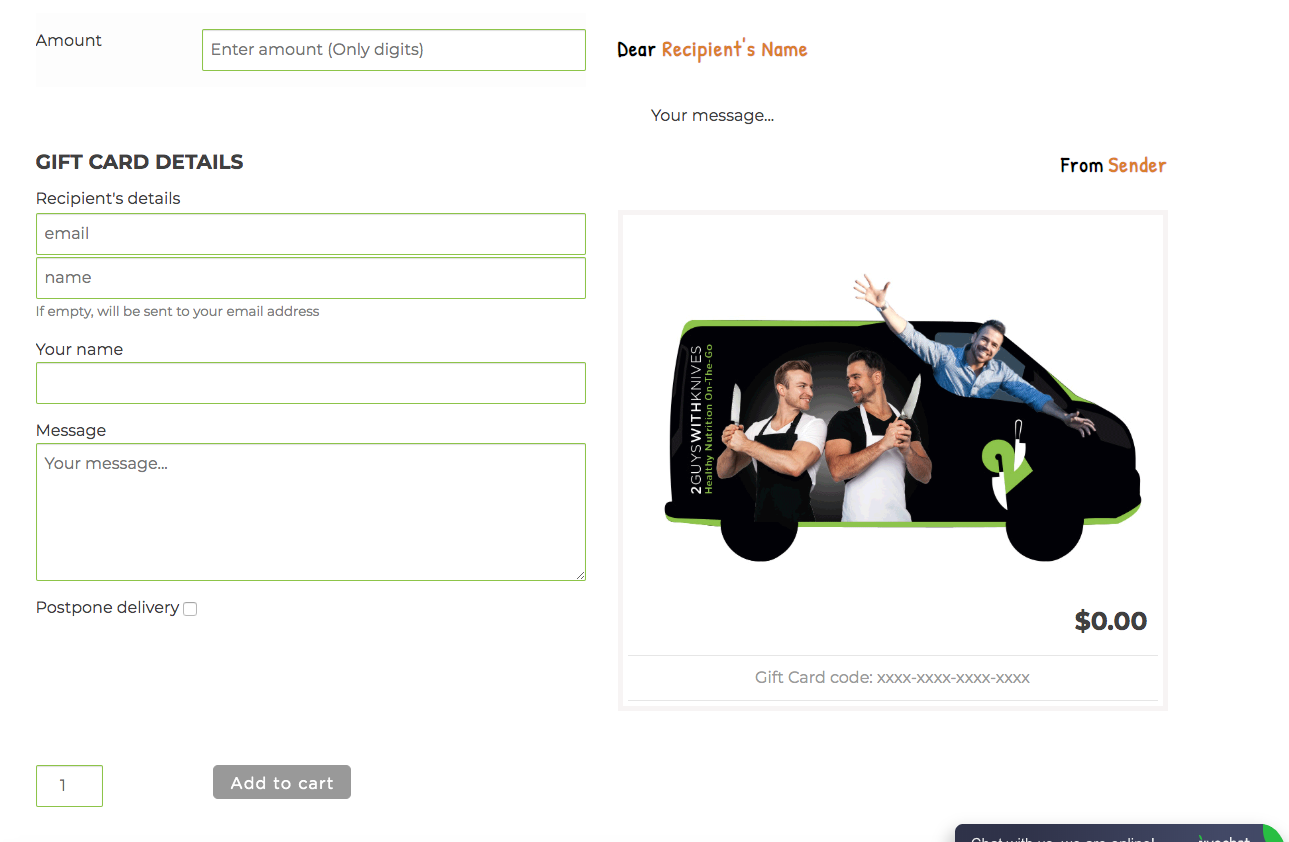
Here, the Client can fill in all of the details. The Message will be displayed directly in the Gift Card email, and Recipient’s name, Sender and Your message on the right-hand side will change as the Client types in the respective fields.
A Client can schedule the Gift Card to be delivered later by selecting the Postpone delivery checkbox at the bottom of the list of the fields. If they select it, a date picker will be displayed, where they can choose the desired date.
Note: the Add to Cart button will be disabled until the Client enters the Amount in the appropriate field.
After the Client has filled out all of the required info, they can add the Gift Card to cart and proceed with to the checkout as usual.
Note: Gift Cards cannot be purchased in the same order as our meals.


