- Organizing and sorting the columns to separate the kitchen pickups from the delivery report
- Checking pick up locations that involve deliveries
- Adding Bag collections
- Deleting dummy columns b
- Double checking the city column
- Double checking the buzzer column
- Double checking the delivery address
- Skimming the phone number column
- Checking the notes column
- Keys, keys & keys!
- Arranging the columns to a correct format
Organizing and sorting the columns to separate the kitchen pickups from the delivery report #
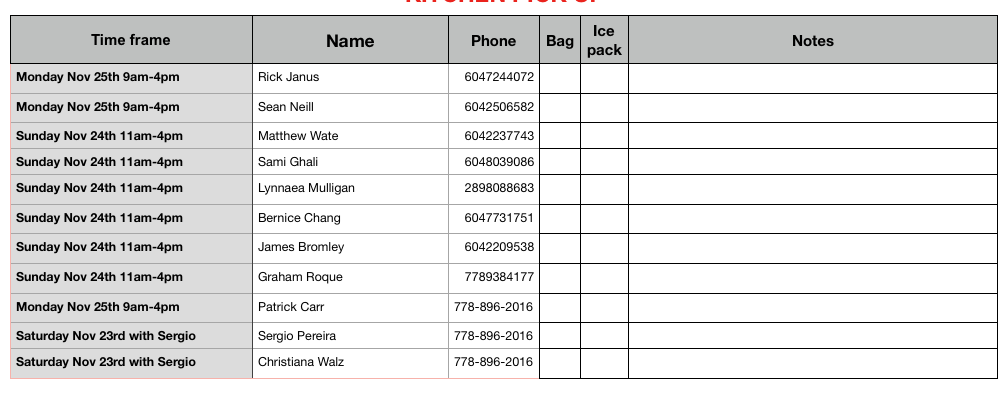
Now that we’ve exported the delivery report, we will have a spreadsheet that looks like this
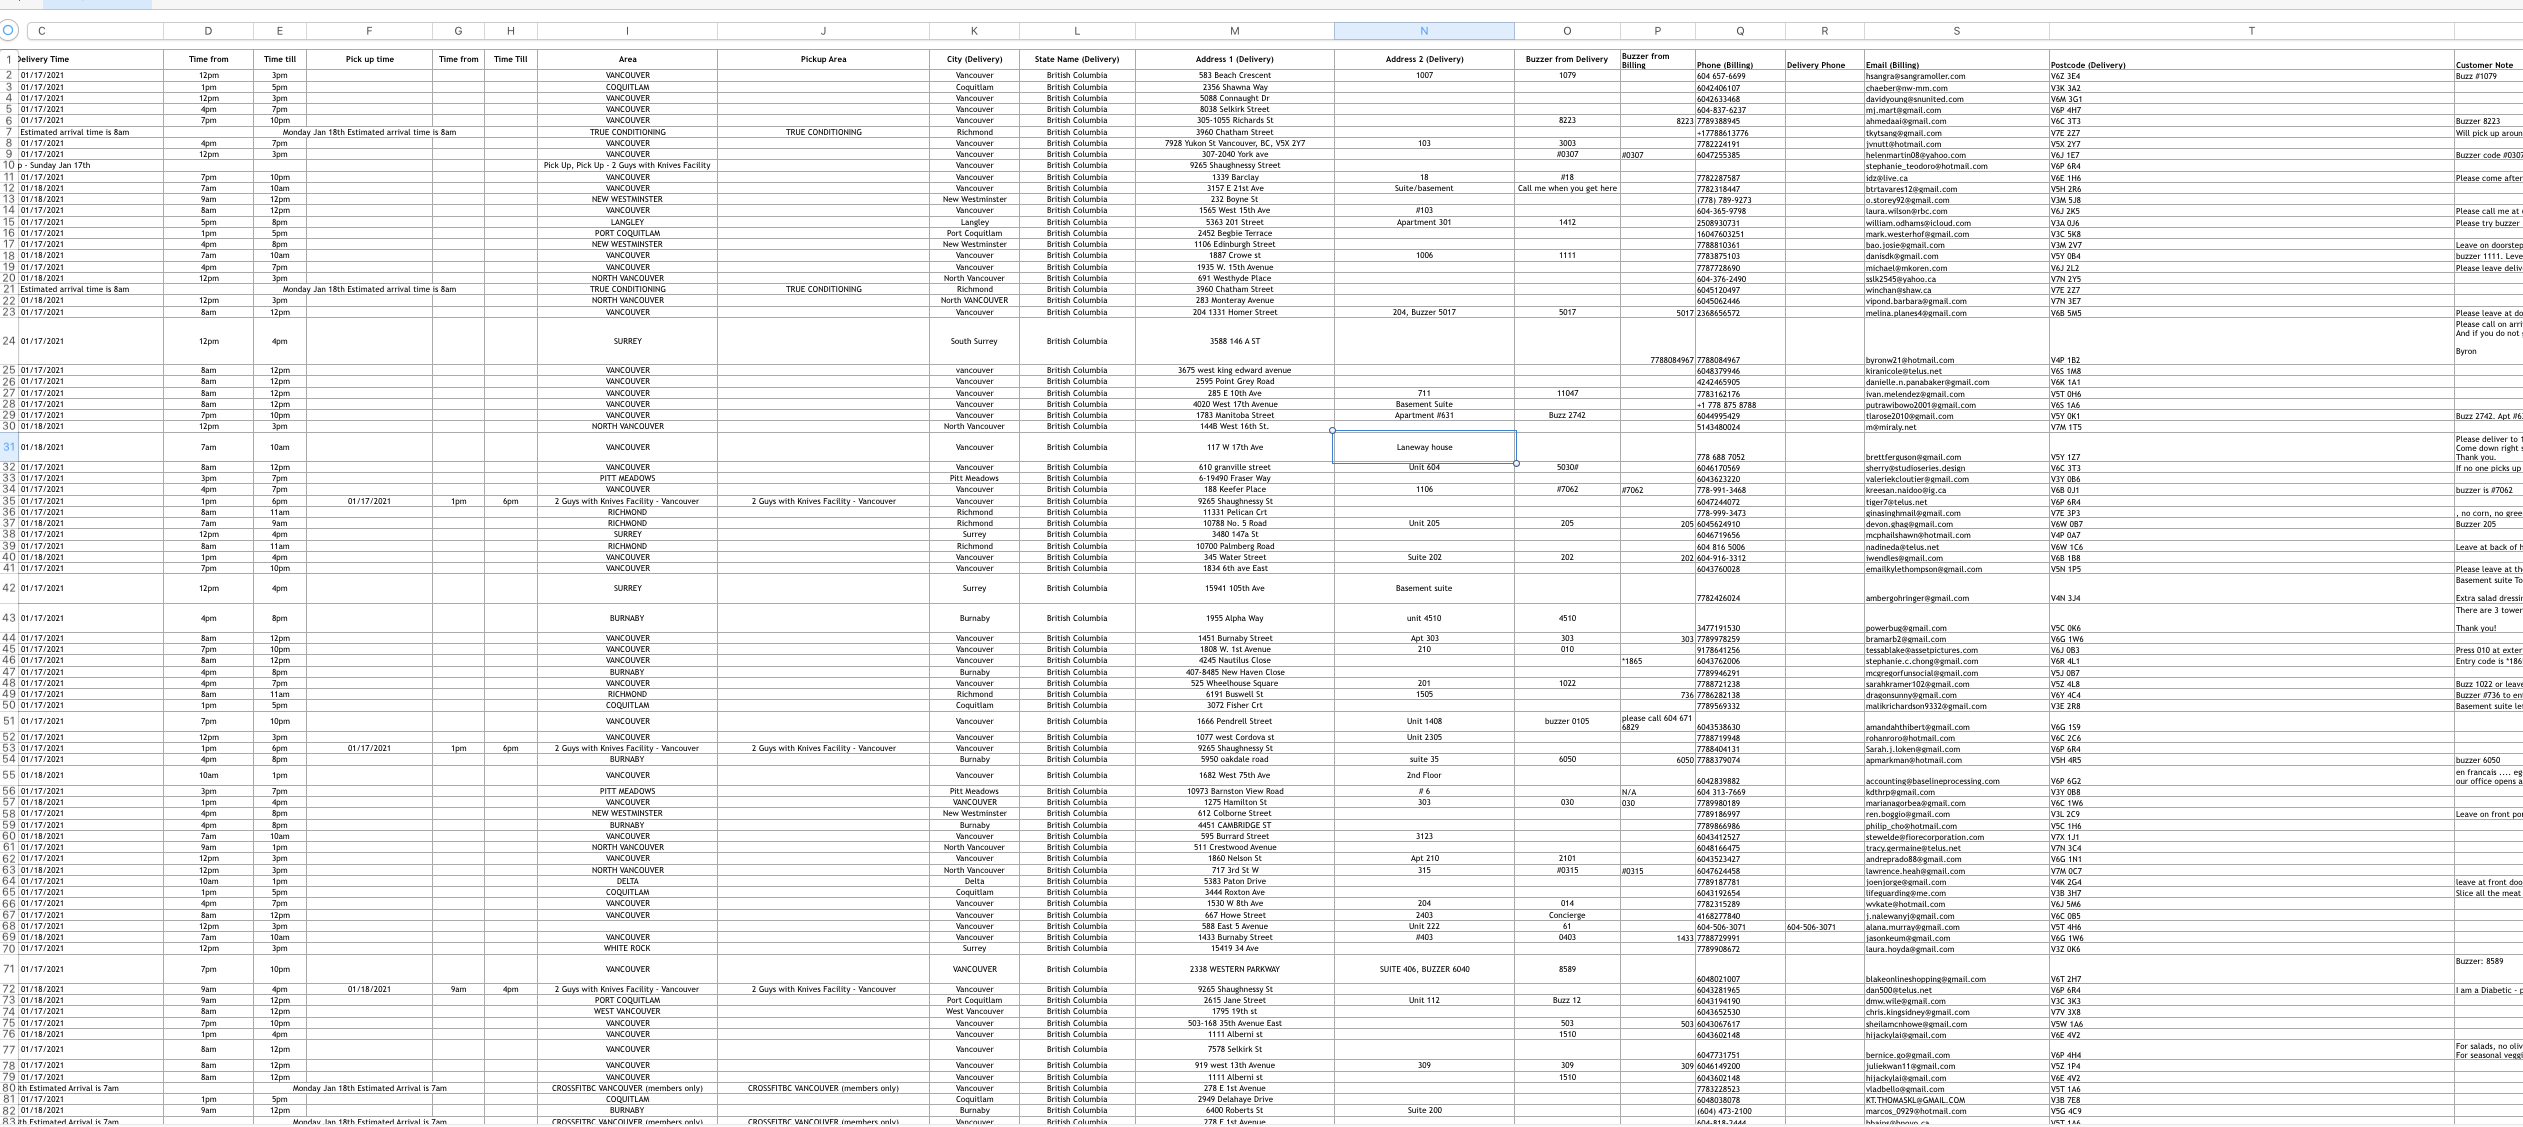
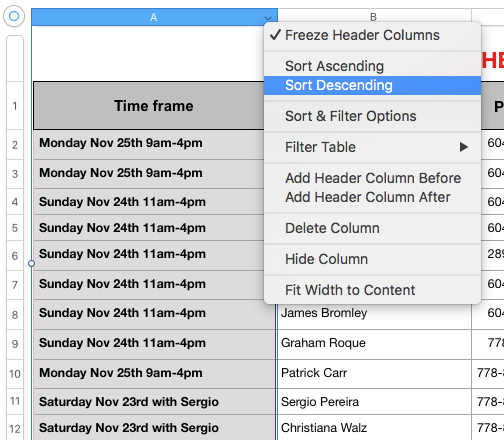
The first step here is to identify which clients will pick up their meals at “2 Guys with Knives”, hence, who doesn’t need his or her meals delivered in the delivery report. In order to do this, we will need to sort the “pick up” column to ascending, this way, all the pickups under this column will show on top. Also, to top it all, let’s apply some filters to make it easier to identify any client who has a pick up scheduled at our facilities 🙂
There will sometimes be an exception where we put a client in the pickup sheet even if his or her meals will be delivered. This is for deliveries done by the wholesale route or by someone else from the company. In this case, we put the name of the client and next to it in brackets (DELIVERY WITH WHOLESALE OR THE PERSON DELIVERING)
Click on the circular icon on the top left of the screen to select all the cells from the spreadsheet.
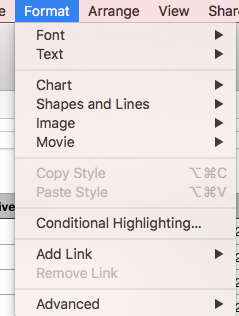
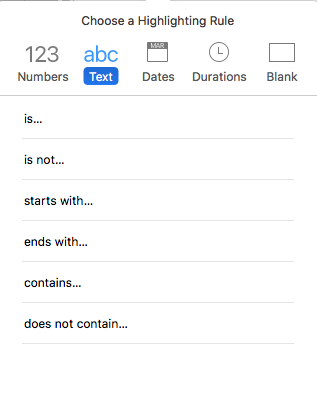
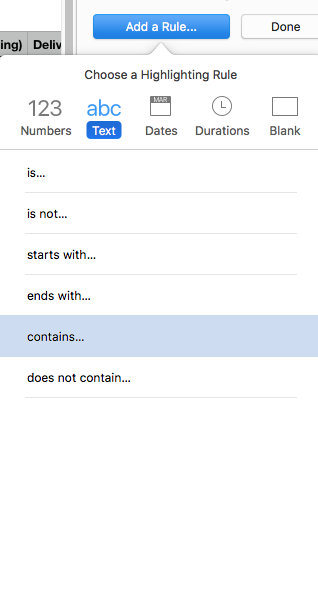
Then go to the top bar of the spreadsheet and click on “format” and then “conditional highlighting”
The following table will pop up, let’s make some rules
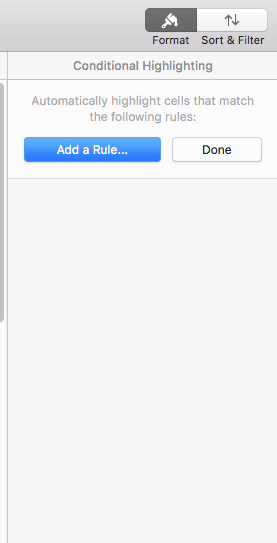
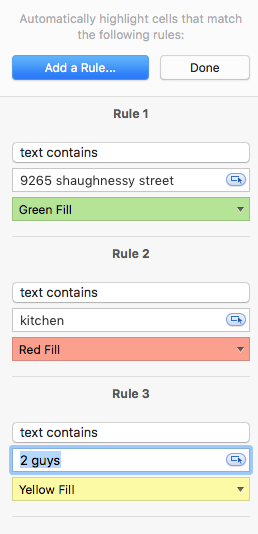
Since most of the kitchen pickups will include text keywords like “2 guys”, “kitchen”, “9265 Shaughnessy street”, and “V6P 6R4” we just need to select a text filter that contains these words as shown below
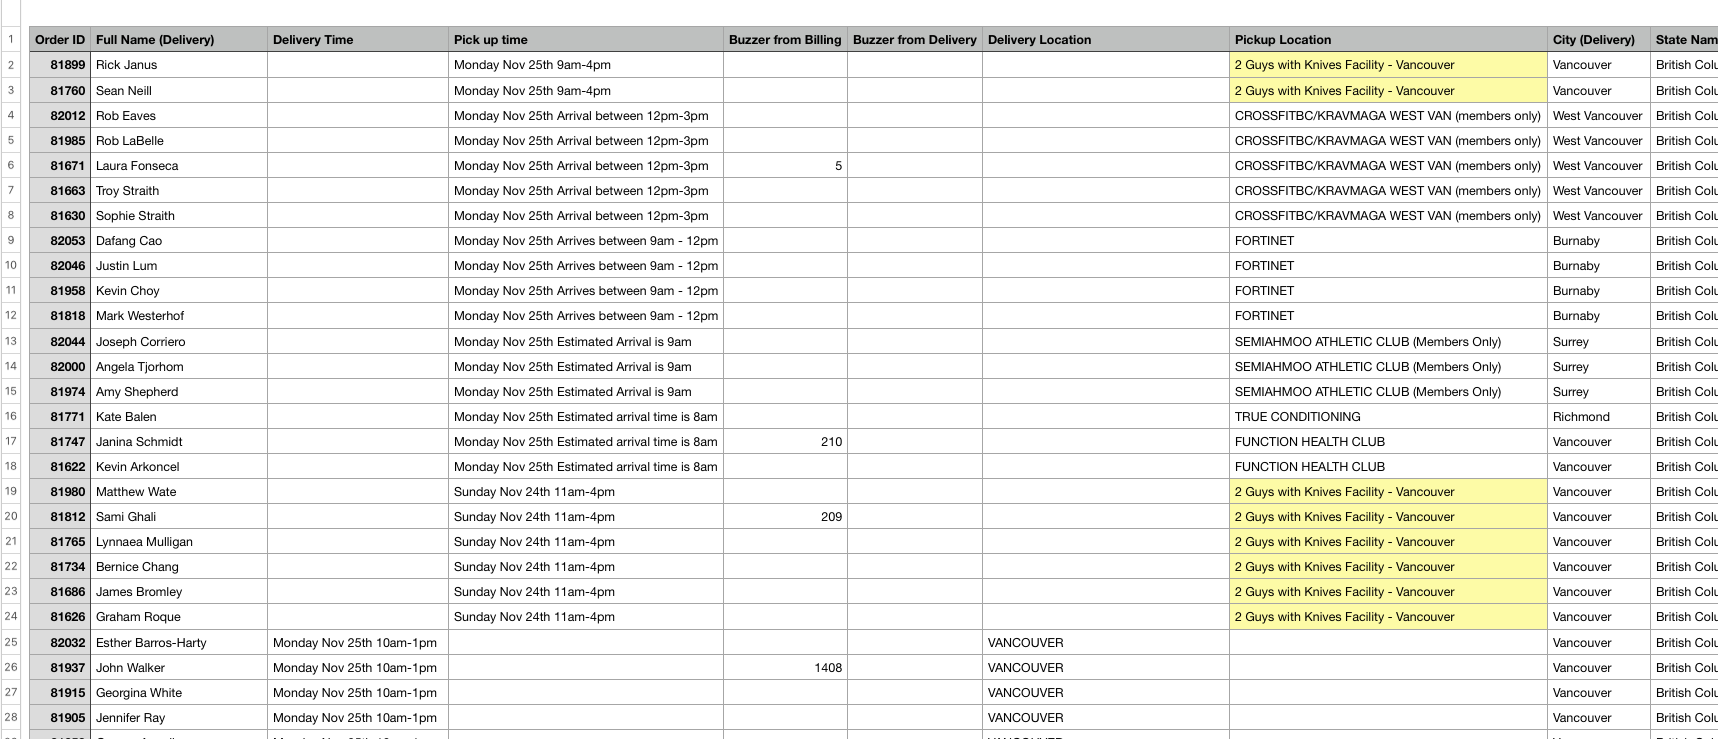
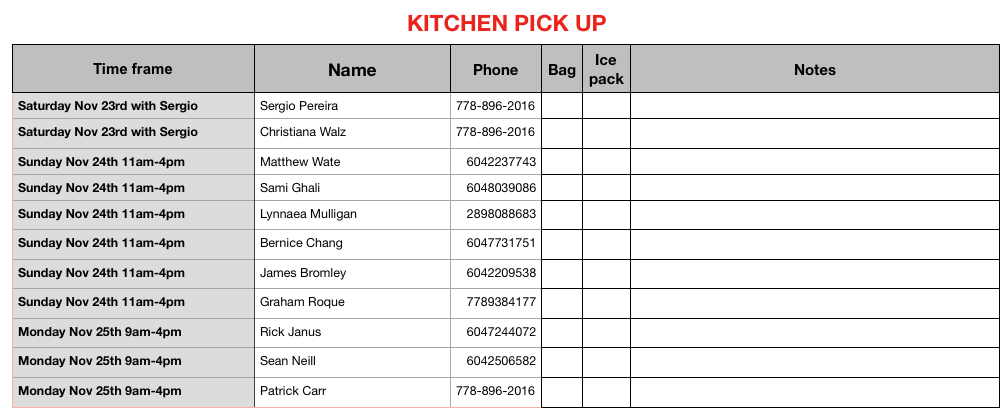
This is the end result of the sorting and the filters 🙂 now it’s easier to see who scheduled a kitchen – pick up and not the delivery. Once we have this info, it’s just a matter of going through the spreadsheet and checking which clients will pick up their meals and drag their rows to the top so we can gather them all together

As you can see, while scrolling down, there will be some people who didn’t go all the way up when the sorting was applied because they were not part of the pick-up columns but yet, they are scheduled to pick up their meals at our facility. That’s why we have to be attentive and keep an eye on all the spreadsheet once these filters are applied so nobody is left behind

Now that we are at the end of the spreadsheet and have identified all the clients who will pick them up at our facility, we’ll need to gather them and transfer them to another spreadsheet dedicated only for kitchen pickups.
This spreadsheet will be located in this example in the following folder 🙂
Let’s start by opening Google drive

Then let’s click on Sales
Let’s select November
Then Nov 24th because this is the week that includes the date range of our deliveries as it was shown at the beginning of this Trainual session.
Then let’s select the delivery team Nov 24th folder
Opening up the routes folder aaaaand.
We will have an empty kitchen pick up spreadsheet waiting for us to fill it out 🙂
Now let’s open this spreadsheet and transfer the info
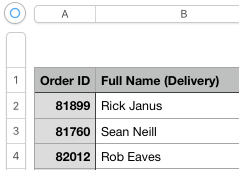
We will copy-paste all of the kitchen pick-up names we gathered on top of our delivery report spreadsheet and transfer them into the kitchen pick-up spreadsheet.
Now we gotta transfer the phone number and pickup time. It’s the same process as with the names but just with their respective pick-up times from the delivery report 🙂
Voila! 🙂 Now we can delete all the kitchen pick up clients from the delivery report because their info has been safely transferred to an exclusive and dedicated spreadsheet for them

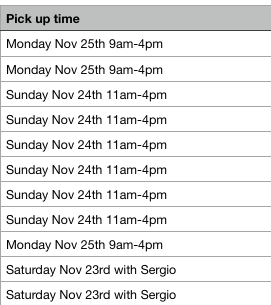
Let’s just sort it so all the rows are in date order 🙂
Now, on to the delivery report with the actual deliveries
Checking pick up locations that involve deliveries #
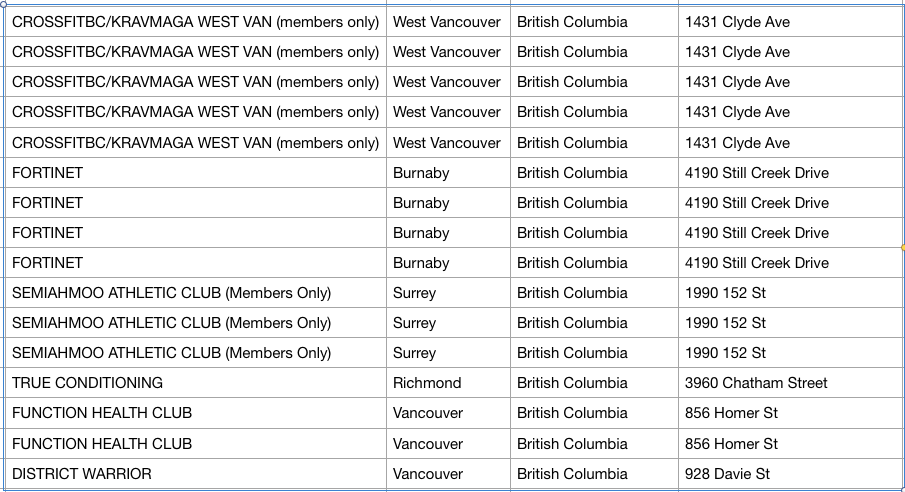
As we discussed before in the introduction to the delivery report, we have pick-up locations that involve deliveries. When we sorted the spreadsheet pick-up locations, they will show on top of the spreadsheet like this
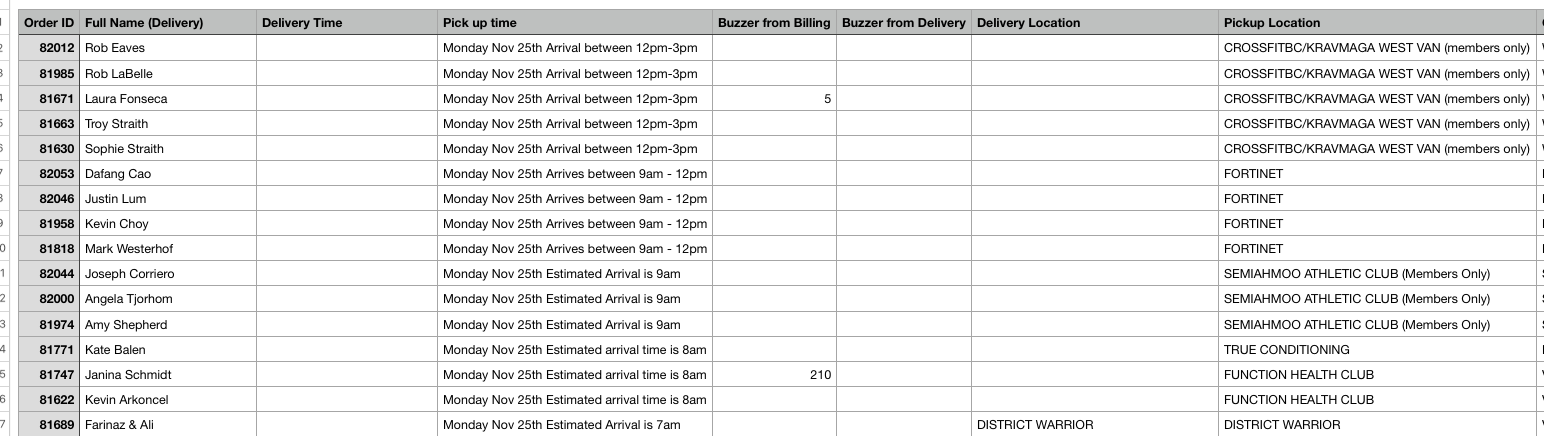
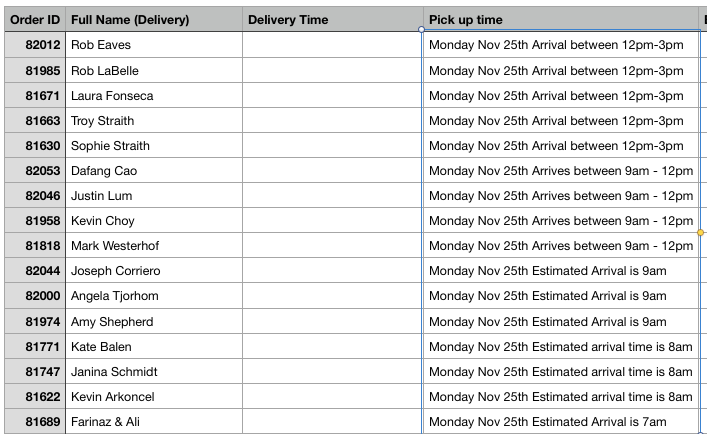
The pick-up times for these locations are usually the same and it only changes when there is a holiday. But as a rule of thumb, people who will pick up at the following locations should most of the time have these pick-up times:
- Crossfit BC West Vancouver: Sunday 8:15am-11:15am
- Semiahmoo (Paused): Monday 8:30am-11:30am
- True Conditioning: Monday 7:50am-8:30am
- Crossfit Vancouver: 6:50am-7:30am
- District Warrior (Farinal & Ali) (Paused): 6:50am-7:30am
You’ll notice True conditioning, and Semiahmoo has something that says “Estimated arrival is ….” This only means that the clients will be ready to pick up their meals at the time stated and therefore we usually assign our deliveries to arrive within 30-40 mins before this time kicks in 🙂
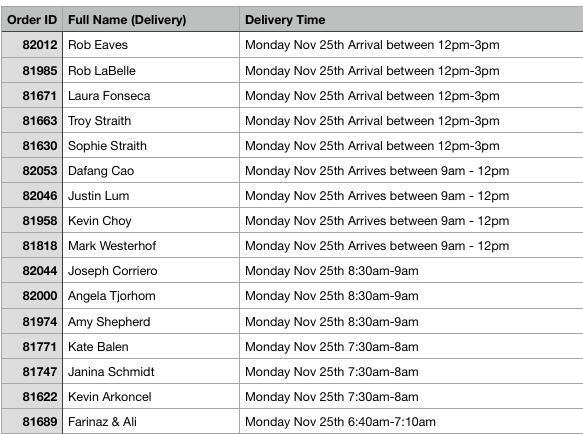
Once we check that the info mentioned above is correct, we can transfer the info from the pick-up time to the delivery time
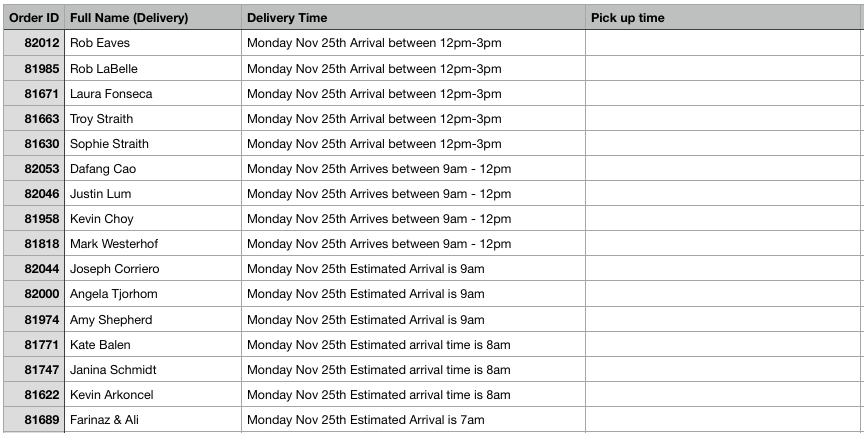
If we apply the rule mentioned before about the estimated arrival times, we’ll have the following 🙂
Adding Bag collections #
As we discussed before, sometimes our clients will want us to swing by and collect their bags even if they haven’t placed an order. We will usually receive these requests by email, phone, Jivochat, SMS, or Slack by Ana. Whatever the medium is, these bag collections will always be assigned in your “Asana” which is a task management platform that we all have at 2 Guys with Knives
As soon as you open the Asana website and log in, go to my tasks and a calendar type webpage will show up
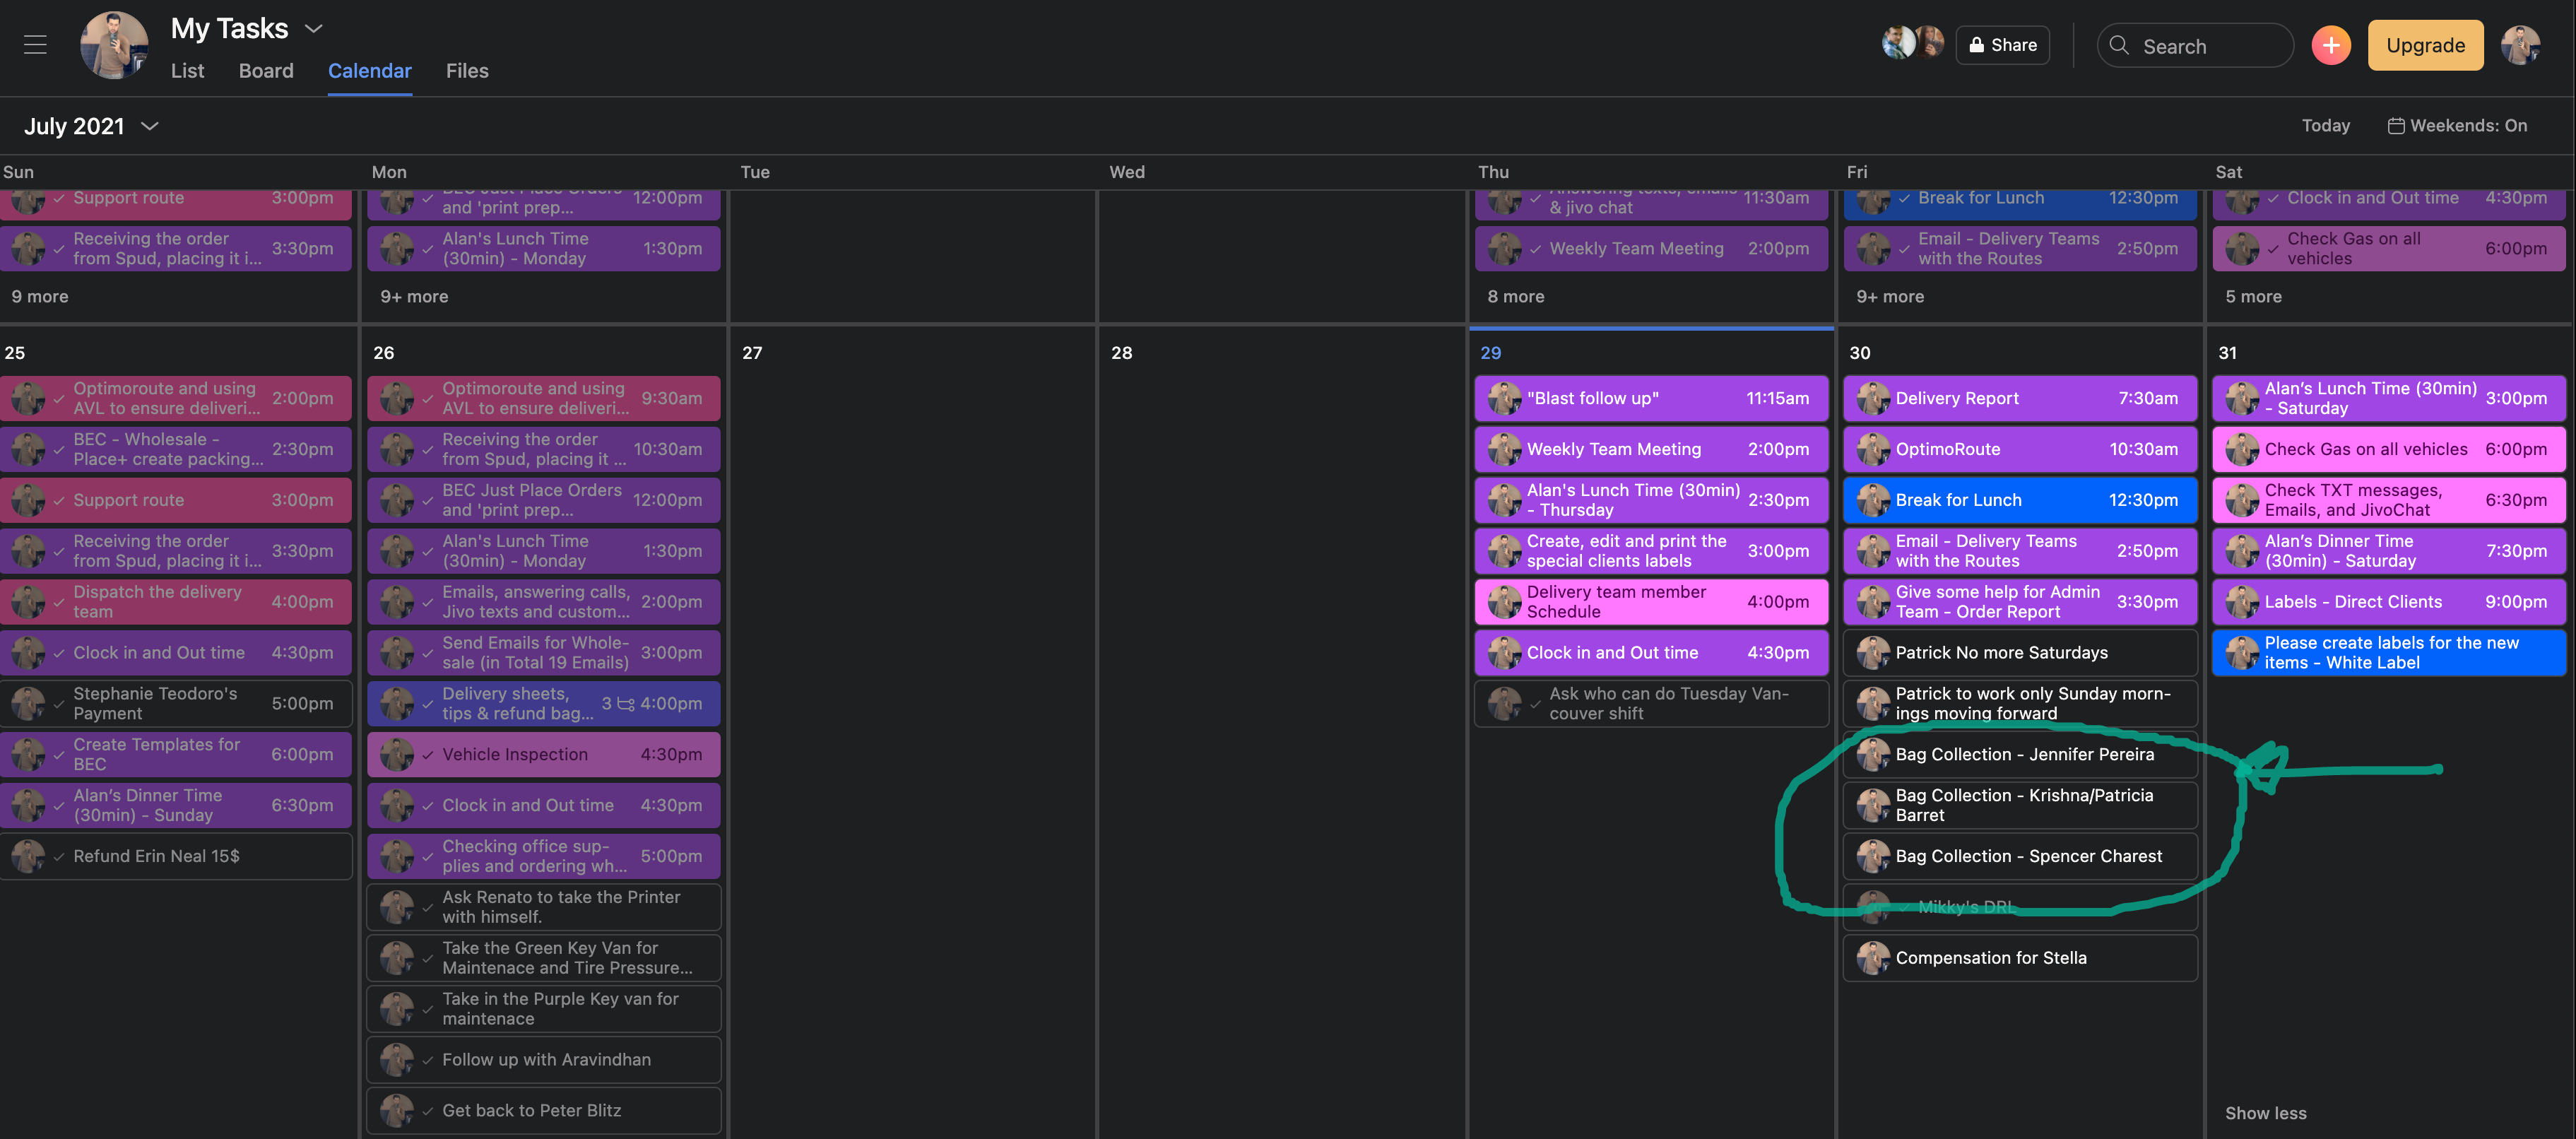
As you can see, in the bottom right corner of my Asana, I have 3 bag collections that I need to schedule for the upcoming delivery weekend.
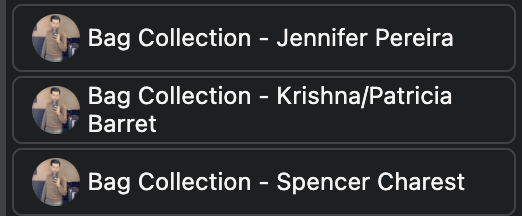
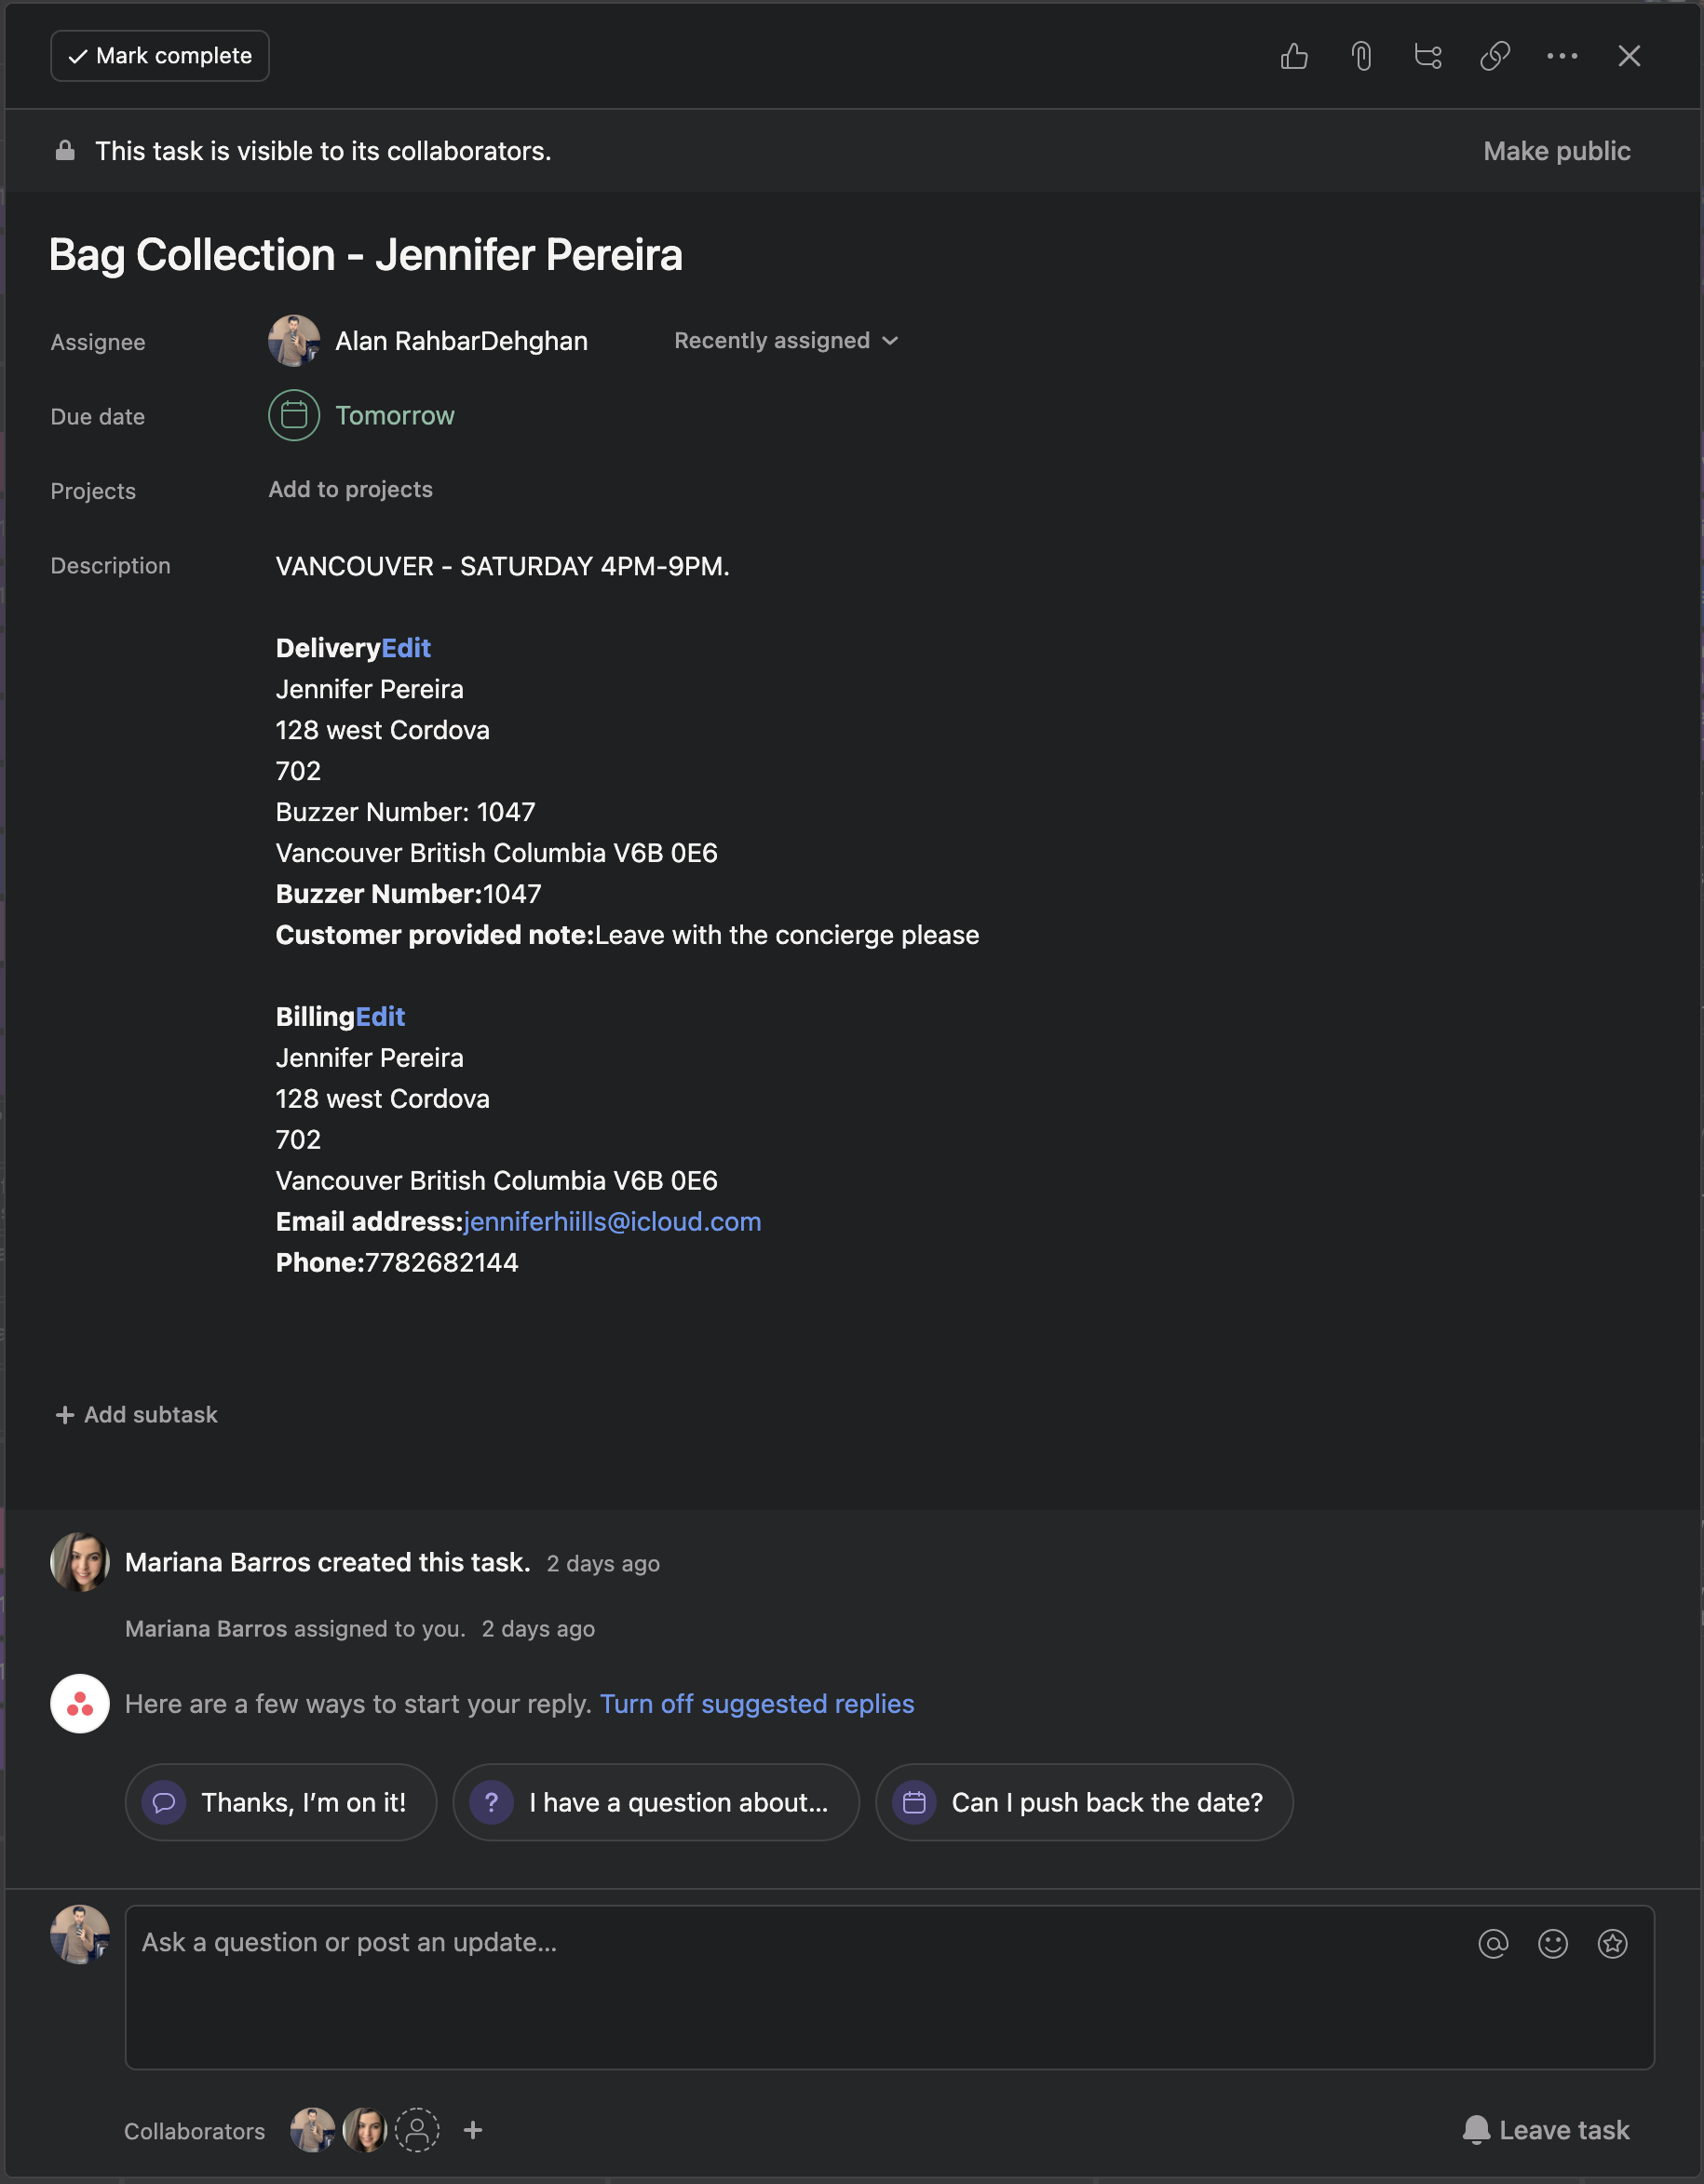
When these bag collections are assigned to Asana, they will usually include the time frame and date in which they are scheduled and the name of the client. Sometimes information is not included in the assigned task on Asana and we have to gather the info from the website. This way, we know which address we usually deliver to and where we’d have to arrange the bag collection.
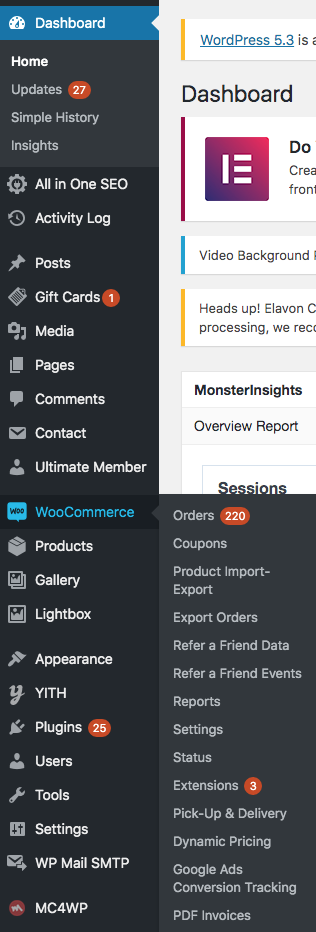
Let’s start off by opening the backend of the website and clicking on “WooCommerce” and “Orders”
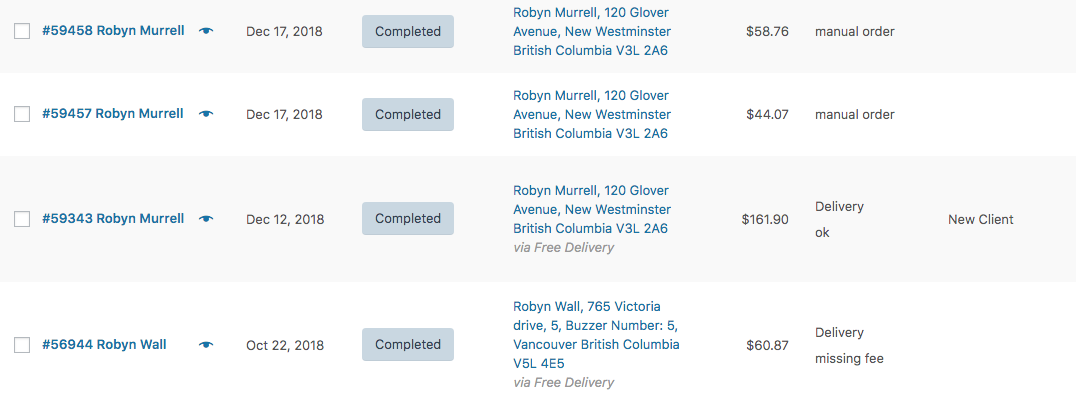
Then on the search bar, let’s type in the name of the client who is requesting a bag collection, In this case, Robyn (hypothetical name, just as an example)
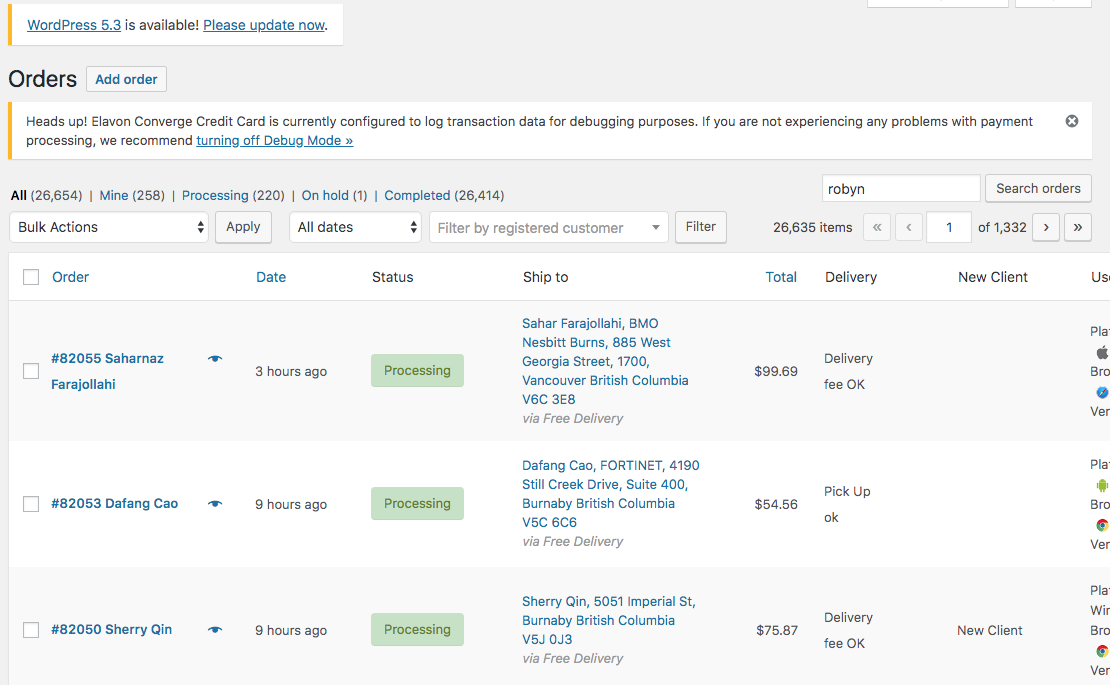
After this, we will see different Robyns, we need to schedule it for Robyn Wall so we click on the order number that includes the name Robyn Wall on the bottom left corner of the screen.
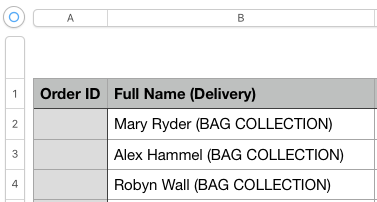
When we click on the order, it will give us access to the usual delivery address:) we will use this one for the bag collection and input it into the delivery report
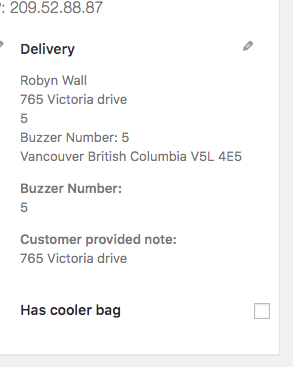
Name: Robyn Wall (BAG COLLECTION) *Always put this bag collection text in upper case and in brackets so it’s easy to distinguish it from a regular meal delivery.
![]()
- Delivery time: Sunday 12pm-3pm
- Buzzer 5
- City: Vancouver
- State (province): British Columbia
- Address: 765 Victoria drive
- Phone: 6043123990
- Postal code: V5L 4E5
- Notes: BAG COLLECTION
We will repeat the process for clients whose info is not included on the Asana task.
Deleting dummy columns b #
There will be a point in which some columns will include irrelevant info or simply be redundant once we start transferring cells to other columns. One example is the pick-up location column, we already processed all of the info from these pick-up locations, verified that their time frame and address were correct as shown below, hence, there is no longer a need for this to be present in the delivery report at this point. Tip: any information that needs to be deleted should be transferred to the Notes section before removal.
Double checking the city column #
Whenever we are working with spreadsheets, the info in the cells must be consistent with the column name. Therefore, at this point of the spreadsheet, let’s just make sure that everything that our customers’ input on the website makes sense shall we?
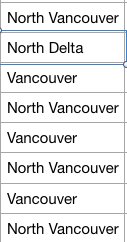
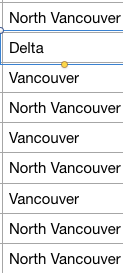
When checking the city field, I ran up to this city “North Delta”, it exists, but North Delta is not a city per se but an area of the city of Delta. Therefore, we need to change it to Delta.
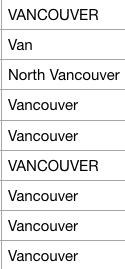
Same here, Van is not a city per se, but Vancouver is 🙂 we just need to update this so the names of the cities are correct for the route planning.

Just look out for these outliers and then it’s just a matter of adjusting the cells to what the customers really meant
Double checking the buzzer column #
Now let’s double-check the info on the buzzer column to make sure it makes sense and it’s consistent
This column will be correct most of the time based on my experience. The formatting cannot be universal as some buzzers work with # or * and sometimes they have to be searched by name too so it’s better to leave it as it was provided by the customers. In this case, all of the buzzers make sense so we just leave them the way they are

They are all good but look kinda messy, don’t they? Let’s make it look a bit more organized!
Let’s click on the top left circular button to select all the cells first
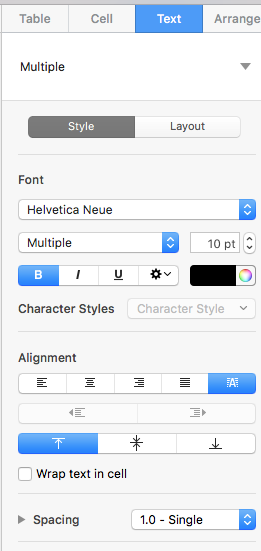
Now let’s go to the format options on the top right of the spreadsheet and select the text field.
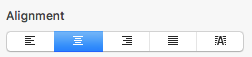
Let’s set a centred alignment
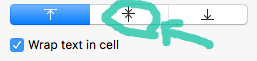
+ wrapping the text in a cell

And it’s not just these cells, all of them were set to look more organized as we selected all of them in the formatting options.
Double checking the delivery address #
This is one of the most important columns to double-check because a wrong address can lead to a huge problem.
- Wrong address + wrong time frame = total disaster
- Wrong address + right time frame = client complaining about not receiving his meals
- Right address + wrong time frame = client complaining about receiving his meals when he’s busy or away from home
- Right address + right time frame = happy customer and happy you
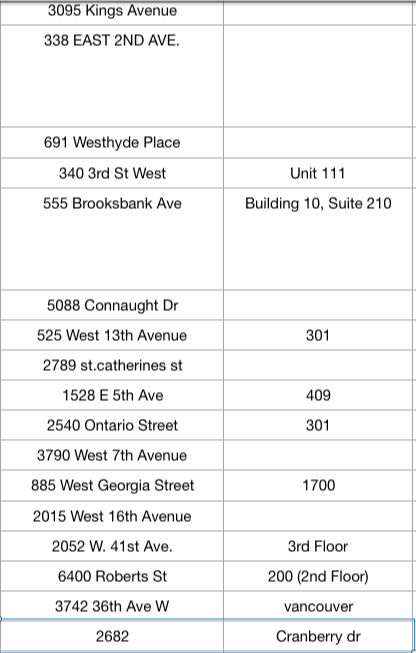
Sometimes clients write their address in the Unit column which needs to be transferred to the Address column or the other way around.
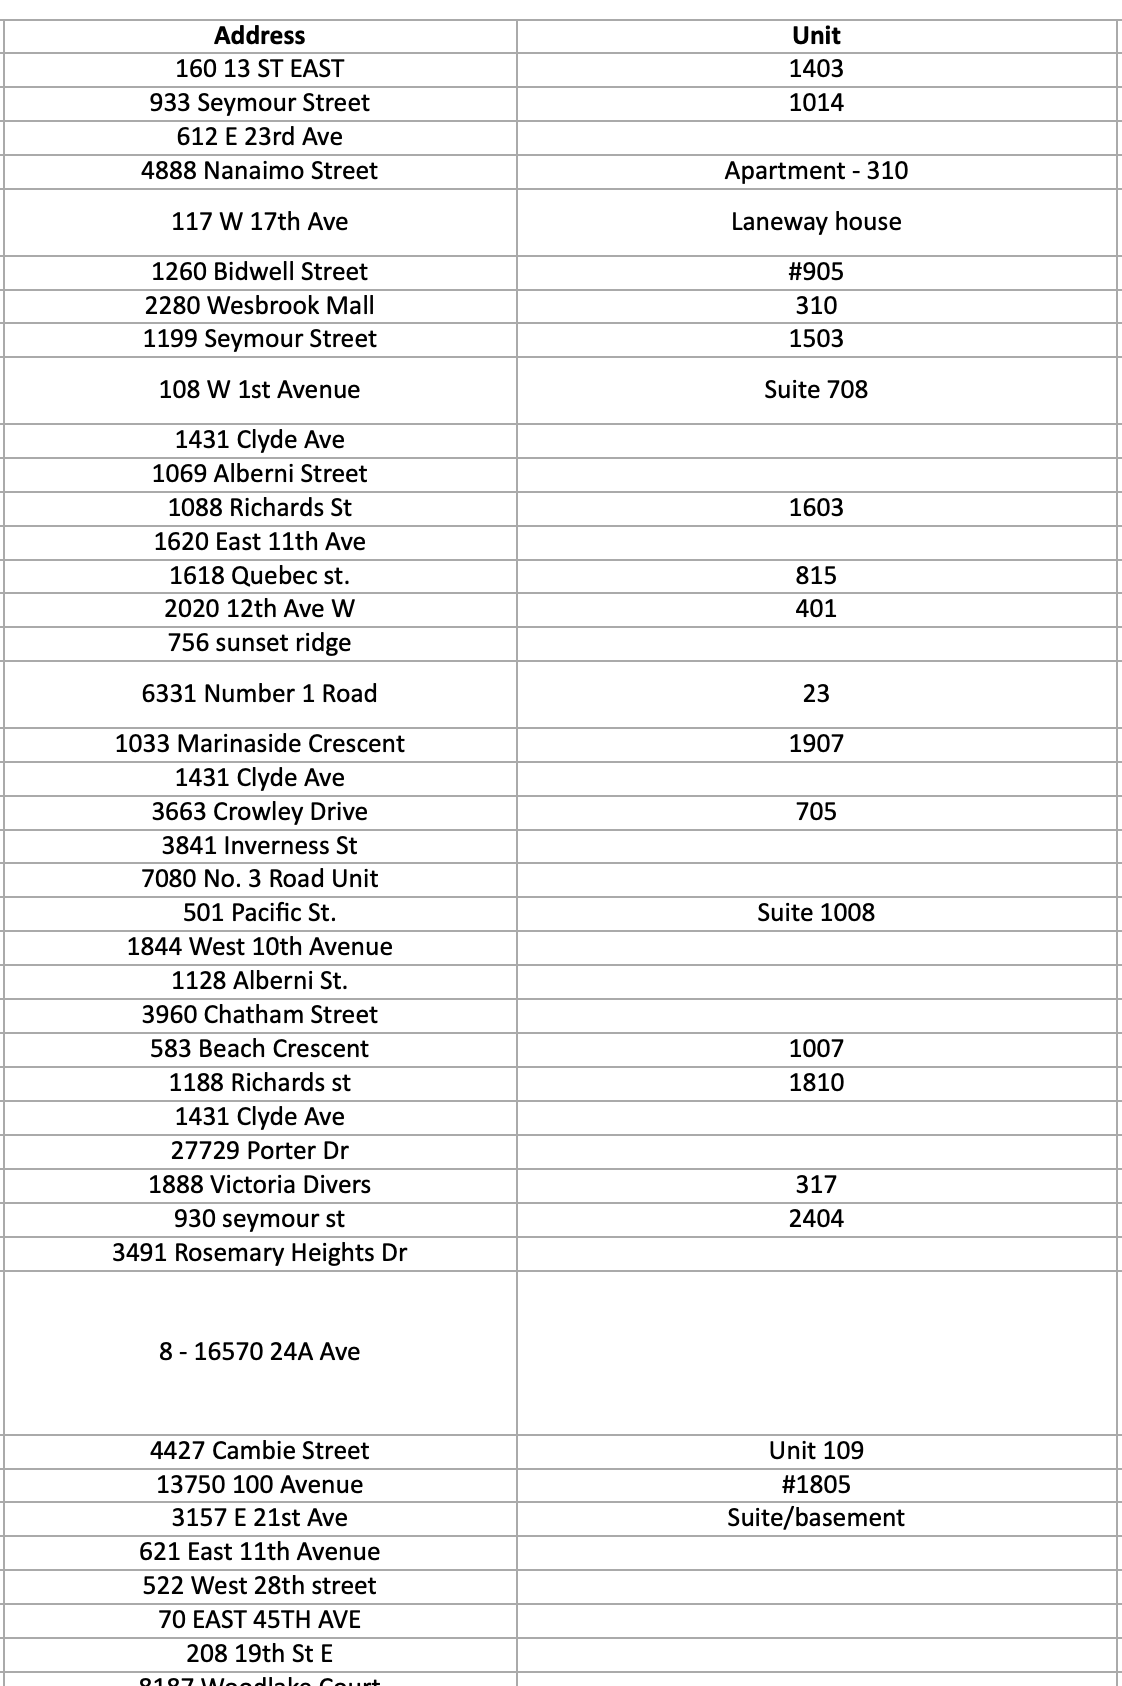
As it can be seen here, the one to the last cell has unit 8 as part of the address but when it’s inputted into google maps, it will not recognize unit 8 and ignore it, so it needs to be placed in the correct column which belongs to Unit info for the delivery. Therefore, it is our duty to transfer this type of info to the unit column which can be considered as suite, unit or apt.
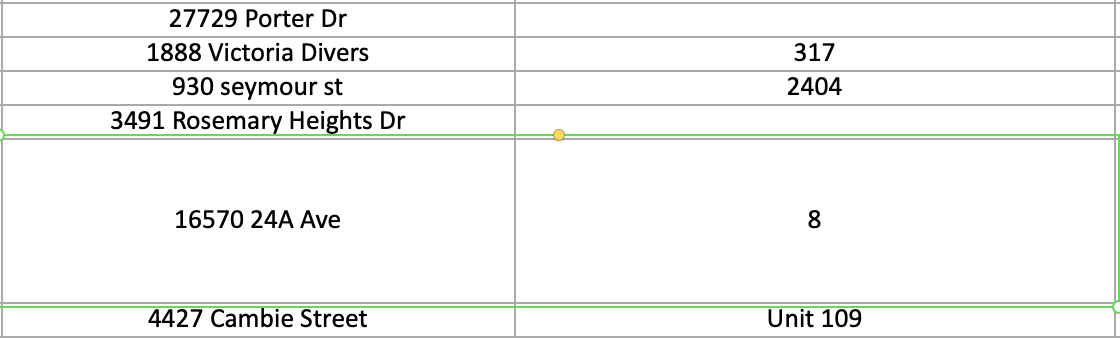
Much better 🙂
In this case, the client accidentally assigned the street name as a suite even though it’s a house. We’ll just need to correct this by transferring the info to Address and it will be all sorted out
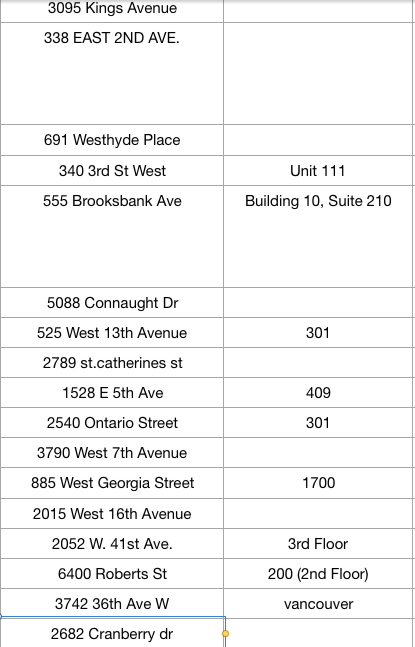
Now it makes much more sense:)
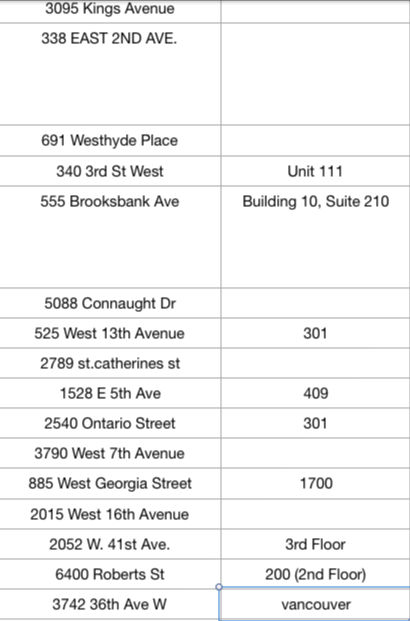
In this case, a client put Vancouver as a suite number.
Let’s look at another example.
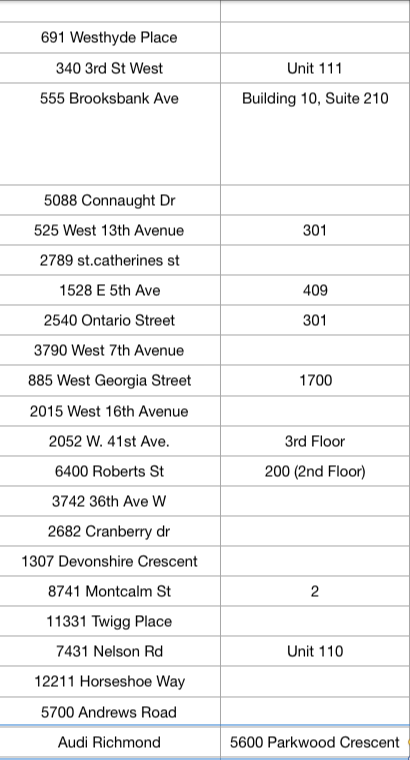
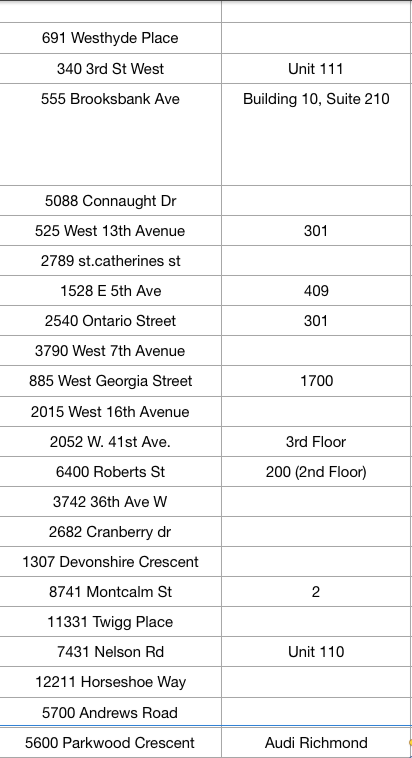
In this case, Audi Richmond should be put as Unit as it’s the “Suite” “number or name” of the Richmond automall. And Unit should be put as an Address as it is the primary address for the delivery.
Let’s see how it works in another example.
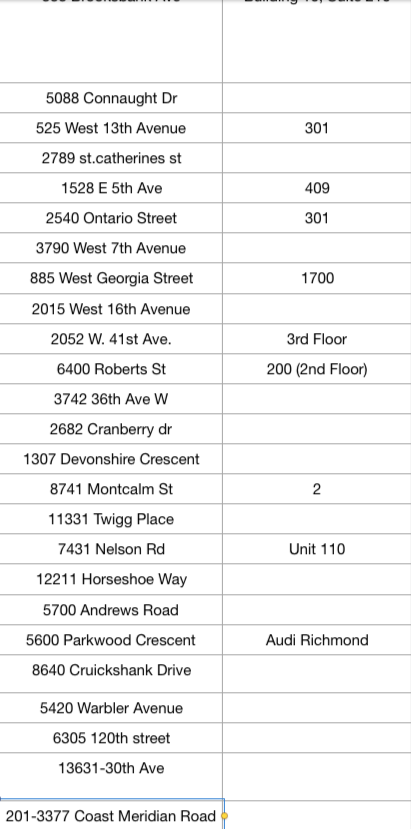
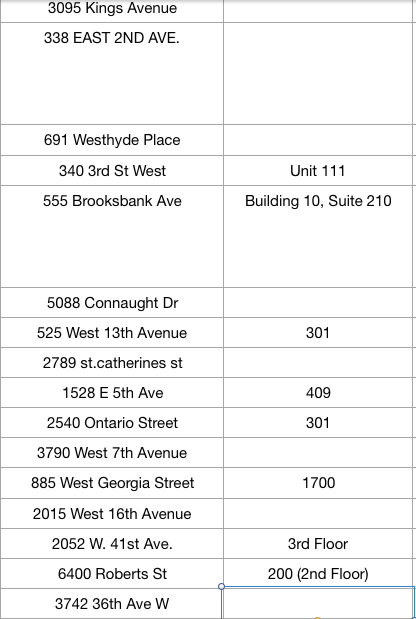
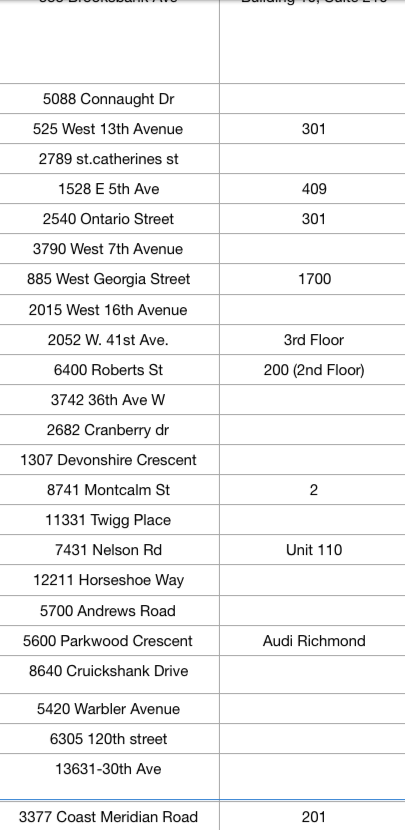
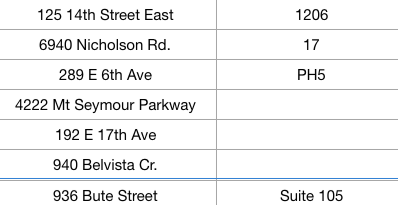
In this case, we have someone assigning the suite number in the primary address but as mentioned before, this will be lost when it’s passed on to google maps and can also create problems with the software (OptimouRoute) as it might think it’s a different address with more numbers and throw out an odd delivery address result. To correct this, let’s transfer suite 201 to the Unit field and everything will be fixed 🙂
Another example could be:
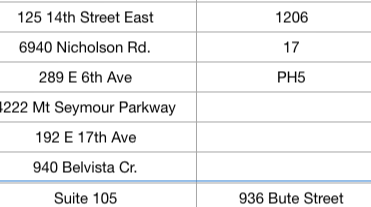
Suite 105 is not a delivery address and I’ve never heard of any apartment room called 936 Bute street
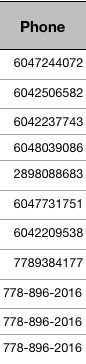
Skimming the phone number column #
The phone numbers provided by our customers help us reach them at the time of delivery to either access the unit or ask for instructions.
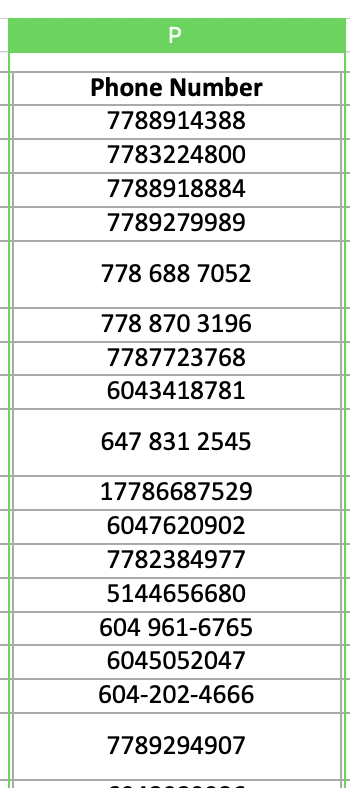
There are some clients that don’t want to receive text messages from the OptimoRoute (our delivery app which we will work on in the next chapters), so in this case, their phone number needs to be transferred to the notes section and be deleted from the Phone Number column.
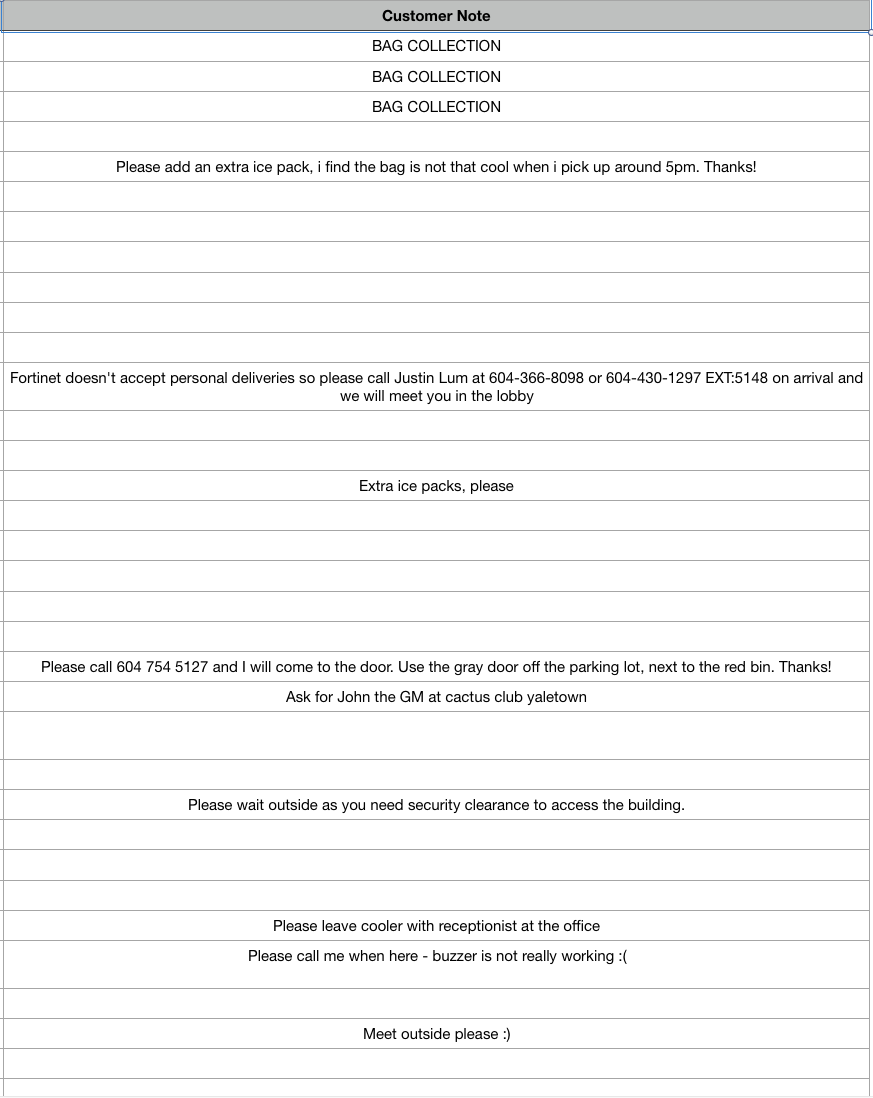
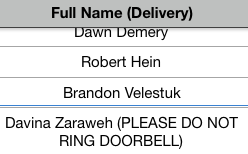
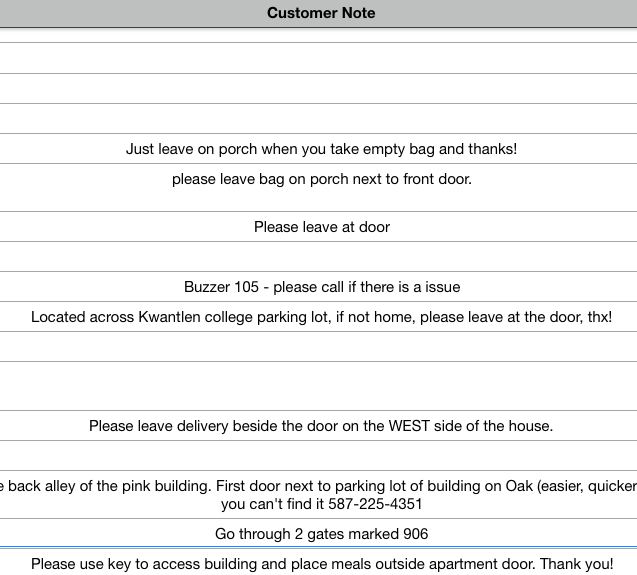
Checking the notes column #
One of the most important tasks is checking the notes column as this one includes very important info for the deliveries.
At the beginning of the notes column, we can see one comment that includes info about adding an extra ice pack. This was written by the client Rob Eaves. A protocol that we have in these cases is to write in front of the name in upper case and in brackets (EXTRA ICE PACK), this way, when the bags are being loaded into the vans, our brand ambassadors will see this note in front of the name of the client and will add an extra ice pack accordingly.
![]()
![]()
Sometimes clients will include notes about food but this is more for order tracking purposes than for deliveries, therefore, we have to delete these notes to not confuse our brand ambassadors when they are delivering.
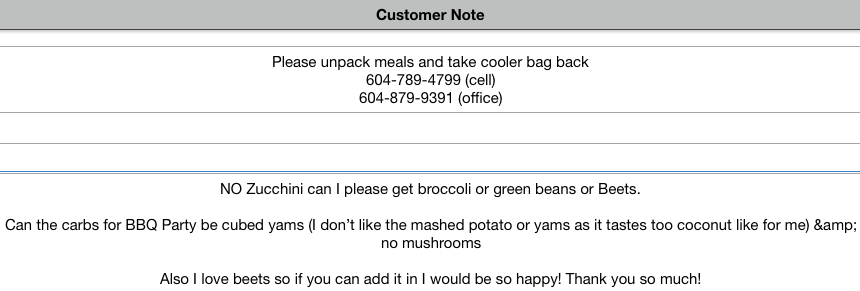
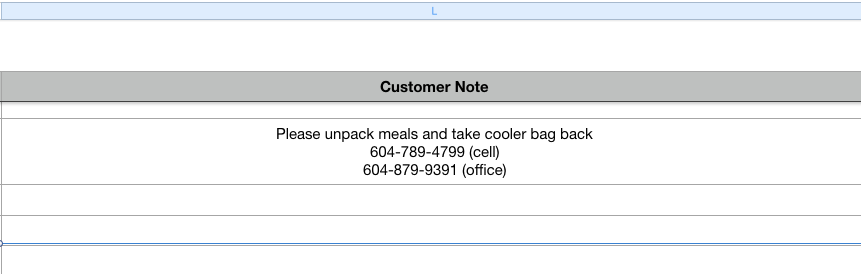
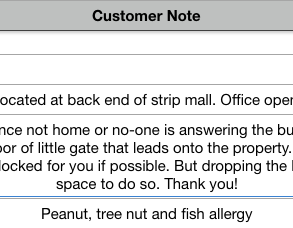
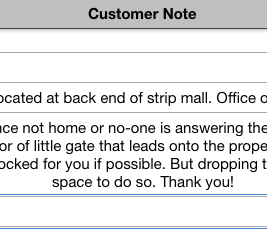
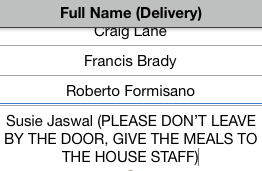
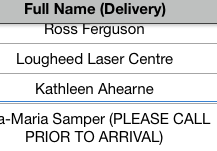
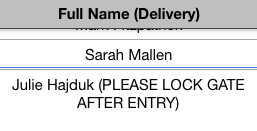
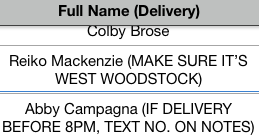
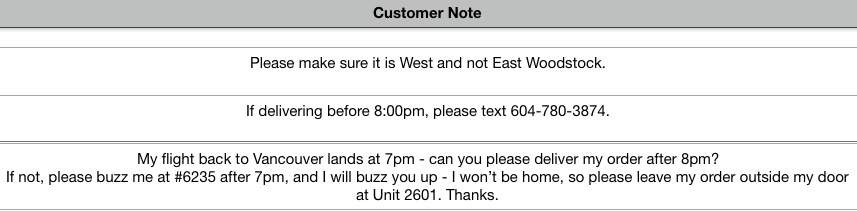
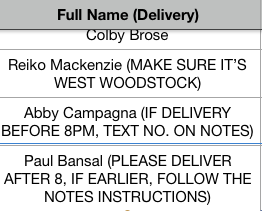
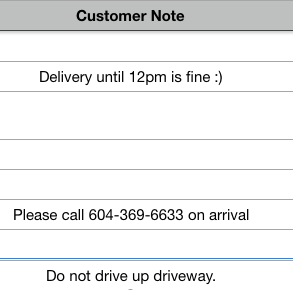
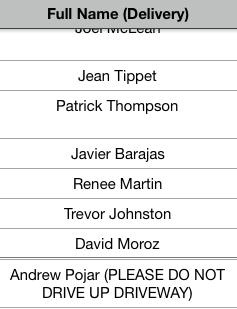
Sometimes our clients want things in a certain way and it’s our task to do everything possible to accommodate these requests. In this case, a client is asking for us to ring the doorbell and hand food to the house staff. Also, they mention not to leave the food at the door. We need to make sure this instruction is followed so we put it in upper case and in brackets in front of the client’s name as shown below.

Sometimes our clients will also have time restriction requests like the following one.
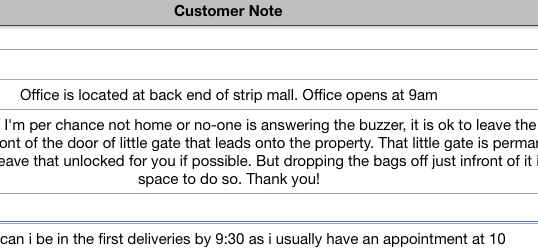
Since she wants to be among the first deliveries due to an appointment that she has, we modify her delivery time from 9 am-12 pm based on her Burnaby delivery zone to 8:35 AM-9:05 AM so it’s almost certain that she will receive her meals by 9:30 in case there is traffic.
![]()
In this case, the client requests to be called prior to arrival so we follow the same protocol as with the ice pack notes.
![]()
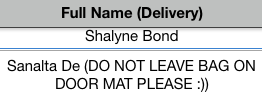
Here, we just need to add the instruction of not to leave the bag on the doormat because the customer doesn’t like it and it’s always best to deliver the best customer experience by just following their instructions as best as we can 🙂
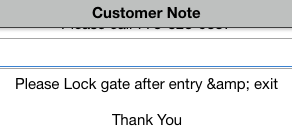
Same case here 🙂 they have a dog so they like their gate closed so he doesn’t run away
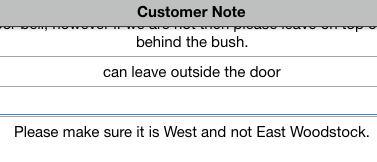
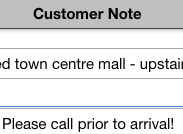
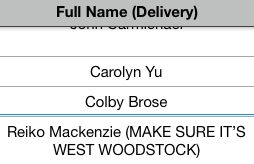
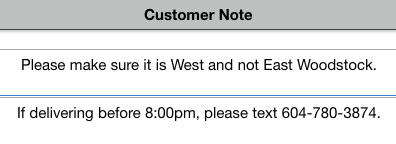
Sometimes, they’ll even help the brand ambassador not to get lost by clarifying things about their addresses. In this case, he’s specifying that it’s west Woodstock as some people might have gotten lost before with the adjacent east Woodstock area.
Here are some other examples of some other common notes they can include and our usual protocol 🙂

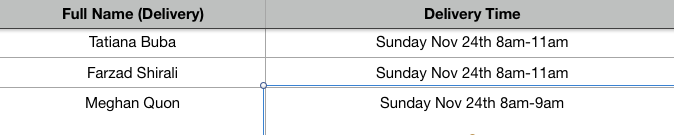
In this case, I changed the time frame from 8-11 am to 8-9 am as she’d like them as early as possible 🙂
Another note to avoid upsetting our customers
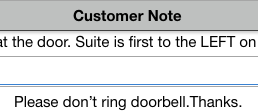
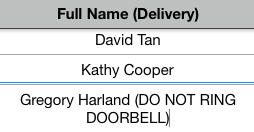
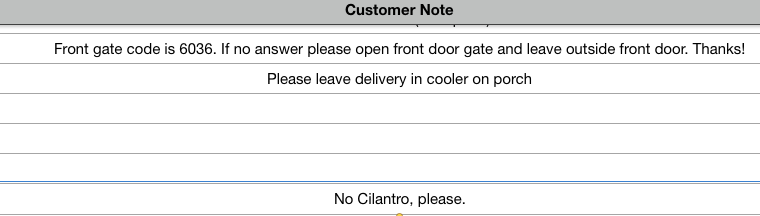
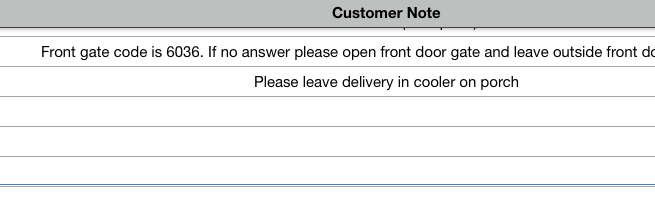
This one is an important one as some customers don’t like to be disturbed. and make it clear to leave the meals by the door without ringing the doorbell. Babies are a big factor too, our customers will be very annoyed if we wake them up

There are some clients that have specific instructions in the delivery note for us, some examples:
- Make sure add the important info gets transferred in a shorter form in front of the client’s name in ALL UPPERCASE. For ex, (DO NOT RING NOR KNOCK), (ADDRESS MANUALLY), (NO MARKETING MATERIAL), (TAKE THE KEY), (ARRIVE BY 12PM), (CLOSE THE FRONT GATE), (EXTRA ICE PACK),
- Remove “Simi Heer” phone number from the Phone Number field and transfer it to the delivery notes.
- Remove “Ramy Lally” or “Carmen” from VPD Cadet (police Department) from the report.
- Pay attention to “Michael Fogel” order as it has to be delivered by 1:15, so make sure add (ARRIVE BY 1:15PM) in front of his name, and arrange the time frame correctly.
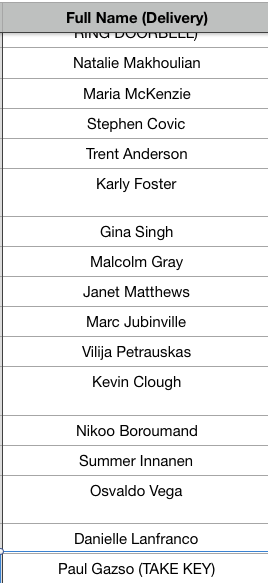
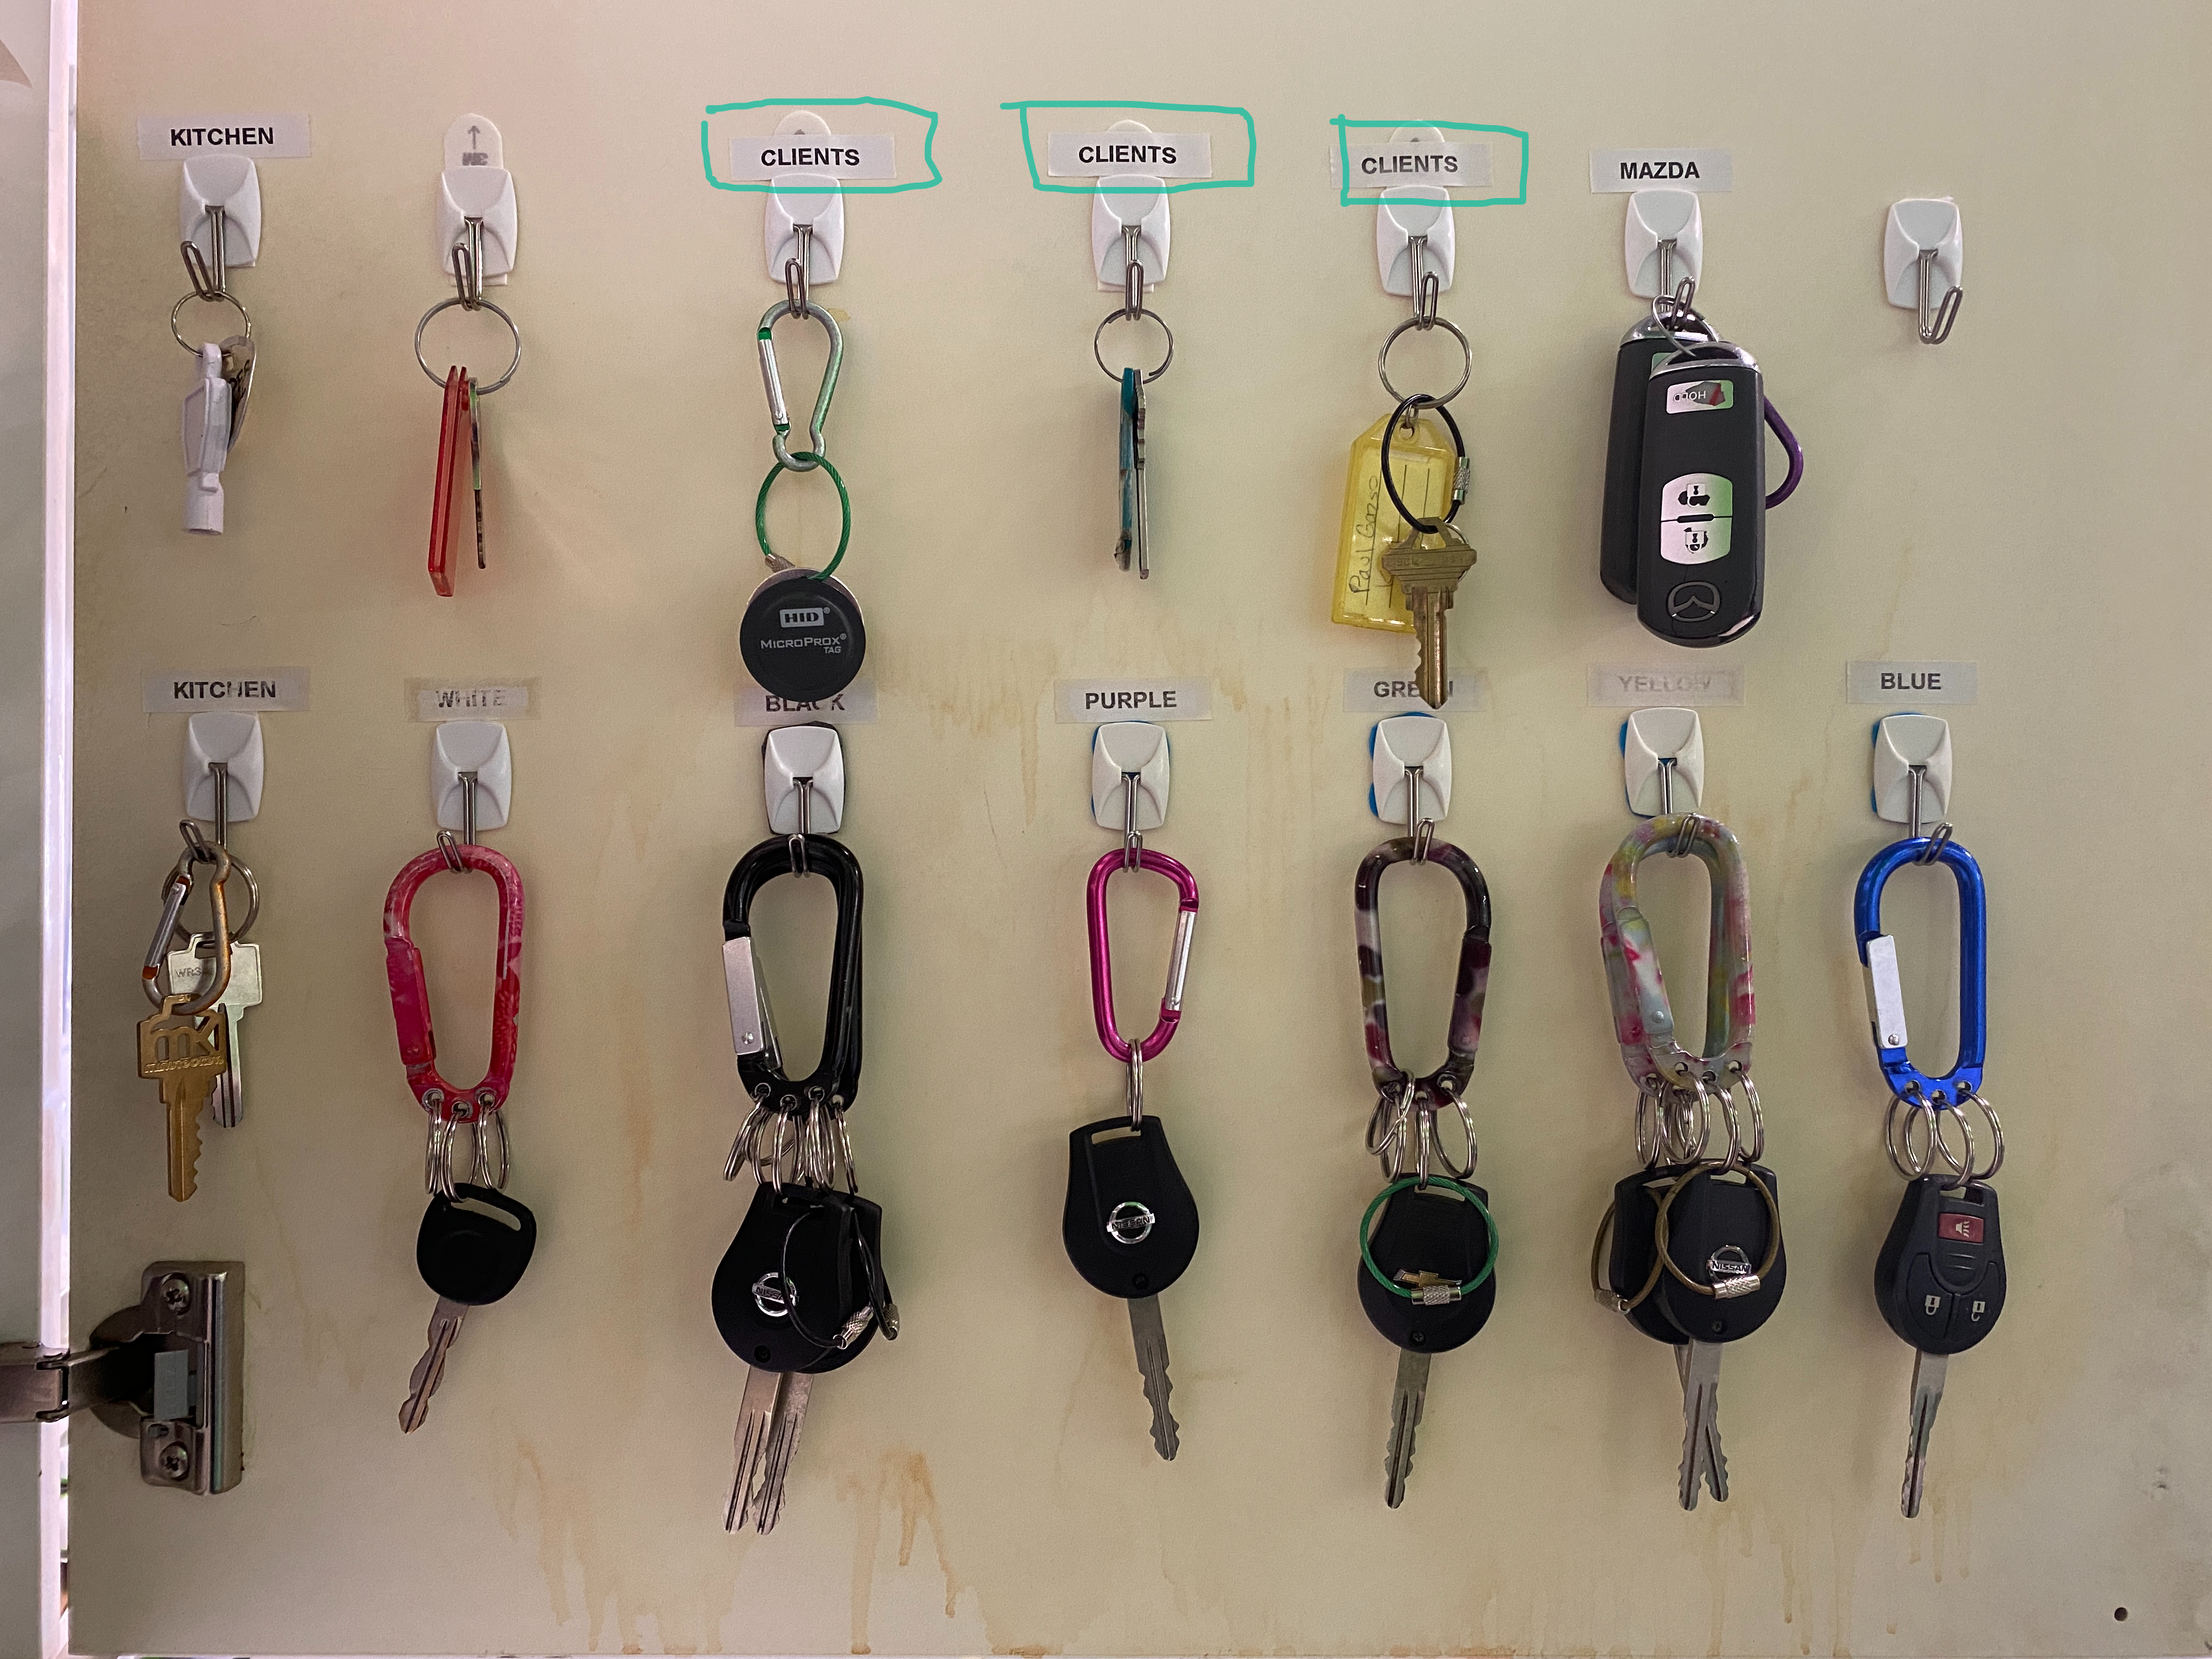
Keys, keys & keys! #
Some of our customers give us their keys because we need to access their buildings and we wouldn’t be able to if they don’t provide us with their keys prior to their delivery.
One example is Paul Gaszo (paused), as it can be seen in his notes (last row), he states that we use the key to access the building and place the meals outside of his apartment door.
Another example is True Conditioning, Sean Merat, etc. Key Can be found in the dispatch cabinet beside all other keys.
Arranging the columns to a correct format #
Now that we are about to finalize the delivery report, when you export the delivery report there are going to be duplicated sections, please just go over the labels and make sure the file is ready to be exported correctly.
The final version of the delivery report should only have the following columns (13 in total):
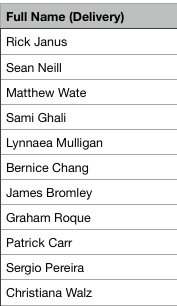
- Full Name
- Delivery Time
- Time From
- Time Till
- City
- Province
- Address
- Unit
- Buzzer
- Phone Number
- Postcode
- Customer Note

Make sure to onfirm that all the fields are consistent once confirmed, double checked and triple checked.
Pro tip: If this step is done wrong, you might have assigned a delivery from one time frame to another or changing the date by accident, all because of not paying close attention to this step. So please check, double-check and triple-check if necessary but make sure all of the info is transposed correctly.


