Taking down the website #
Once all the previews steps are done, it is time to take the website down to make it ready for the next day, when our new week’s sales start with our new menu!
To start the process, you have to go to Products -> All Products.
It will take you to a page with all our products; you have to put the name “MENU” in a search bar and press “search products.”
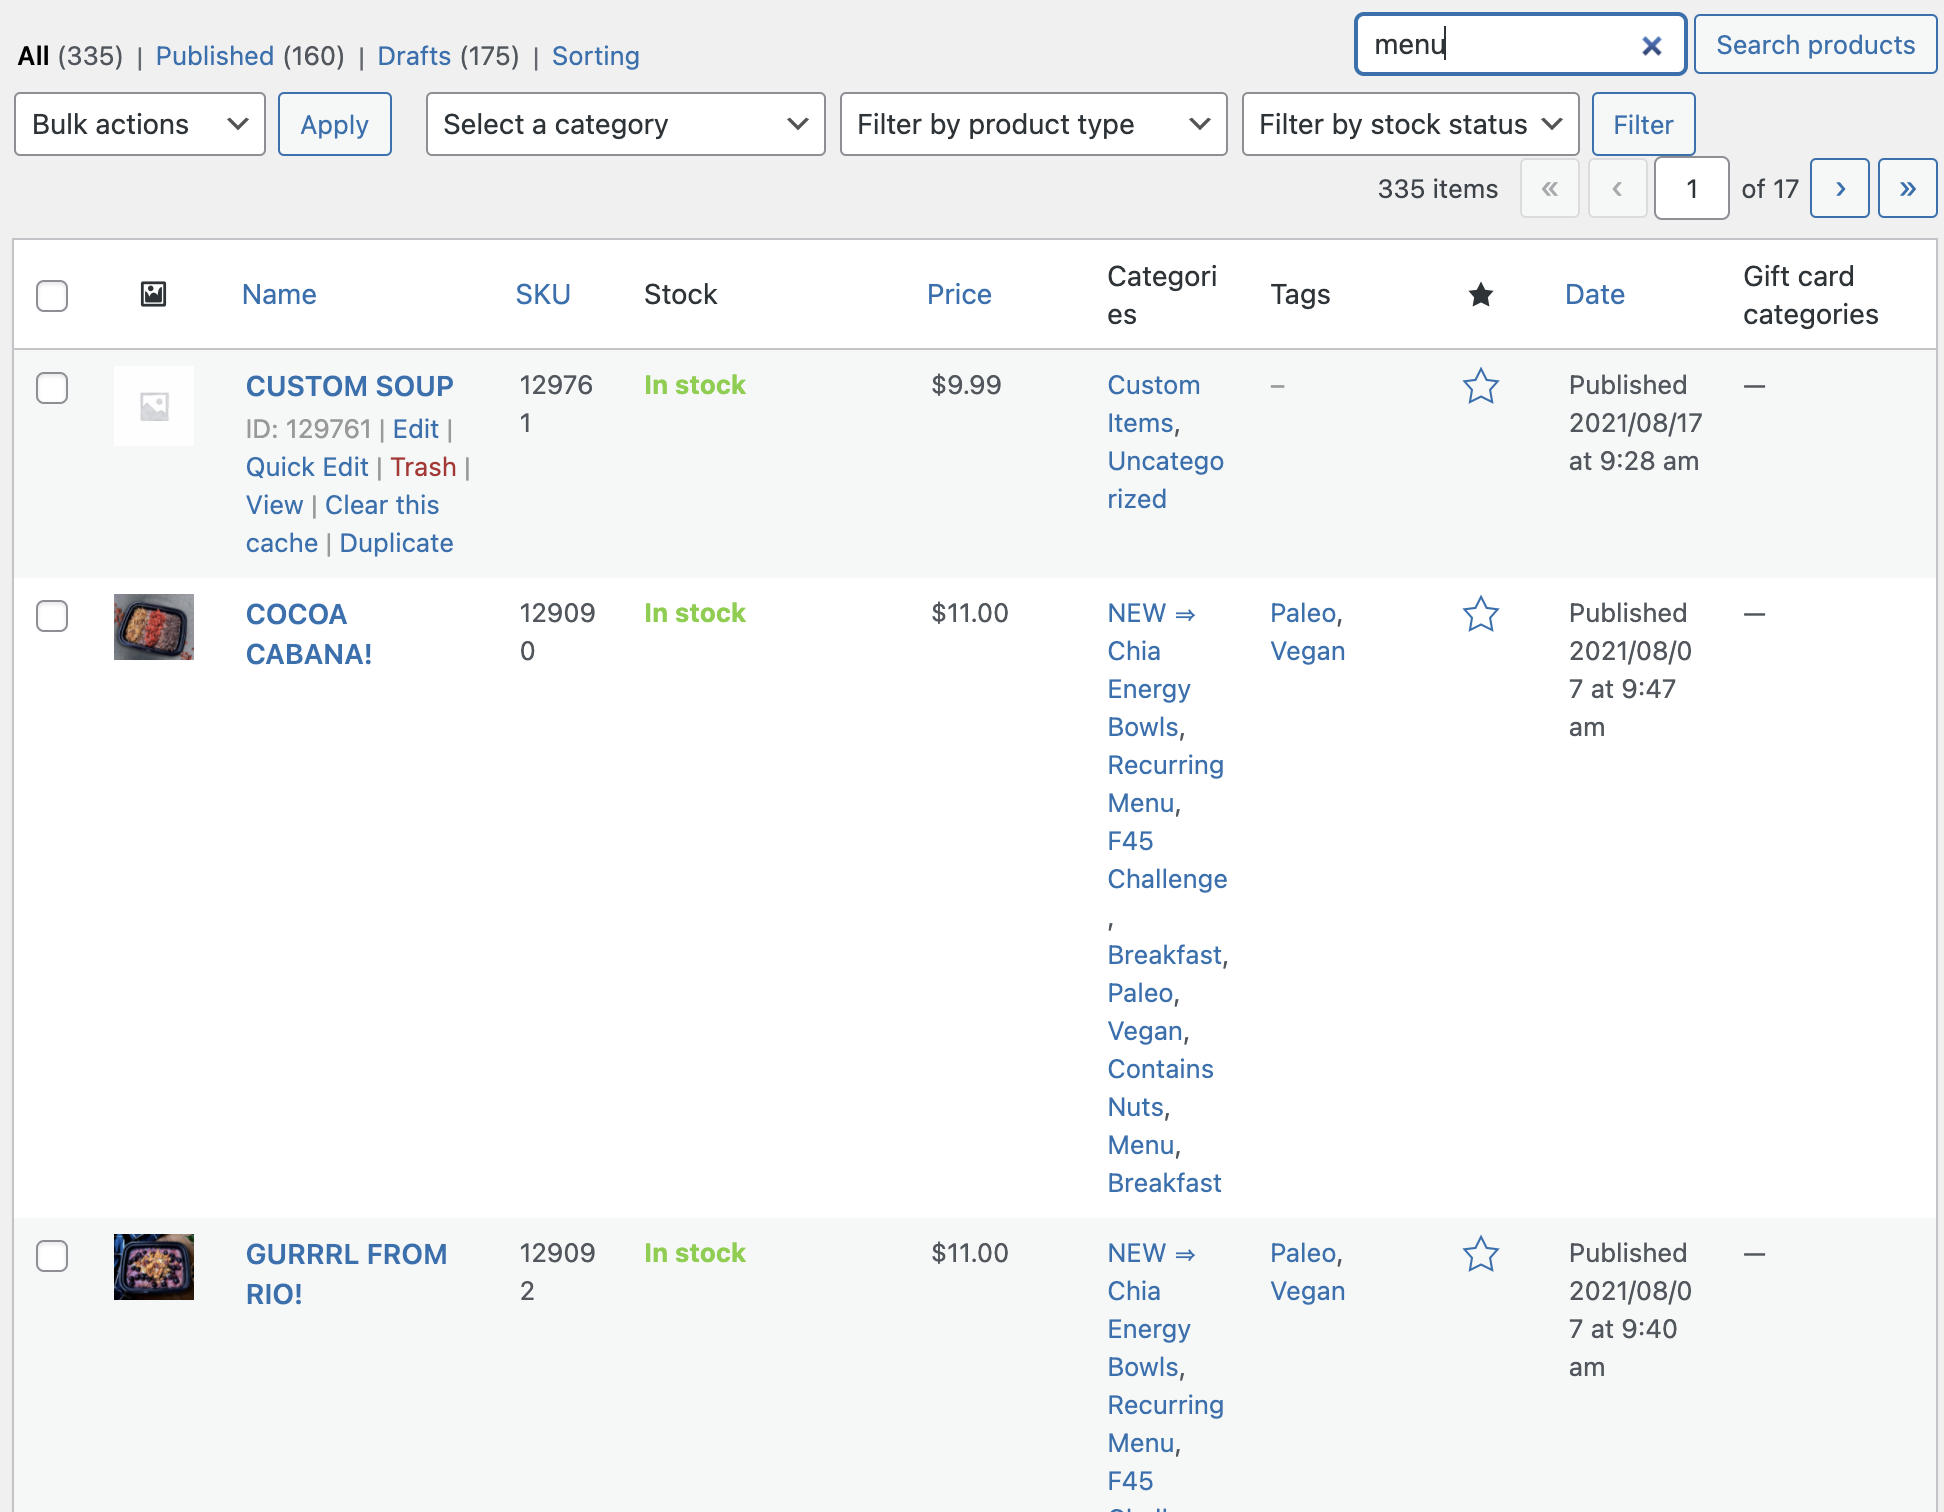
It will take you for a page like the one on the following picture:
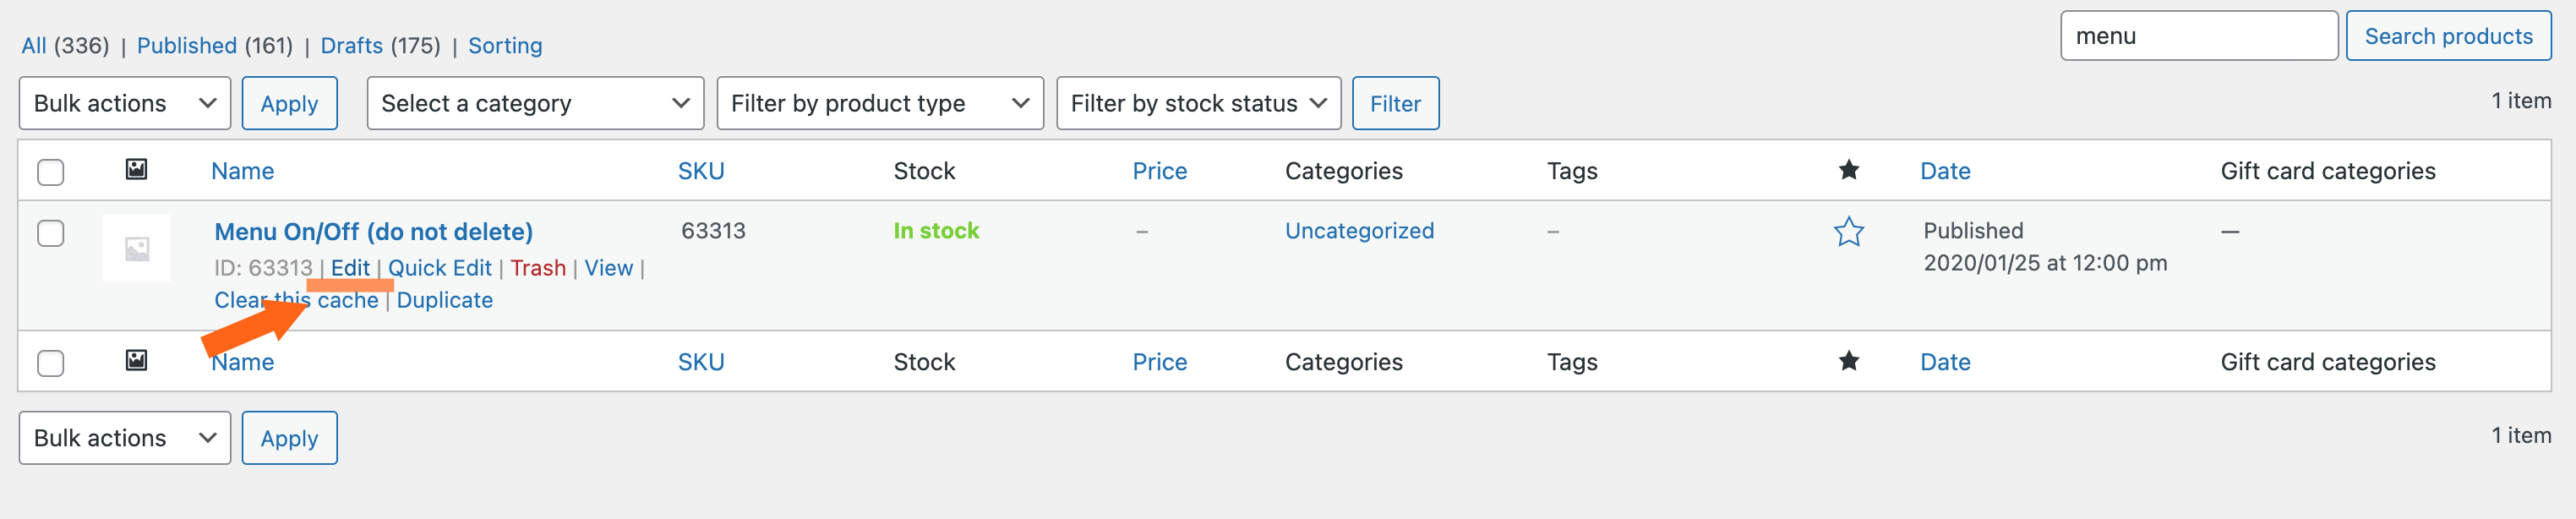
Click on “Edit,” and then you’ll have to eraser the number 1 that you’ll find on the field “Regular price ($)”:
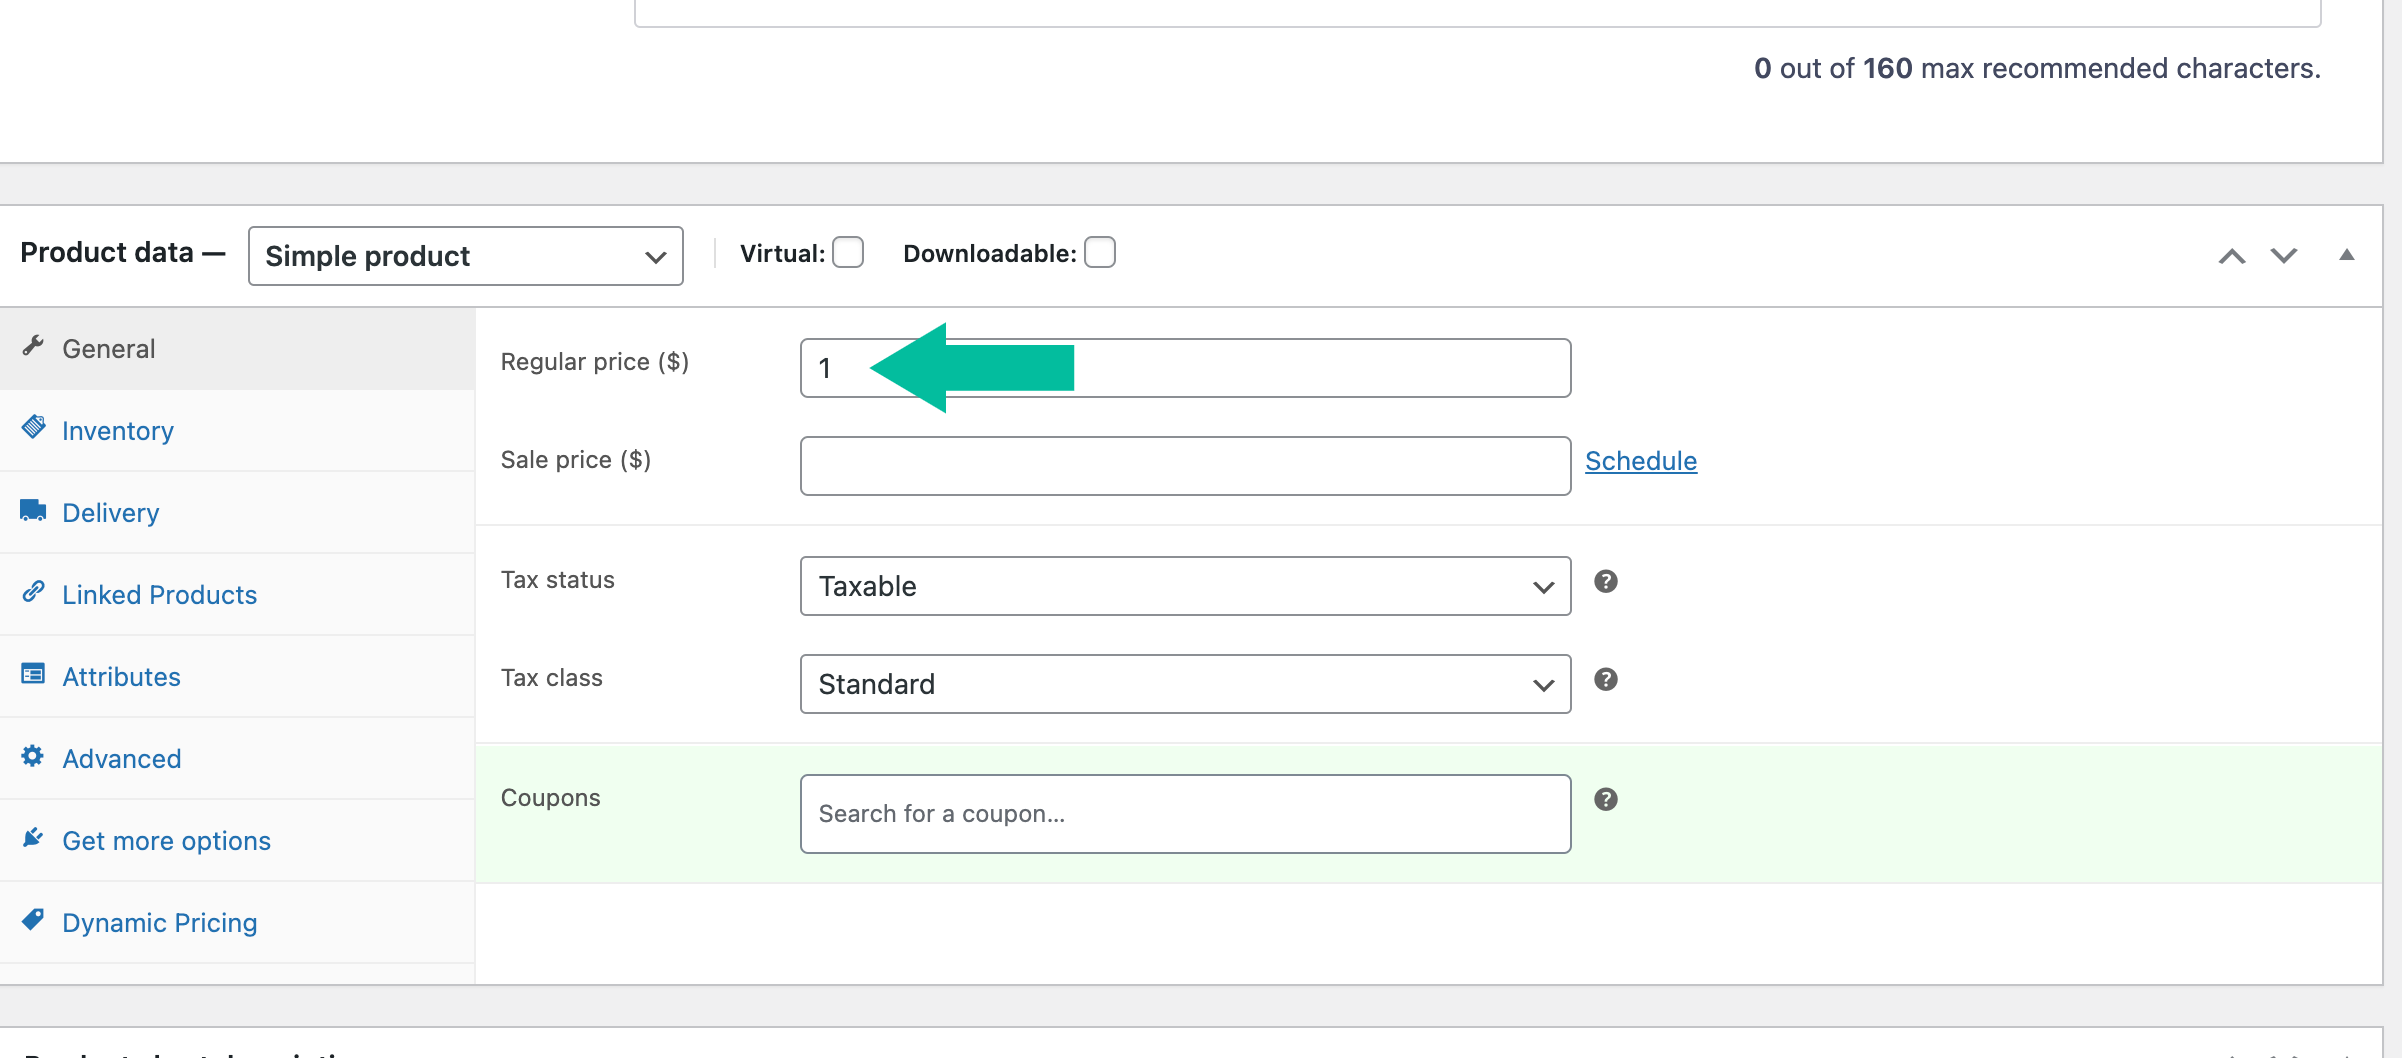
Once you eraser it, you must press the button “Update” on the top right of the page.
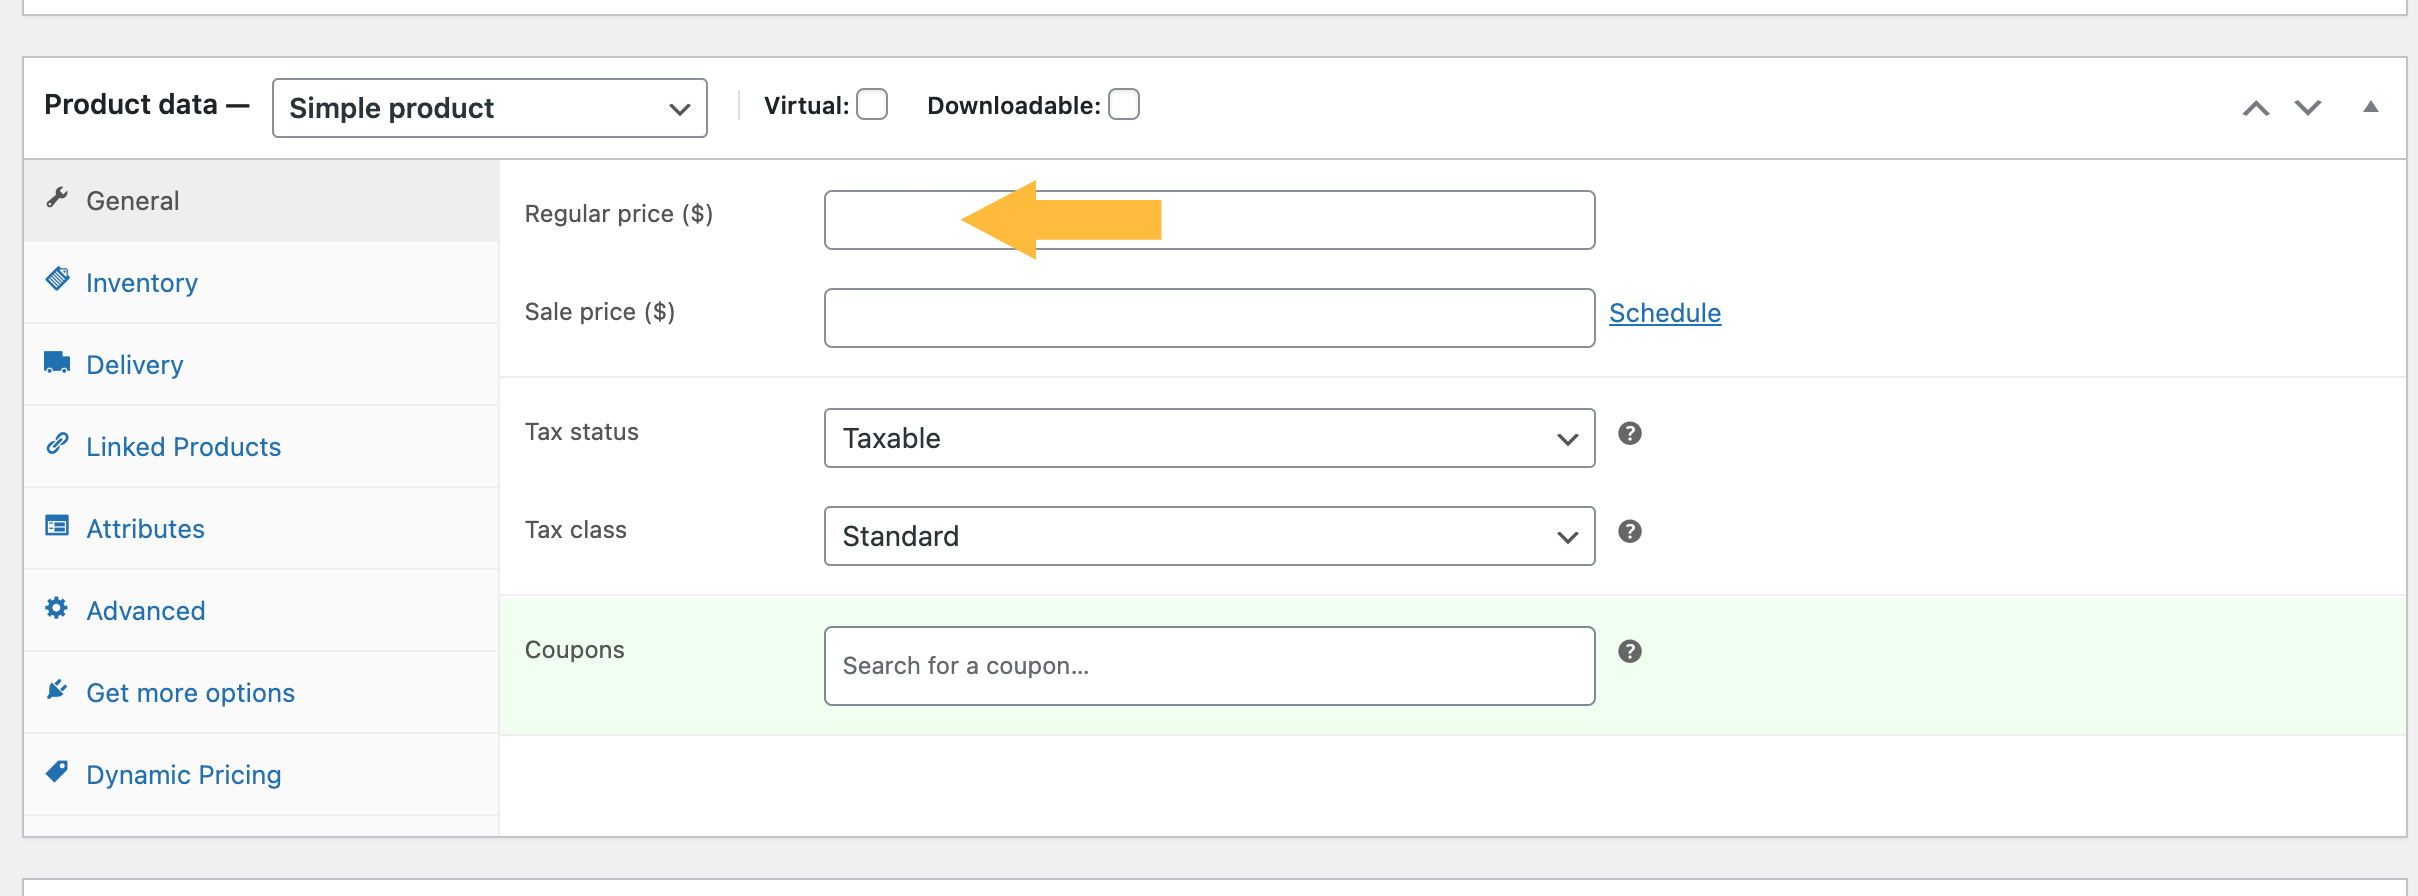
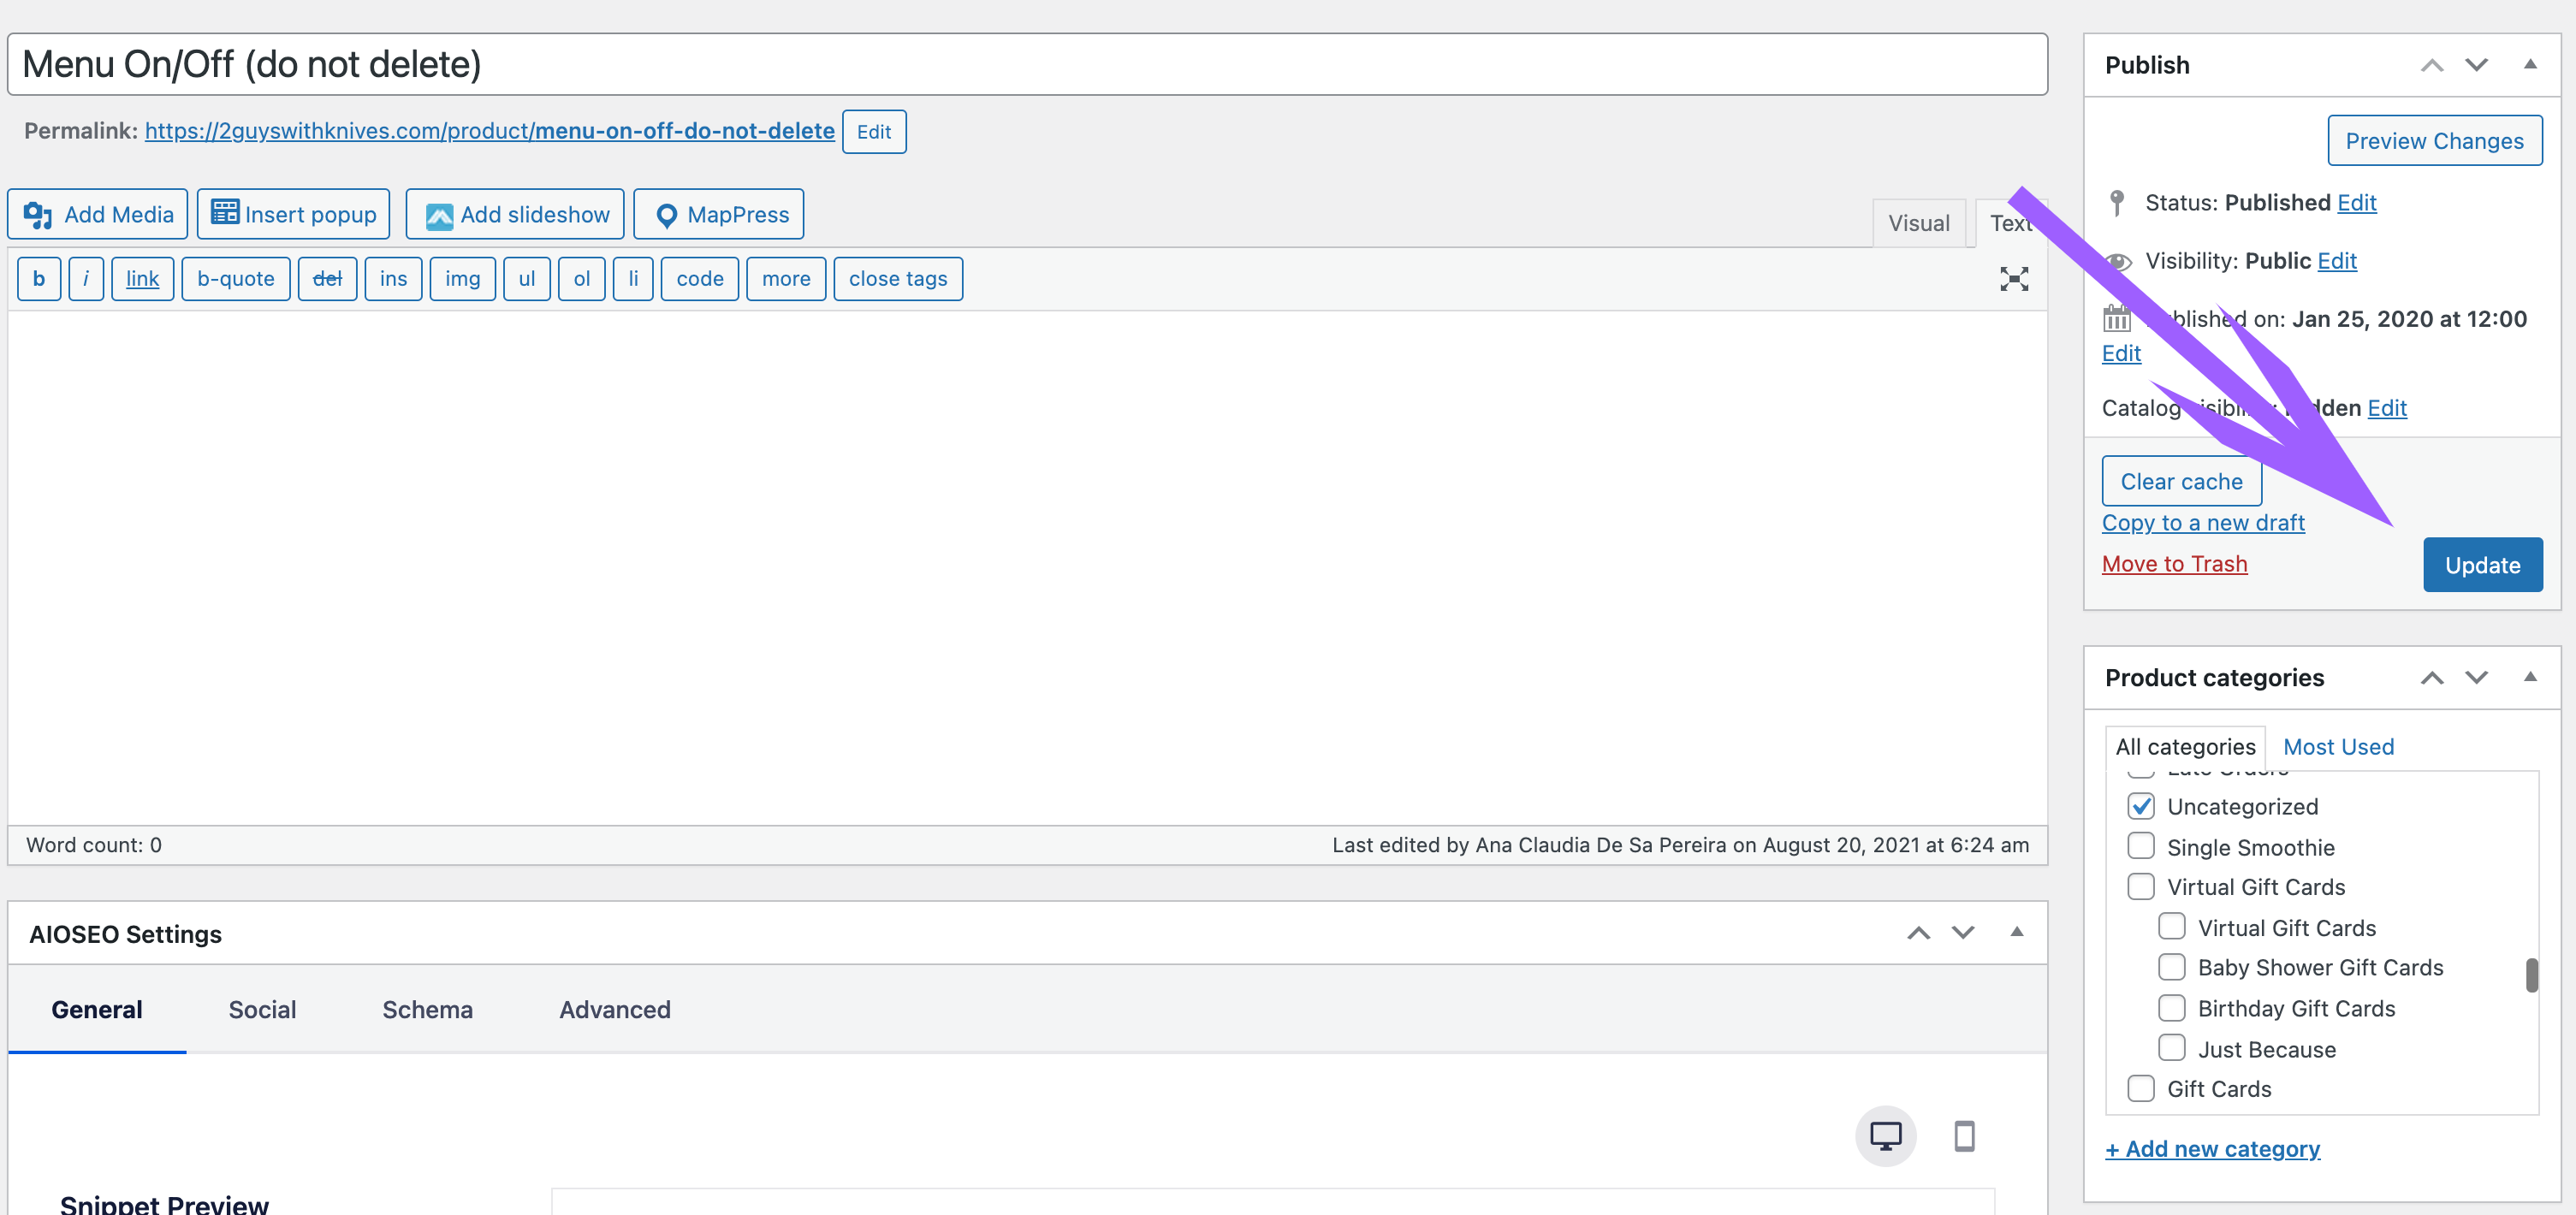
Simply like that, the website is down!! Good job!!!
Some of the clients start ordering, and for some reason, they don’t finalize it, which results in their cart full of items, but no orders done.
When we take the website down, we must clear their carts, so if they think about ordering after our deadline and with our website down, they don’t have access to it.
Our last step in this chapter is to show you how to clear their carts, also to make sure we are not going to have any confusion on the order report.
On top of the website page, you click on “WP Rocket” -> “Clear cache.”
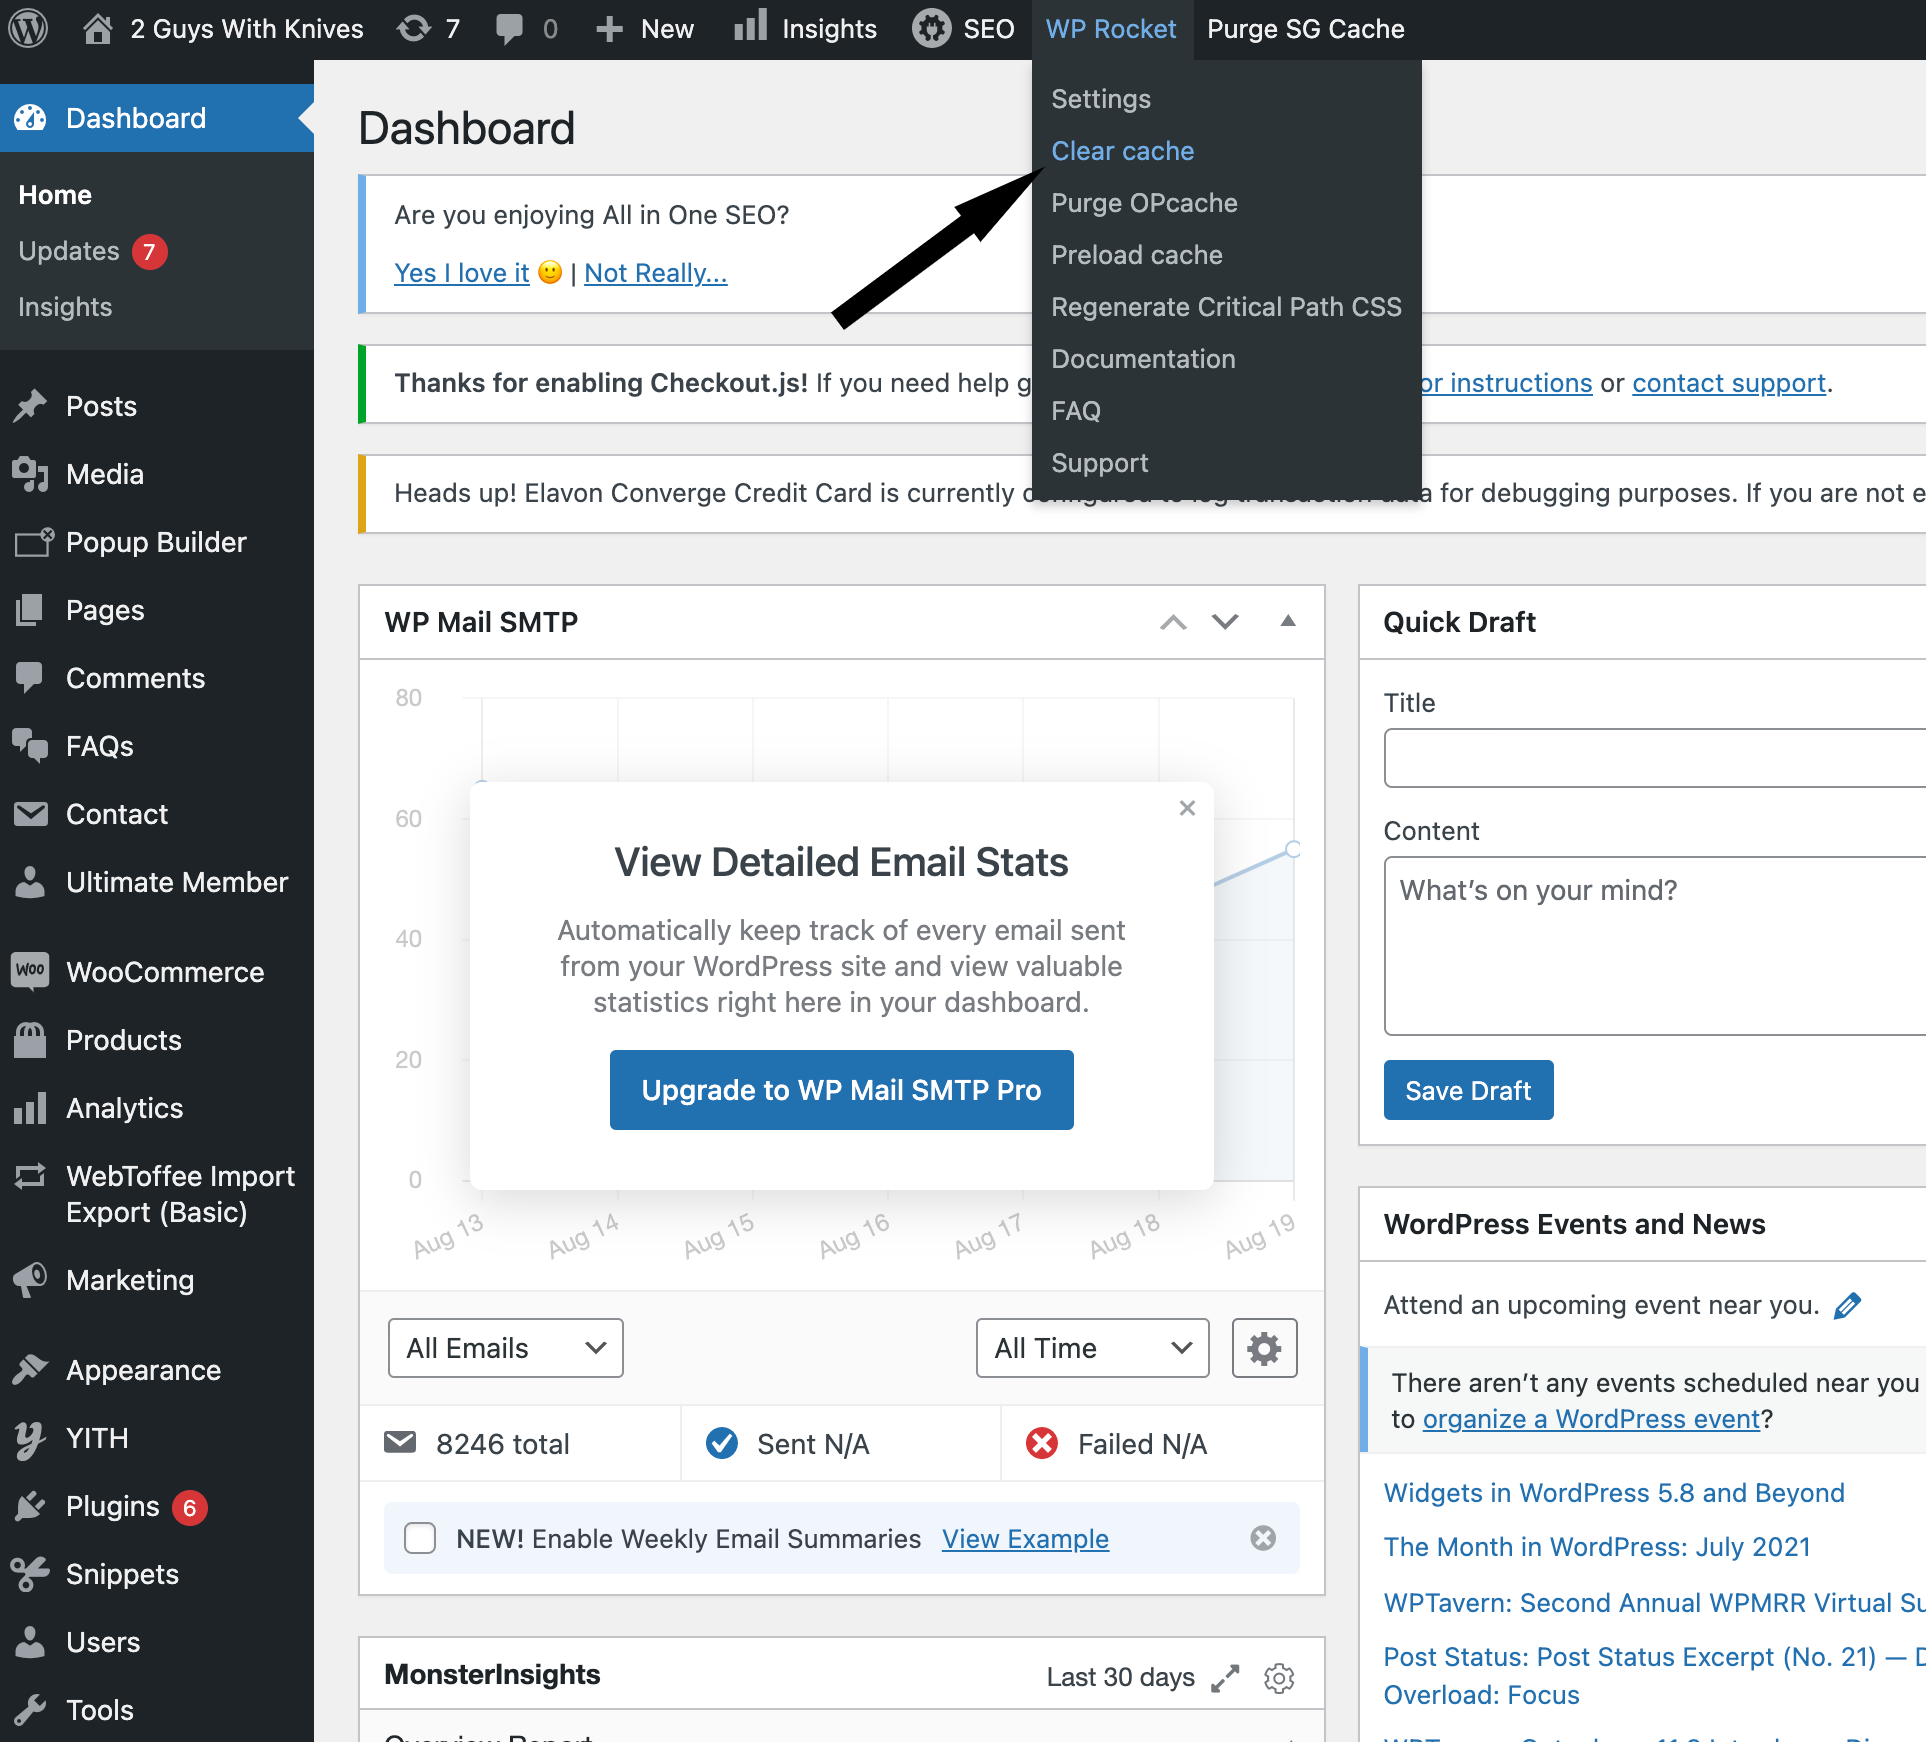
And… that’s it! Simple and easy! 🙂
Marking orders completed #
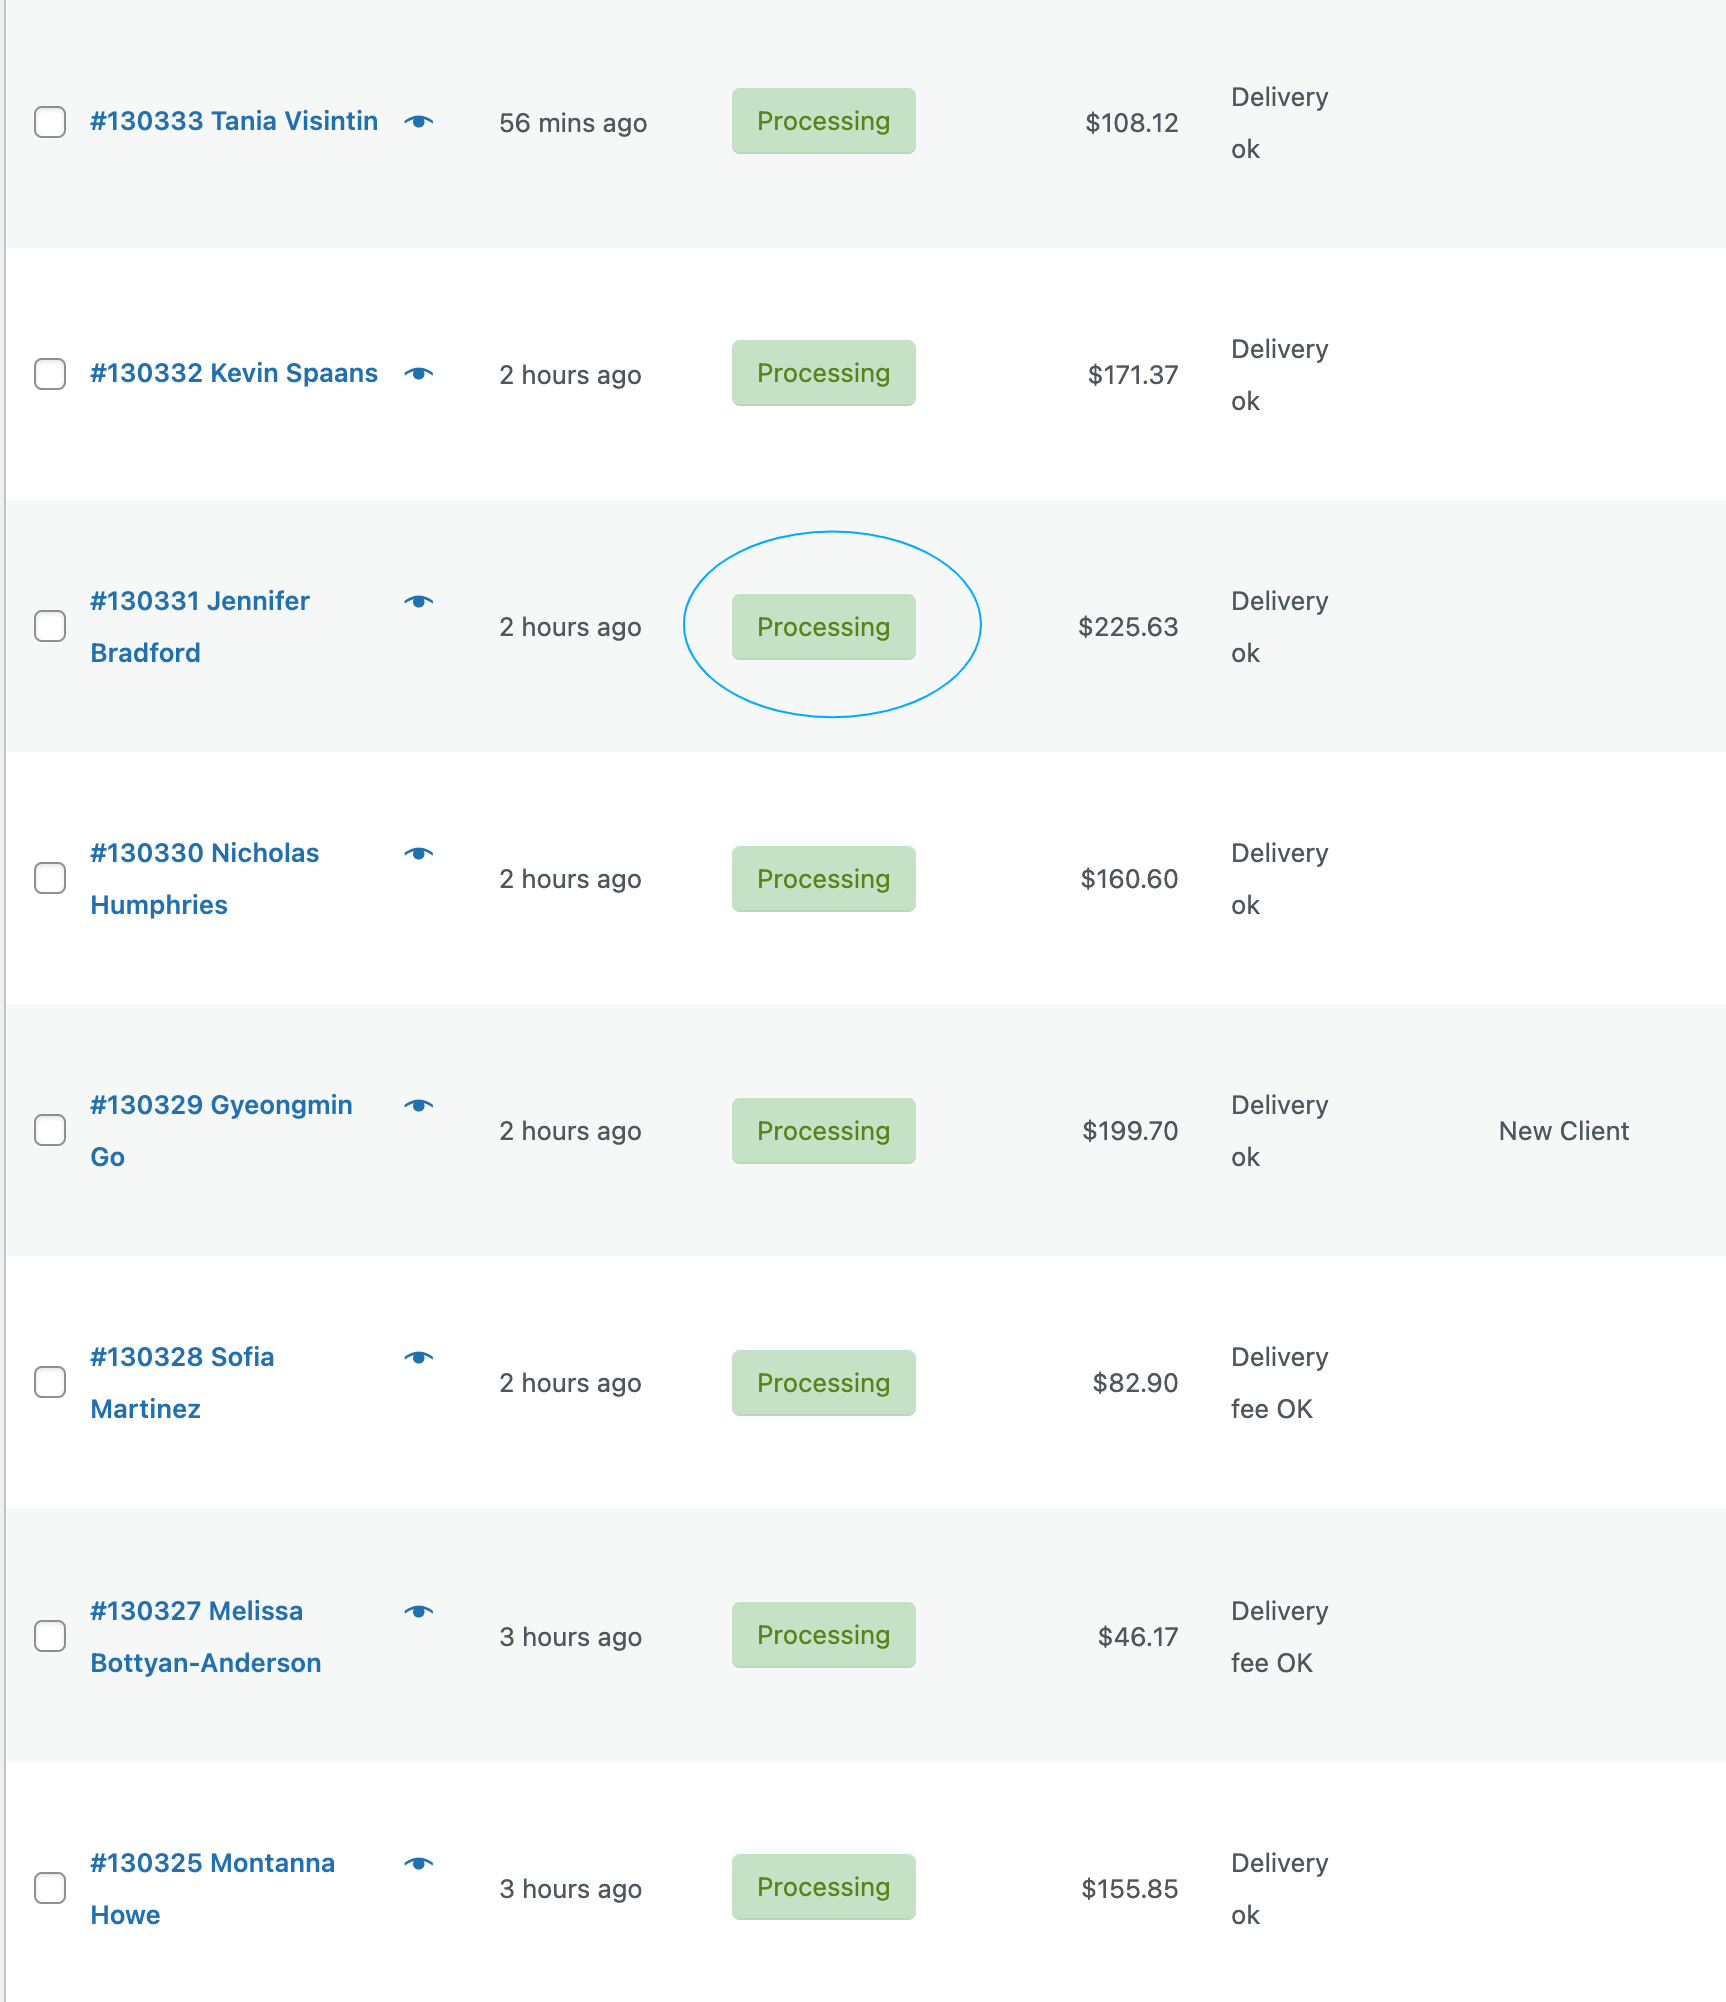
During the week, all the orders show to us as “processing” orders, which means they are still waiting to go to production. Once we get all the numbers we need for production and close the website, we must make “completed” orders. In that manner, we’ll make our website ready for the next week’s sales and for all the orders coming in that following week.
That’s how it looks like when the orders are on “processing”:
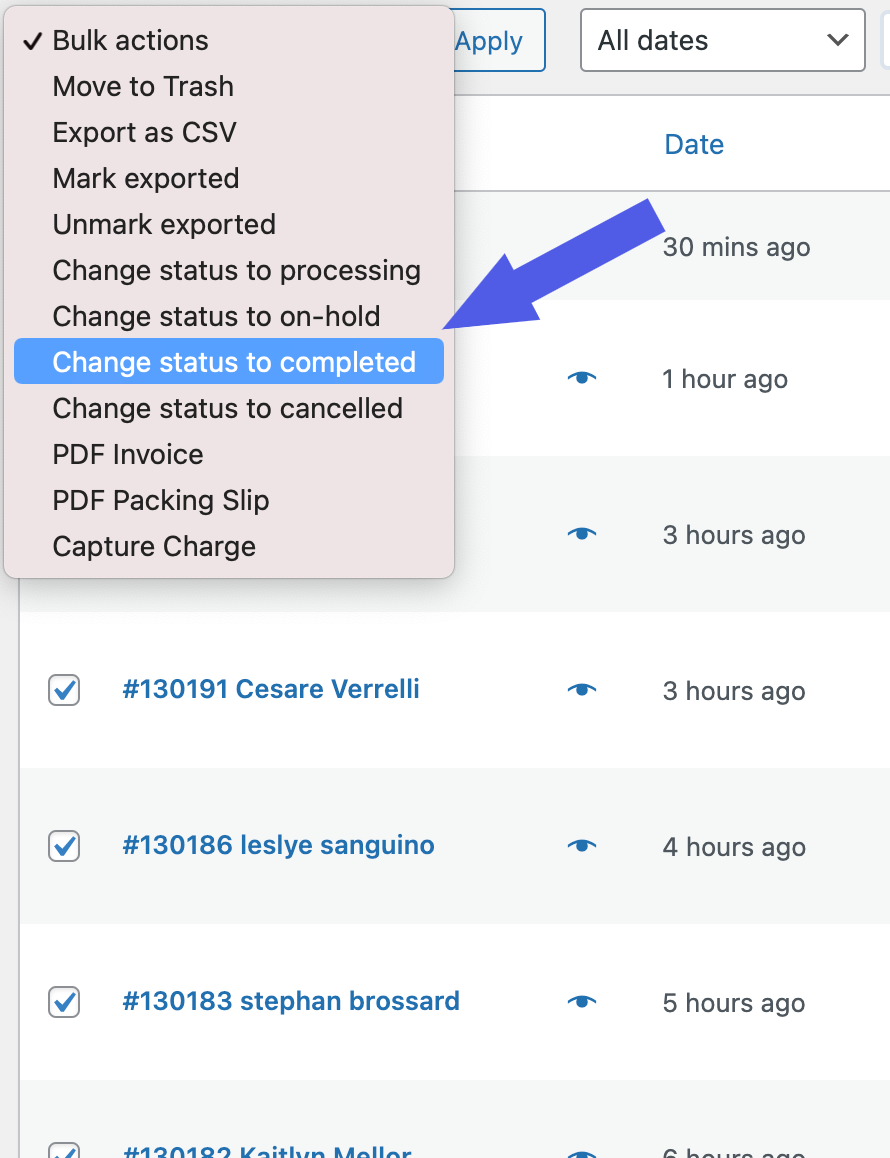
To make them “completed,” you will change your screen options to make it easier when you change the status of the orders. You will change the number of items per page from “20” to “100”. For that, when you change the status of the orders and update them, you’ll reach a larger amount of orders than if you work just with 20 orders.
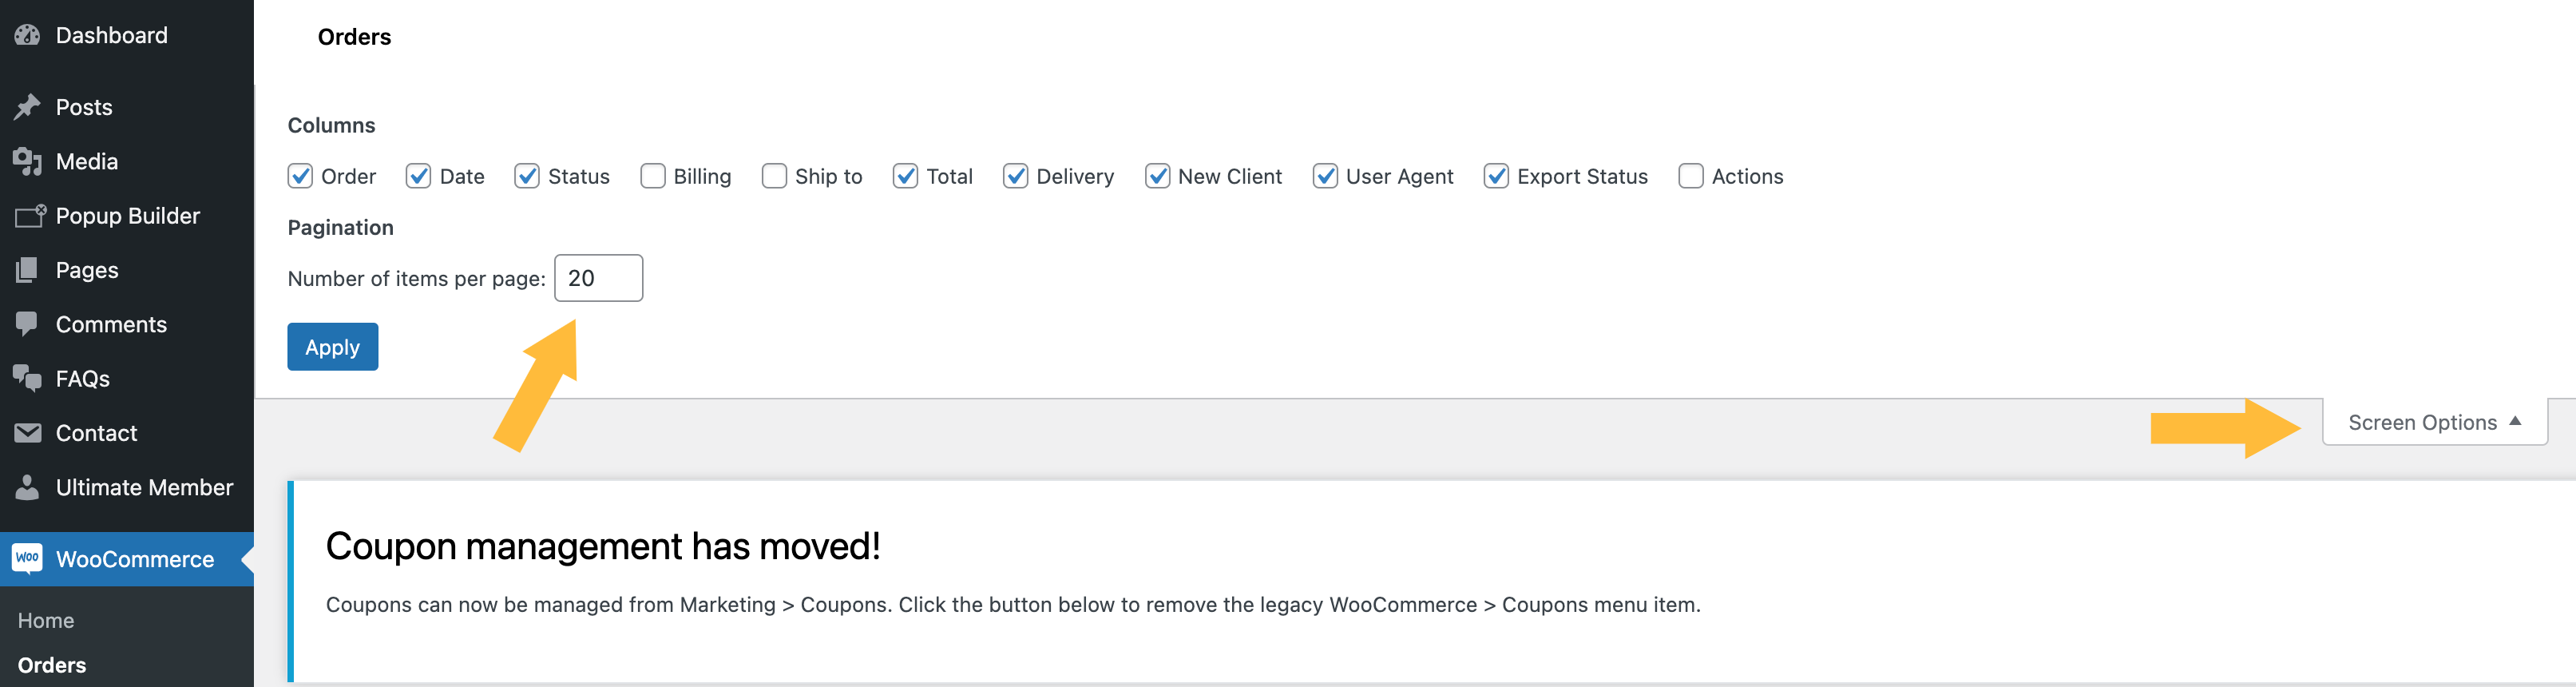
When you change it, you have to select all the orders from that specific page (which will be “100” orders since you already set it up) and press “change status to completed.” Automatically all those 100 orders are going to change from “processing” to “completed.” You’ll have to change all the statuses to make them “completed .”
When you’re done, that’s how your page will look like:
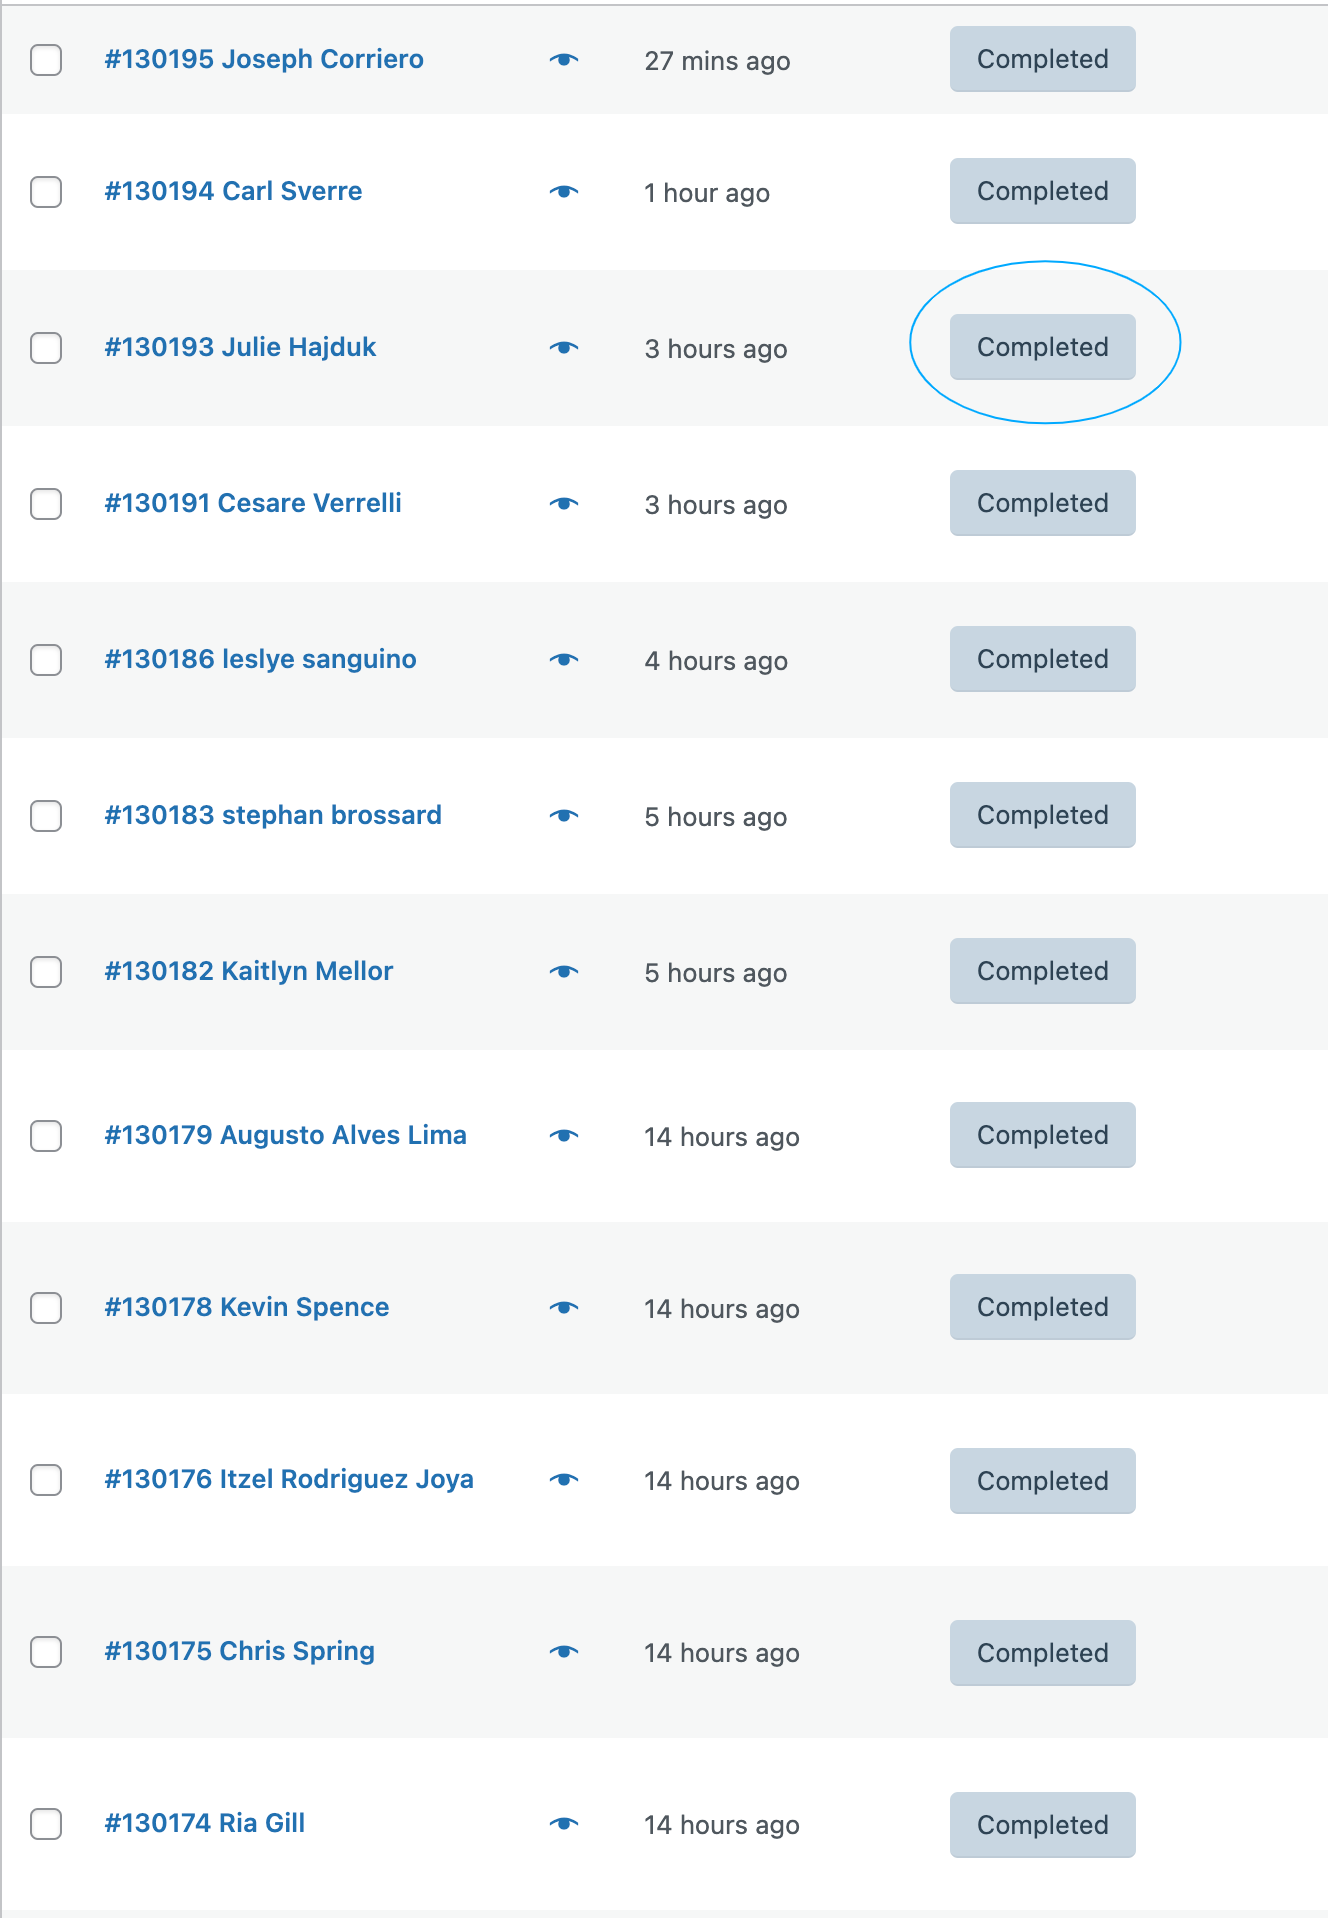
Woohoo! We are on our way to make the website 100% ready for the next week’s sales!
Organizing shop page #
We normally close some timeframes on Thursday when they are almost full to make our delivery routes easy to plan on Friday. We have to activate a button to show our customers that a specific timeframe is closed. Once the preview week is over, we have to deactivate it.
Then, follow the next steps to deactivate this feature and make all the timeframes available for the following week’s sales!
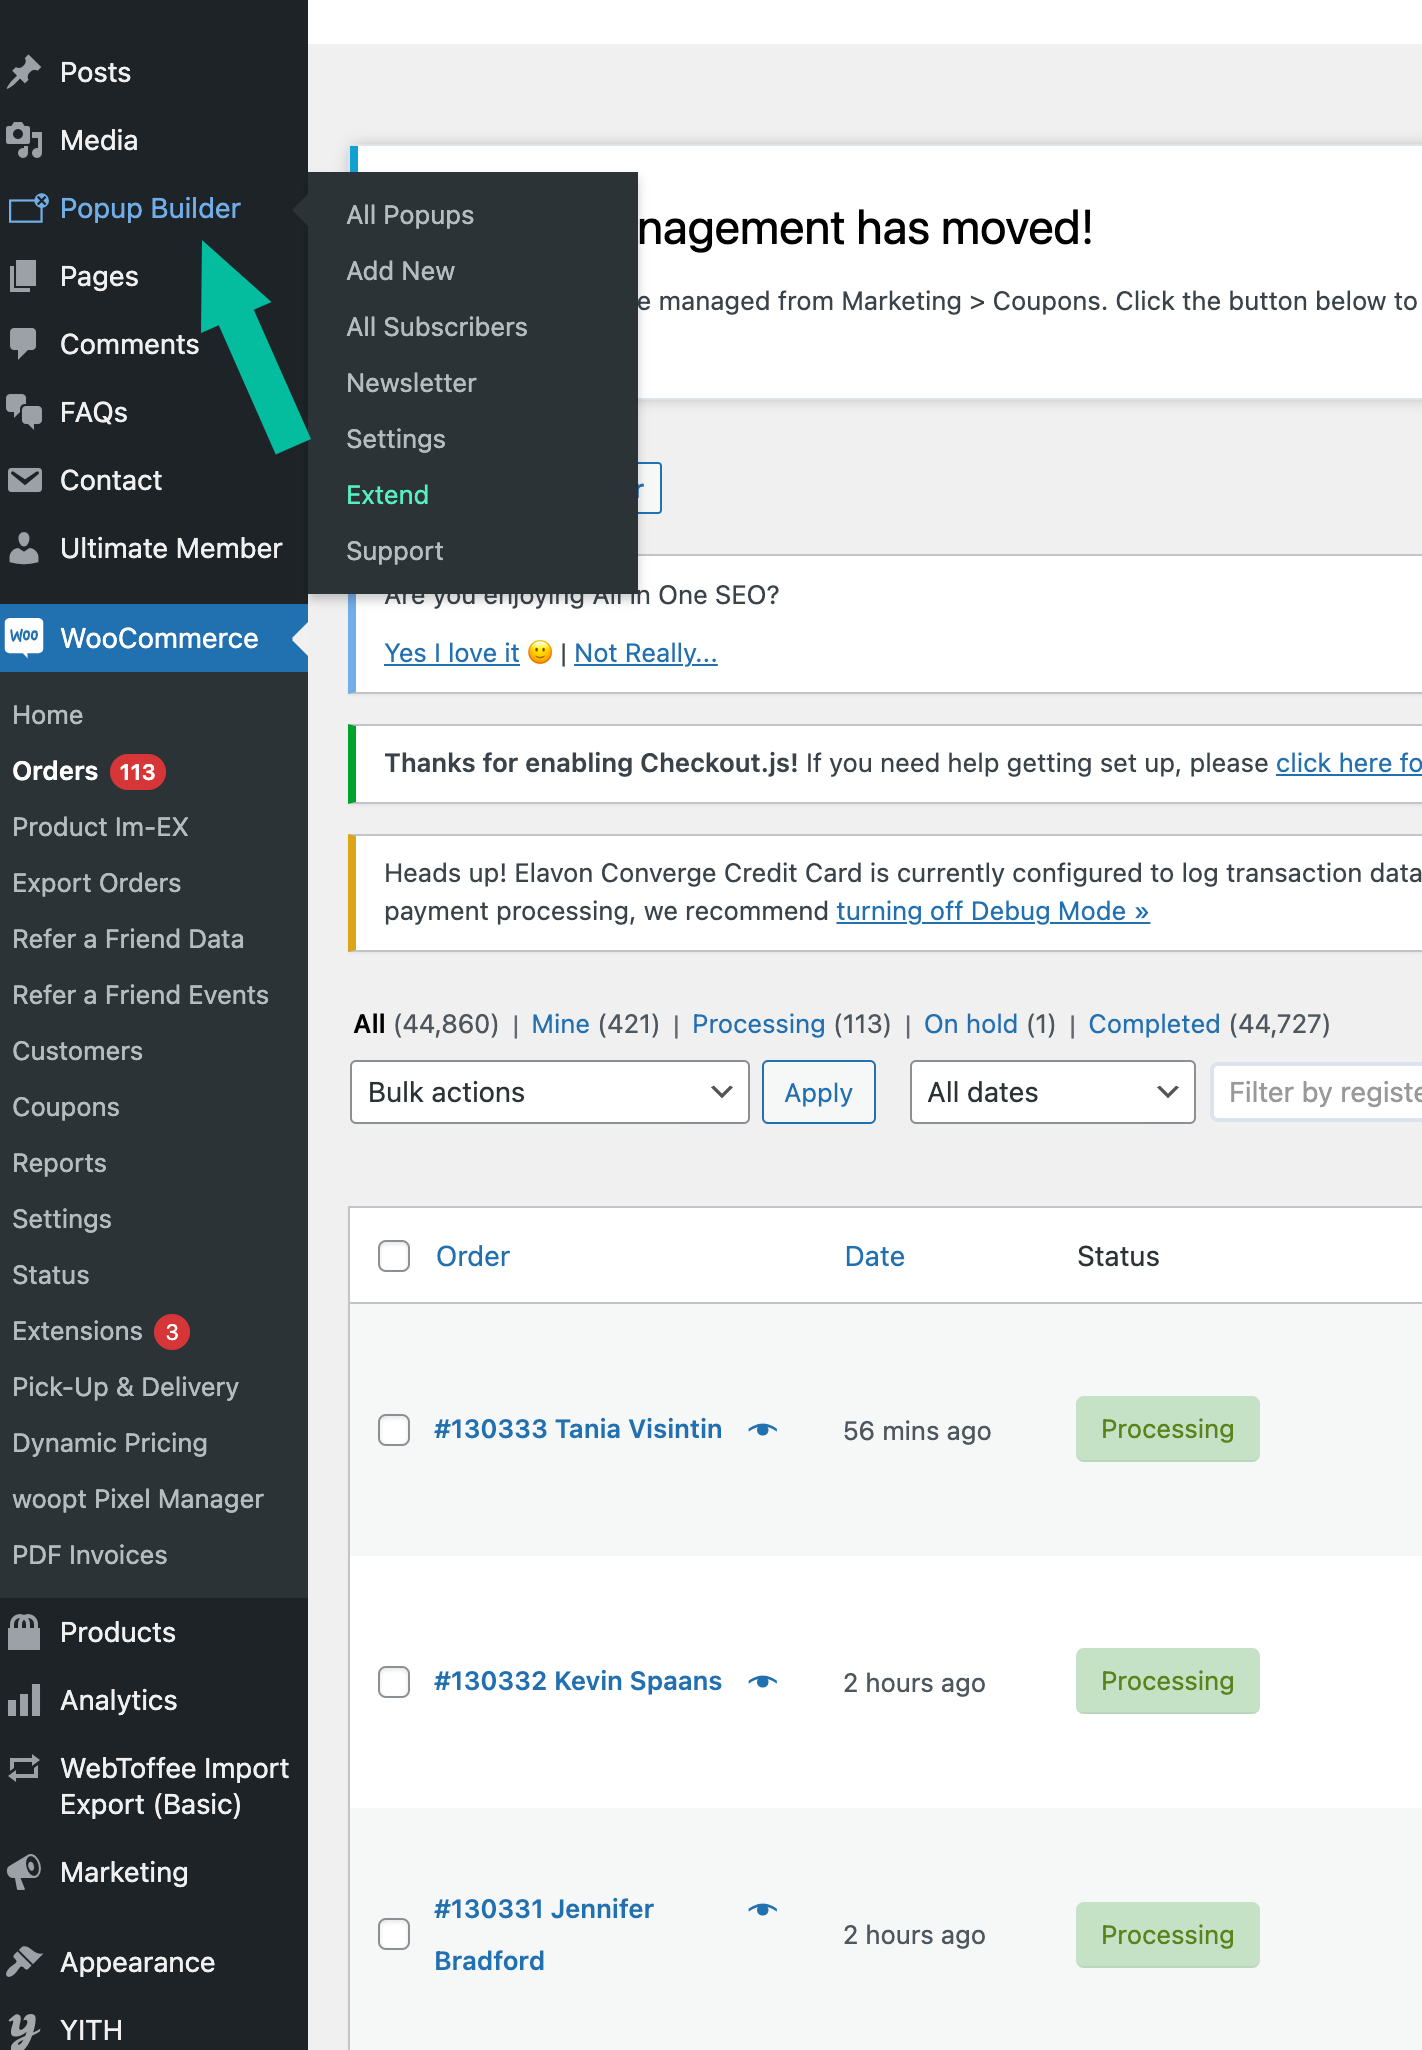
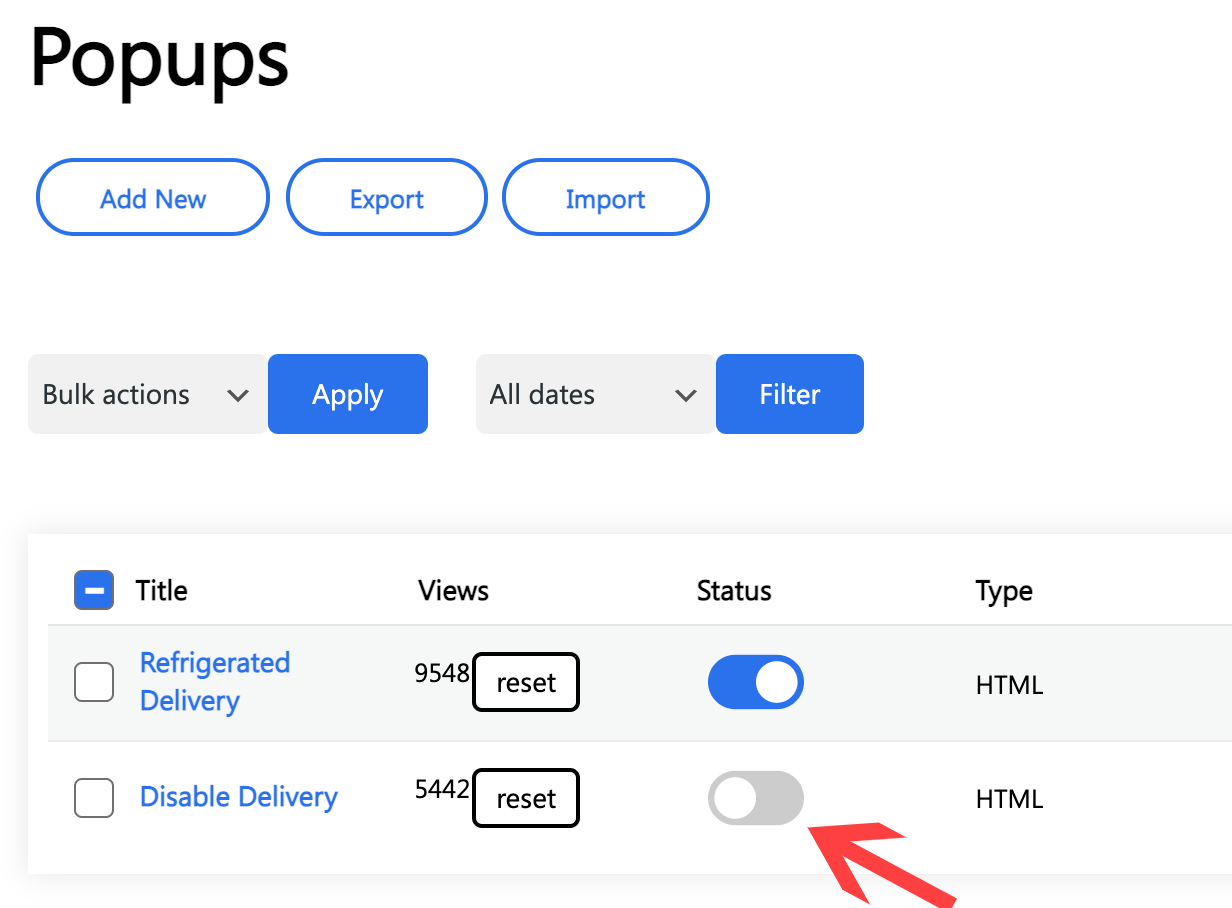
Click on “Popup Builder” on the left side of the page:
You’ll see that the page looks like the following picture, and the status of “Disable Delivery” is blue, which means it is activated.
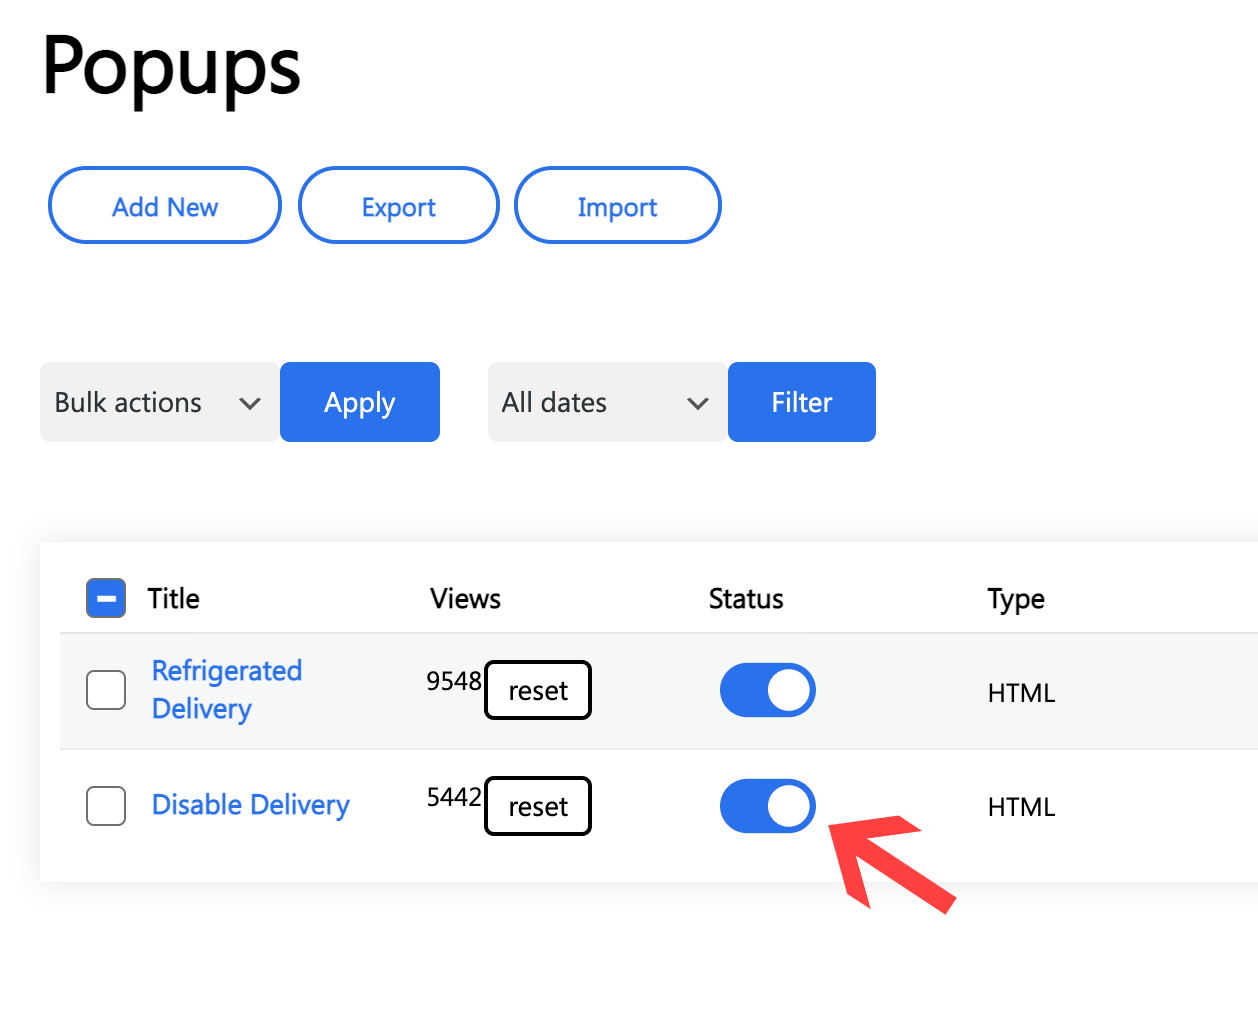
Click on it, and it will turn gray, meaning that we deactivate the feature, like the following picture:
When our clients open the menu to check it out, the first information that they’ll see is our deadline and delivery days info.
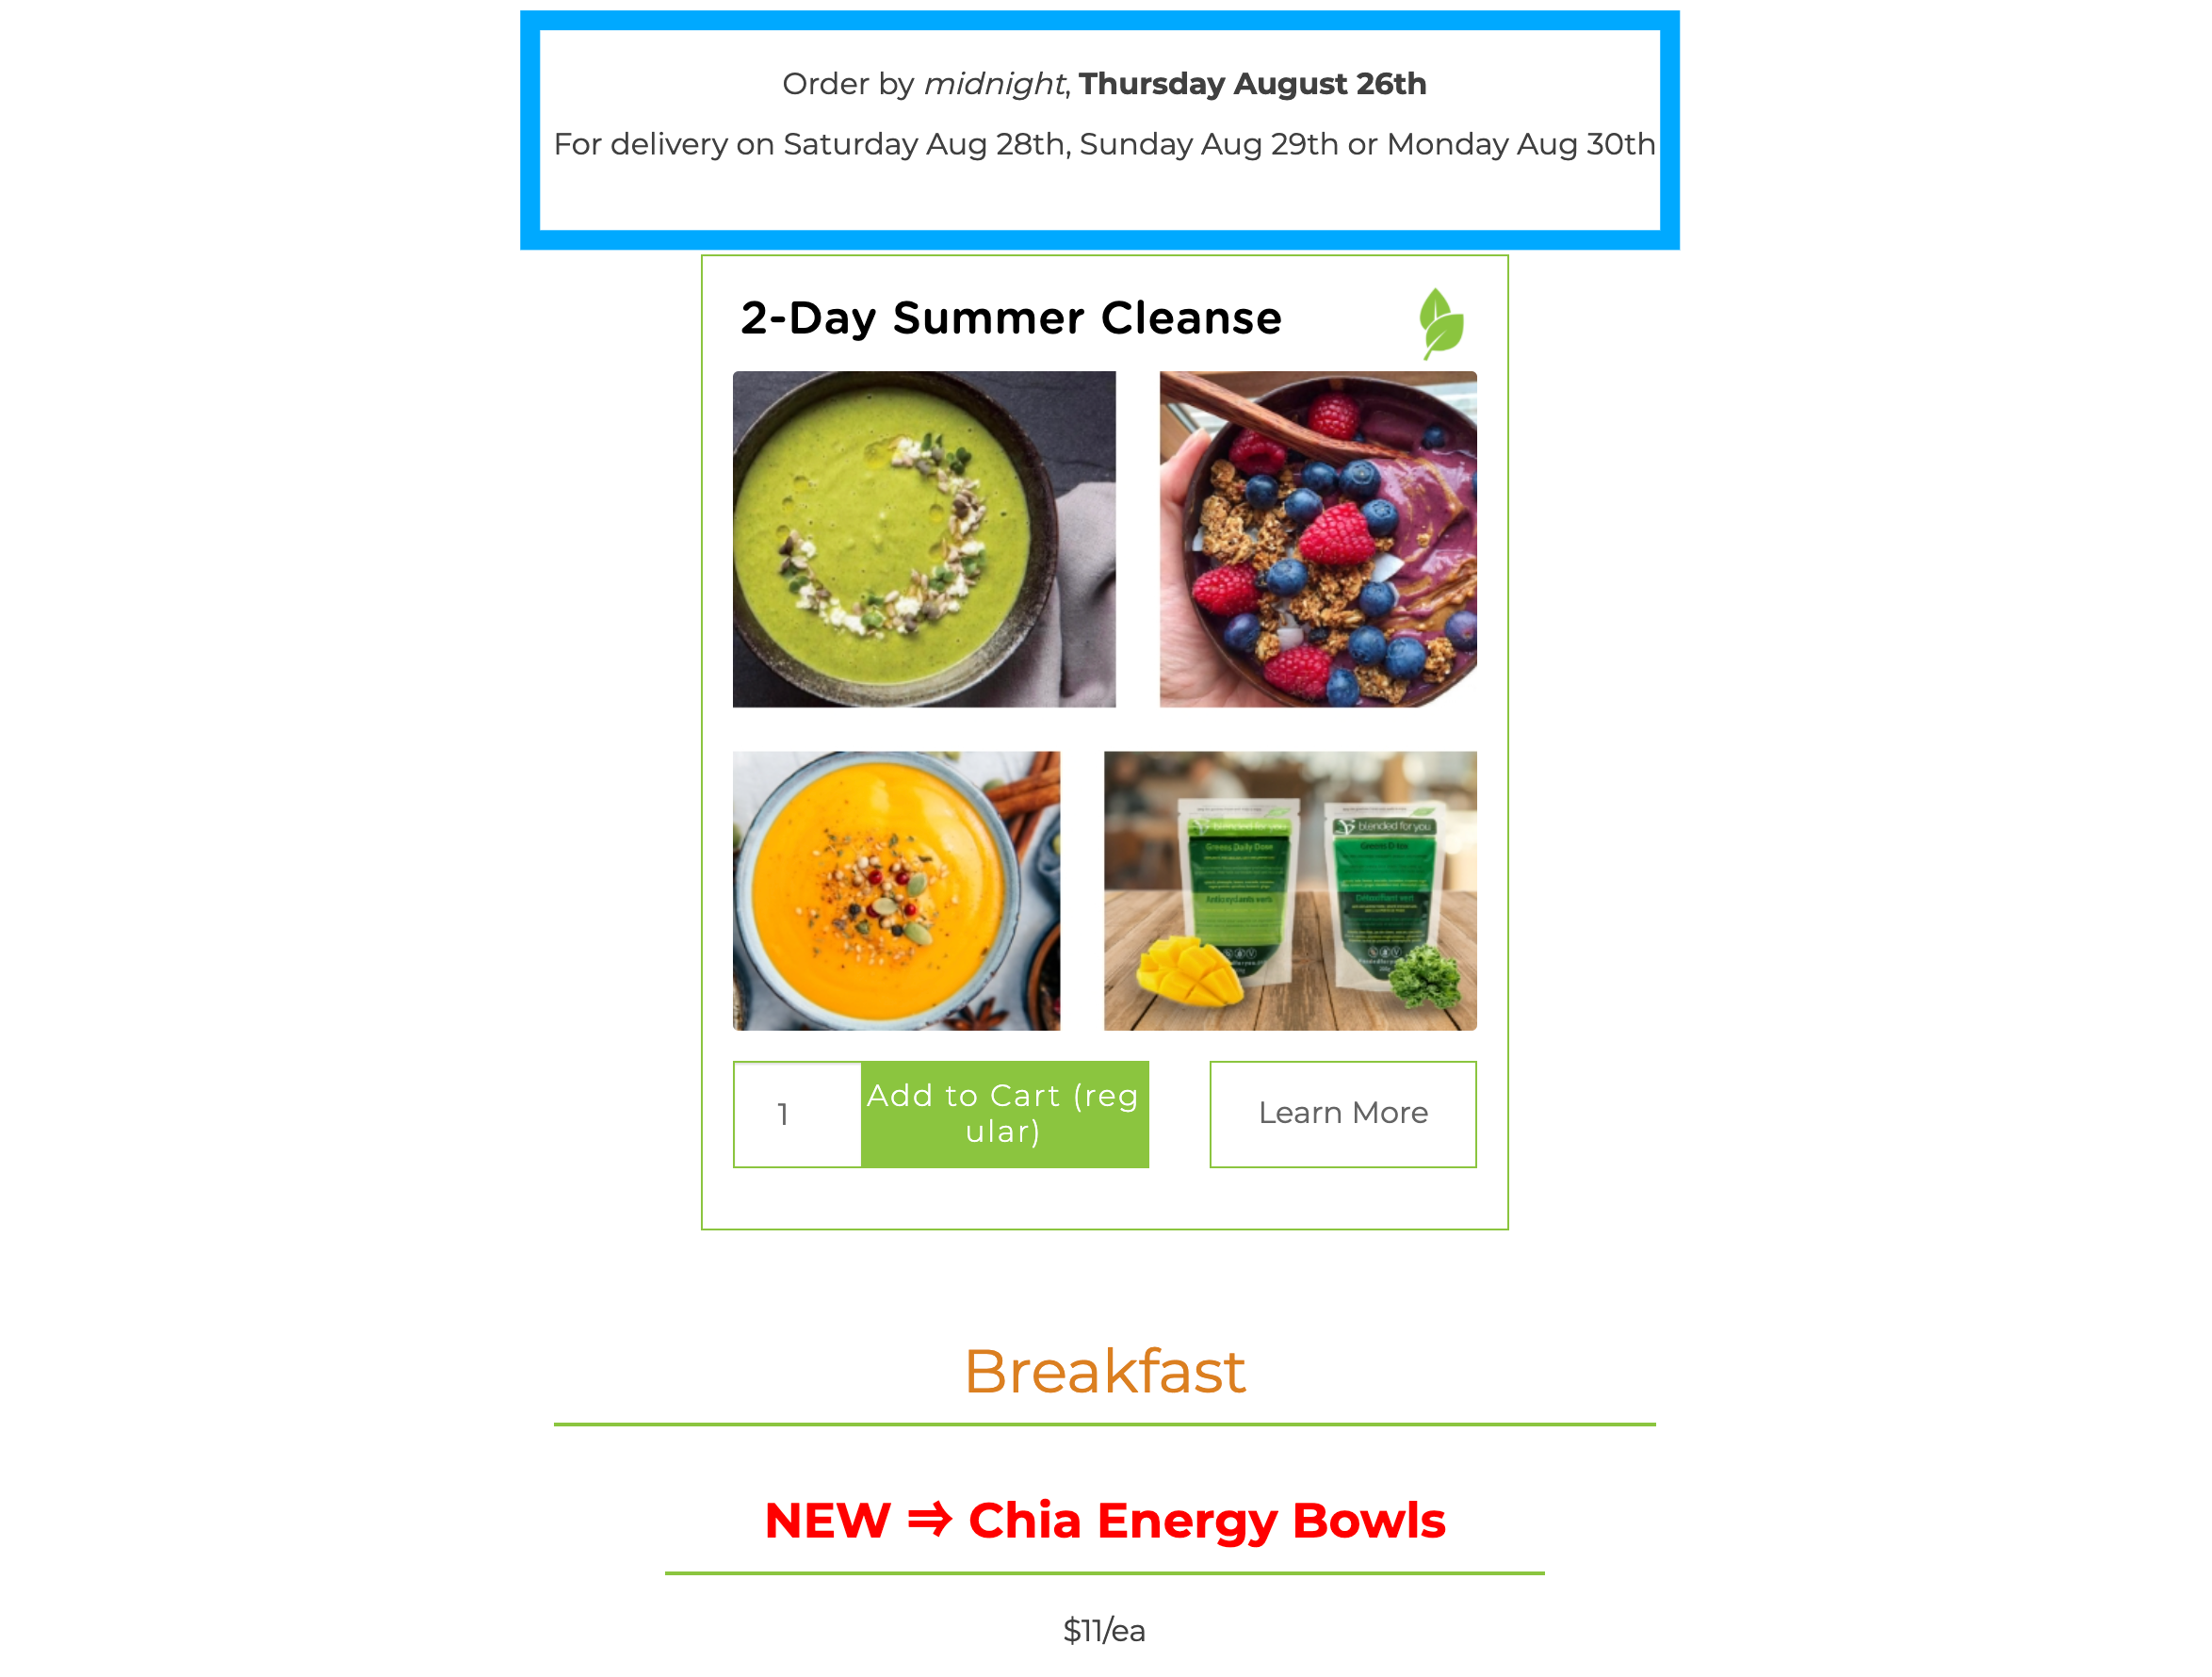
Once the preview week is over, we must change that information for the following week. That’s what you’ll learn in the next step.
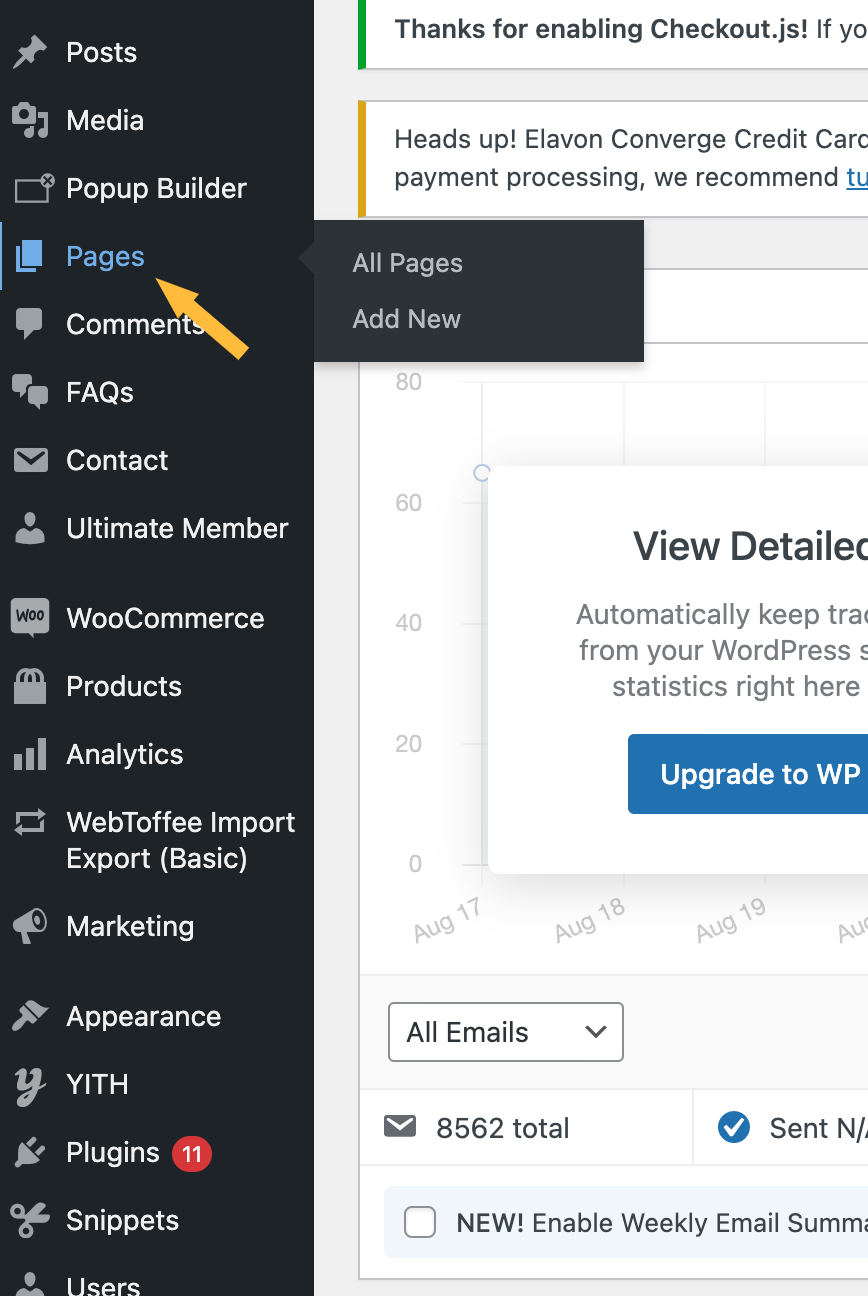
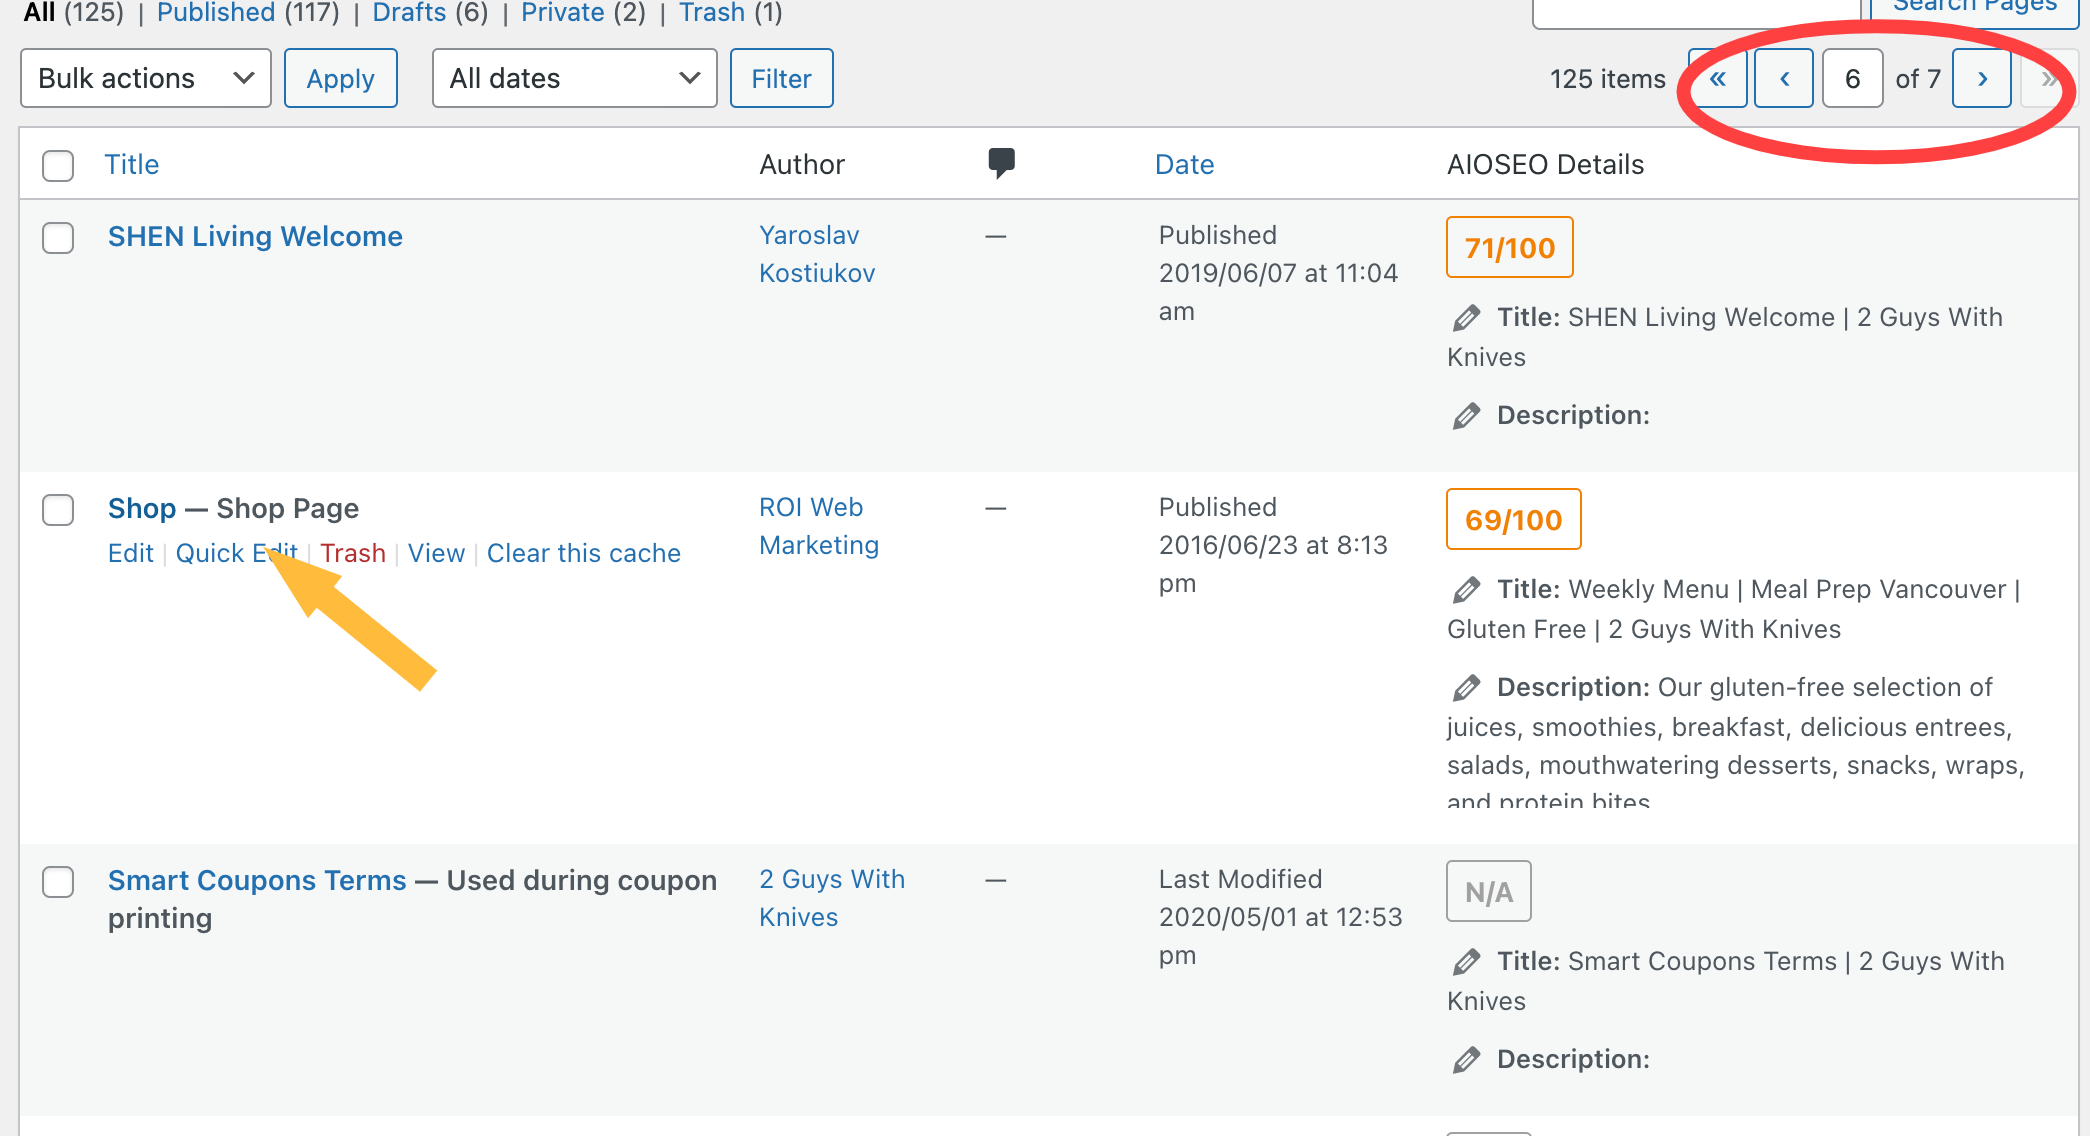
First, you’ll click on “Pages.”
Then on the top right of the page, you’ll go to page “6”.
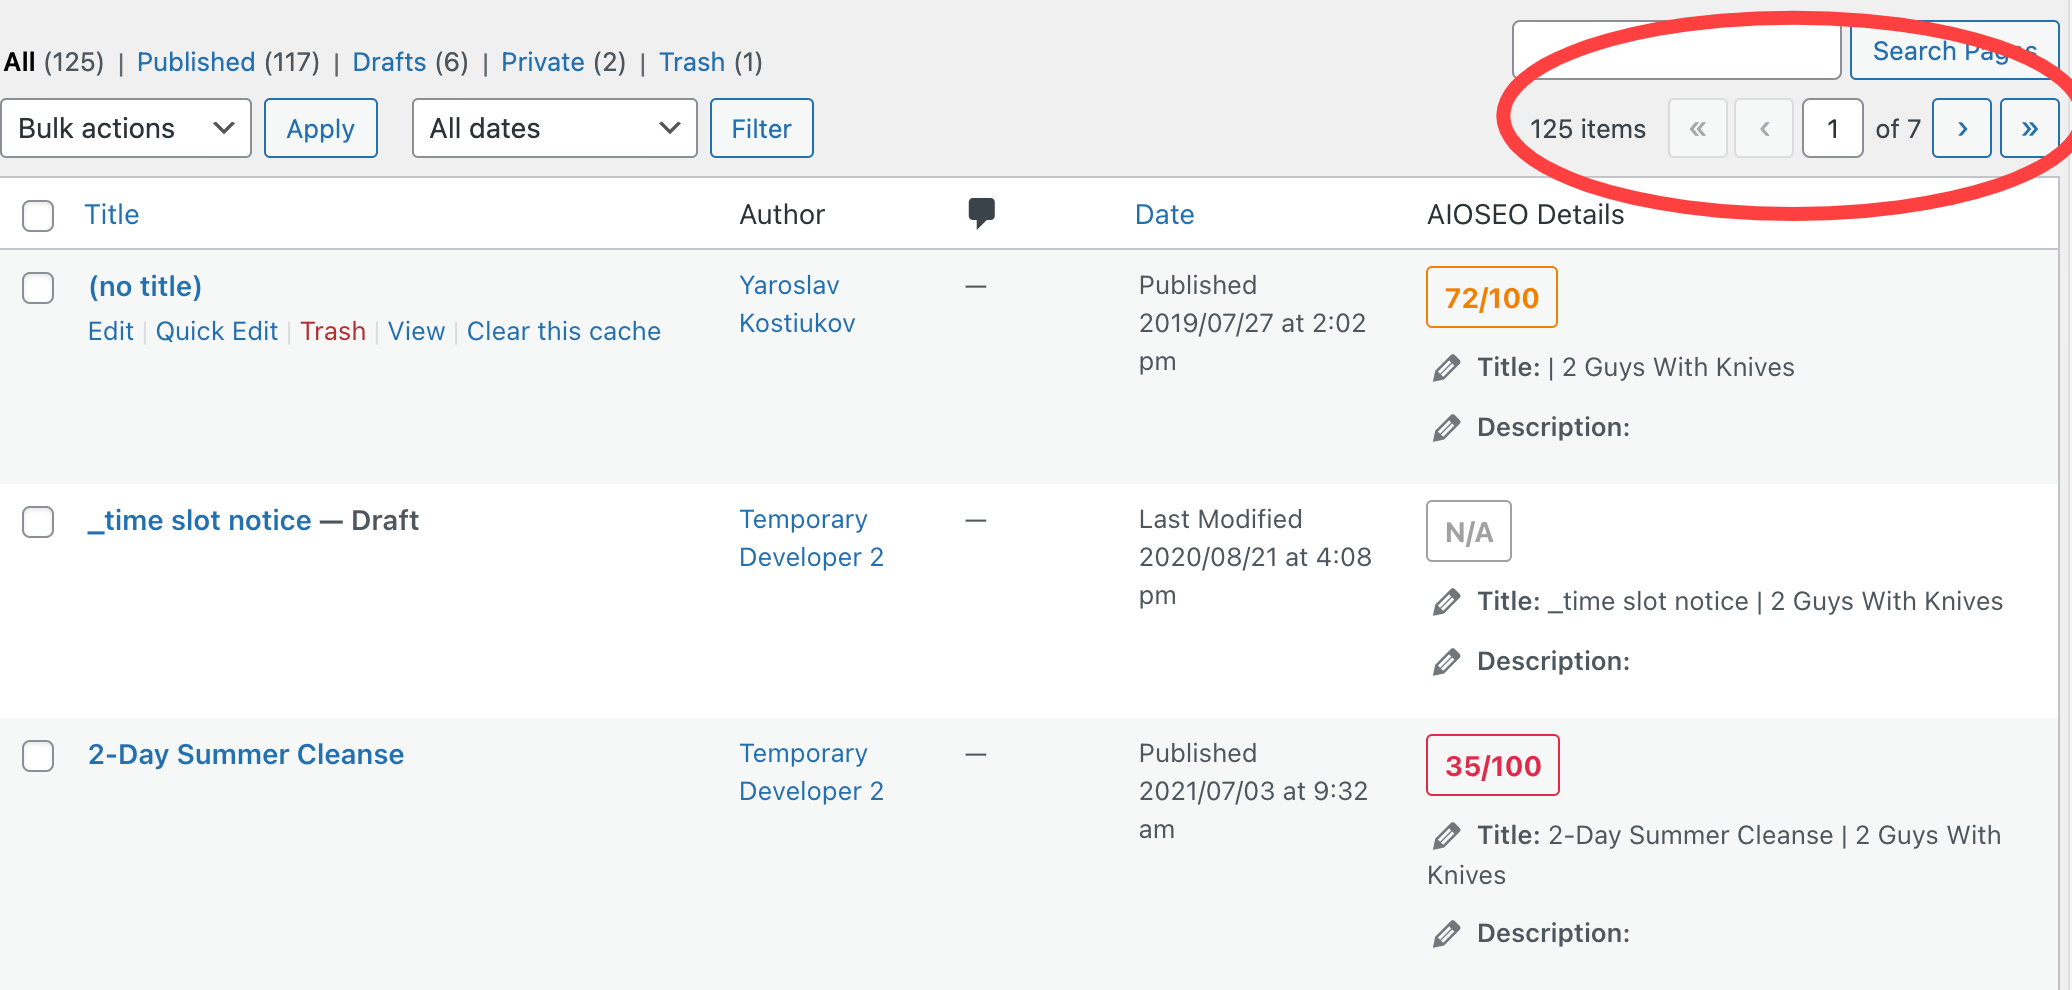
On page 6, you’ll find the button “Shop.” Click on it:
And it will take you to the page to change the info manually for the following week. : ) Once you change them, don’t forget to click on the button update.
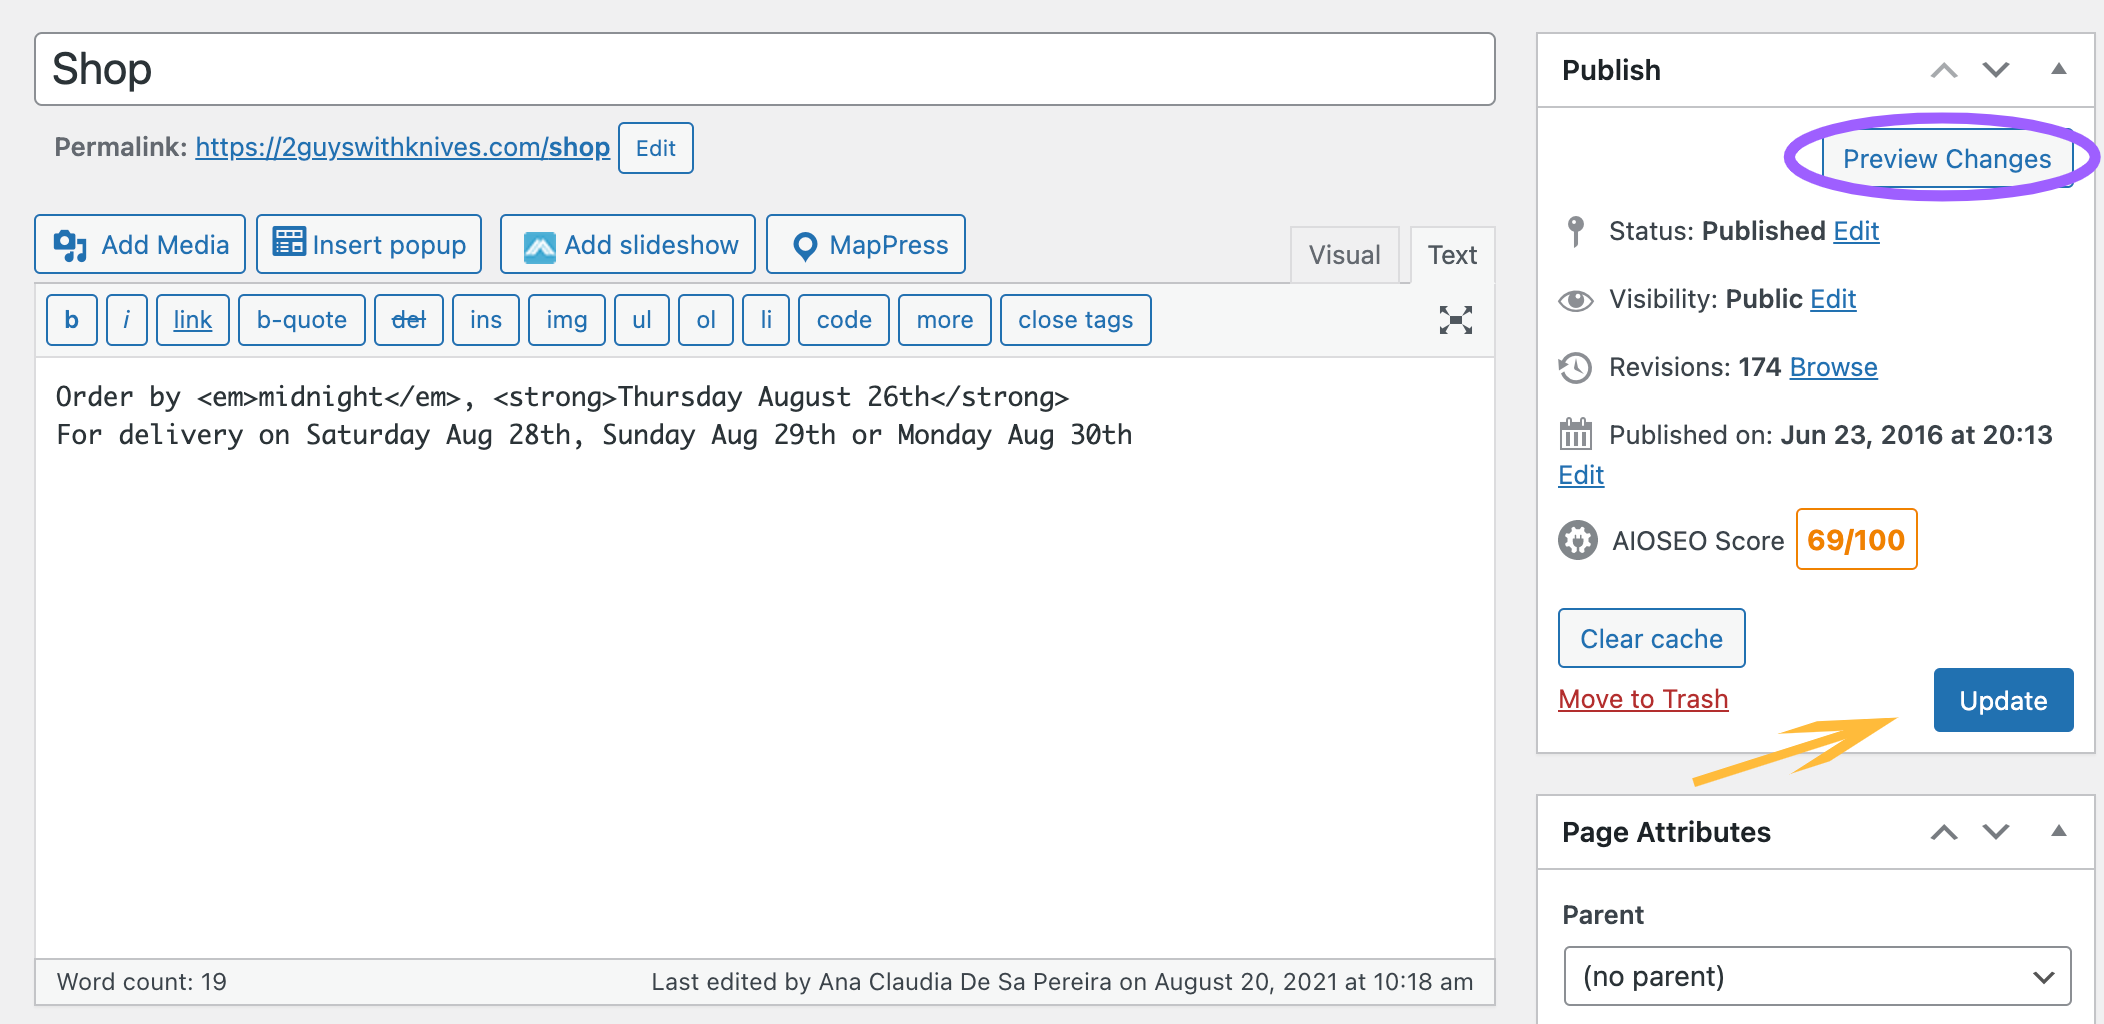
It is also important to click on ” Preview changes,” and it will give you an idea of how it will look like on the website so you’ll be able to visualize if it is perfect to go 🙂
Congratulations! You finish one more step to make the website 100% ready for the following week! : )
Preparing delivery and pick up dates for following week #
You did it!!! And now you’re ready to learn the last step of this topic!
In the last step, you’ll learn how to change the dates for the deliveries and pickups locations we offer to our customers 🙂
On the dashboard, go to Woo Commerce -> Pick-Up & Delivery.
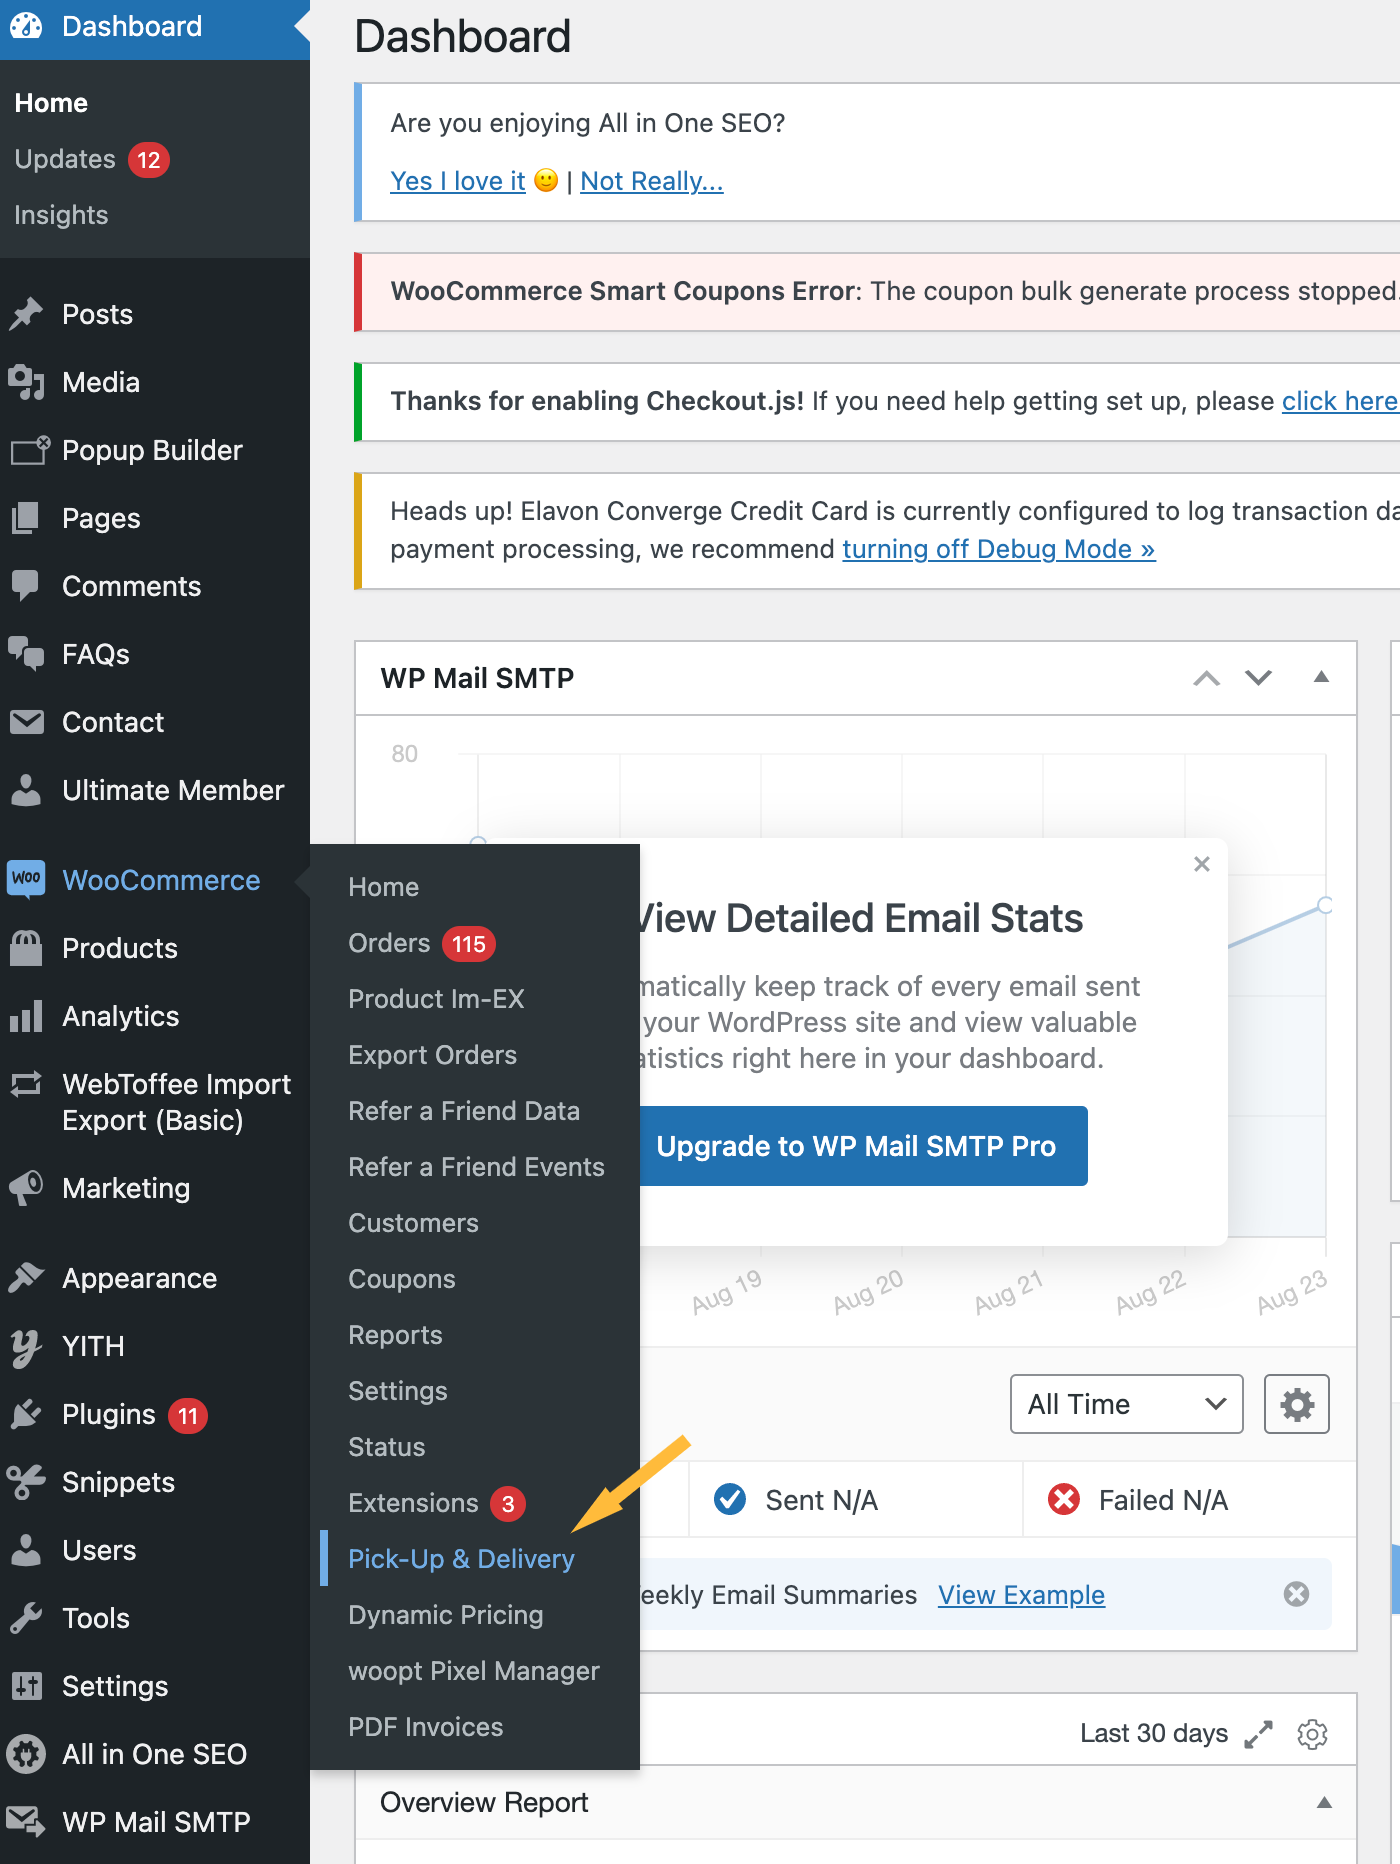
It will take you to a page with all the Pick-Up Options that we offer to our customers, and you’ll be able to see all the addresses and time frames :

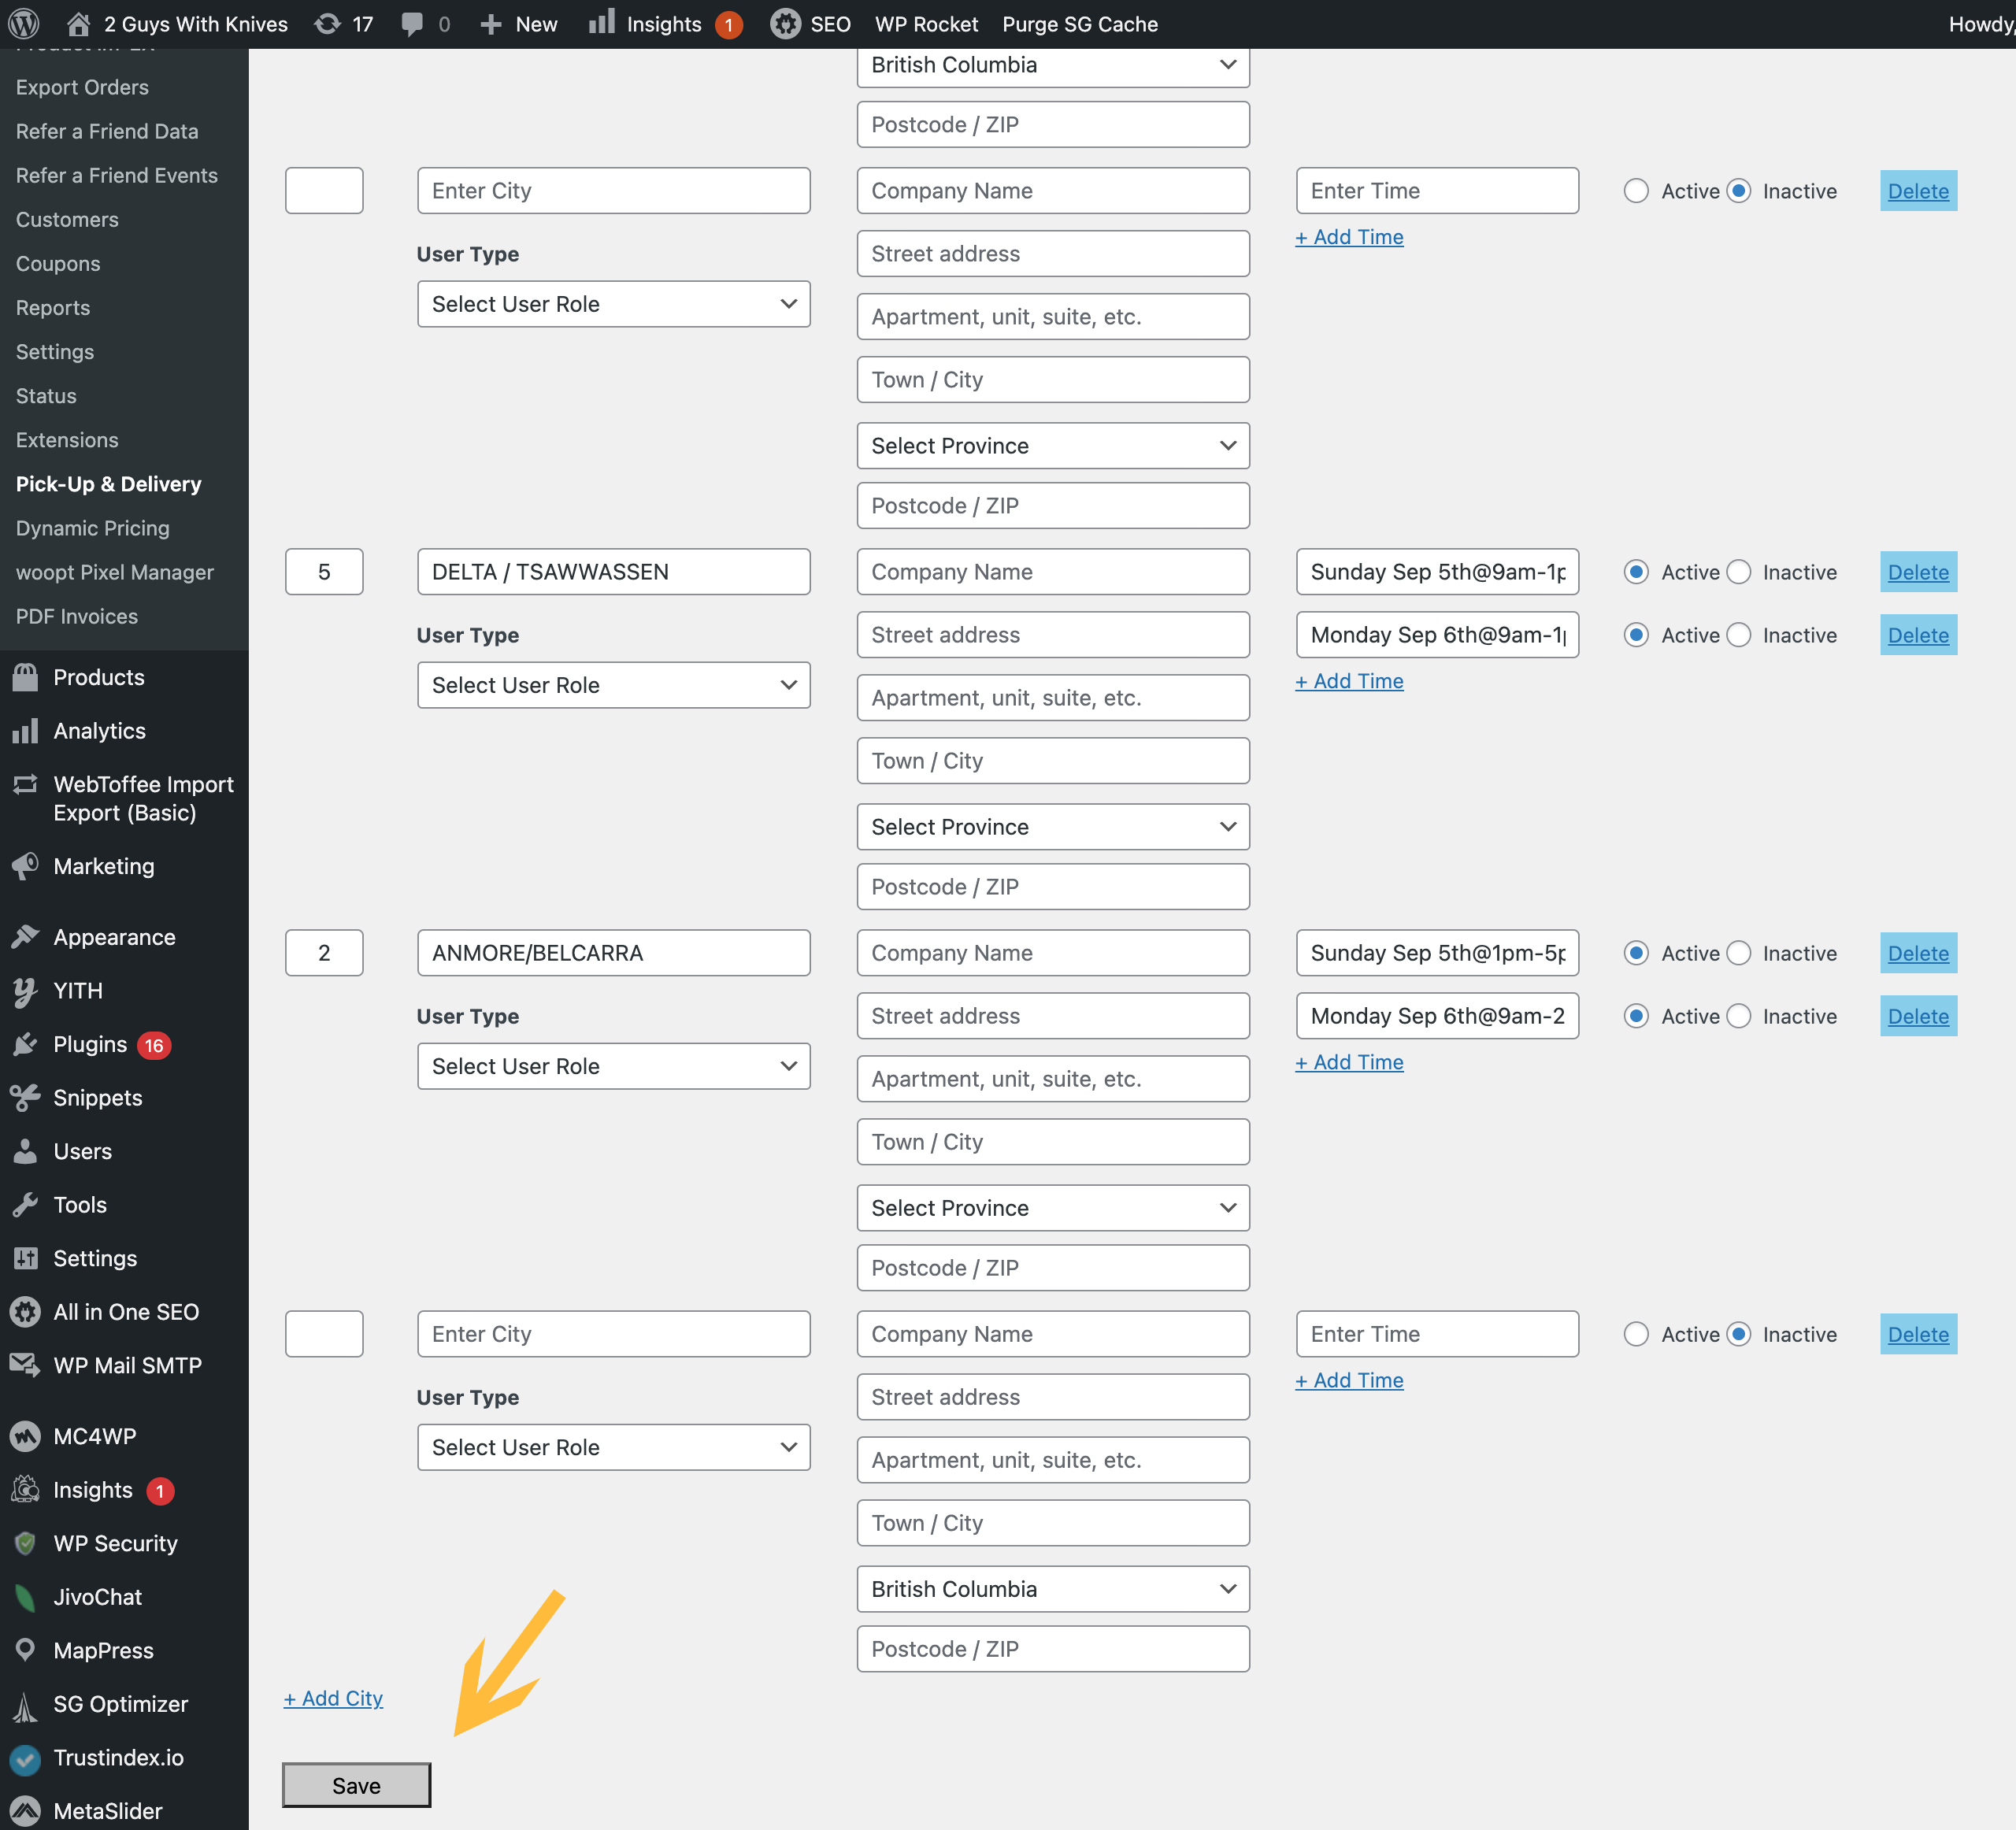
Manually you’ll change all the time information for the following week. You must keep the same structure; otherwise, the computer won’t read the information correctly. It must be exactly like the following example:
Day of the week (space) Three first letters of the Month (space) Date@TimeframeMonday
Monday Sep 4th@2pm-6pm
Please make sure you press Active for all the timeframes you need for the following week; it is important to note that some time frames are Inactive.
We have three reasons for that:
1- If we are not offering deliveries to that specific location anymore.
2- If it is a holiday. We have a Tuesday option that we just put Active when it is a holiday week, so other than that; we keep the option Inactive.
3- If we got too many orders for a specific time frame, we close it, so none of the clients will be able to choose that option anymore.
When you finish all the steps, you must click on the button “Save” at the end of the page.
It is an easy step, but it requires a lot of attention. It is always important to double-check your work before you save the info. 🙂
Congratulations!!! Now you’re more than capable of making the website perfect for the following week! Good job!


